Beaches and Cream
This week's feature is a true transformation of trash to treasure!
~ A Sweet Little Treat for the Home ~
Beaches and Cream
Hello My Sweets!
I found this OLD, handmade chest of drawers during the Liberty Antiques Festival in Staley, NC. It was not in the actual grounds of the event, but in a field leading up to it. There it sat, all worn out and beat up, but what I saw was potential! As I’ve said before, I despise being wasteful, so I love finding these solid (although not pretty) pieces that have so much more life left in them! It was quite wonky, being handmade, but I knew that I could fix it up into something fabulous and give it another hundred years of use!
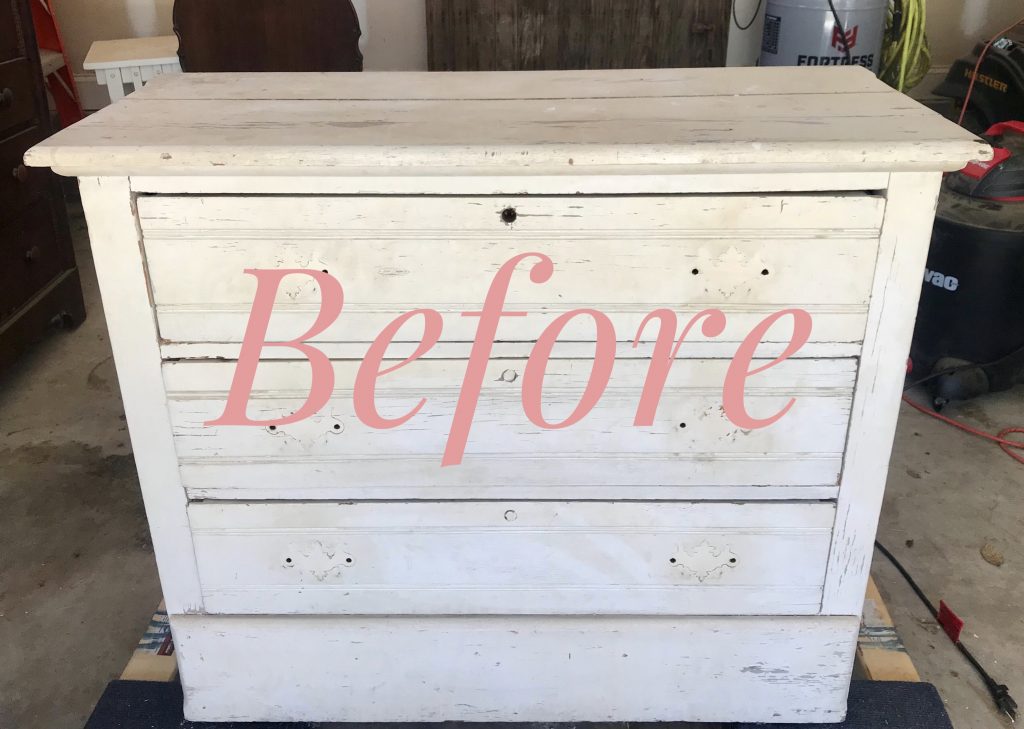
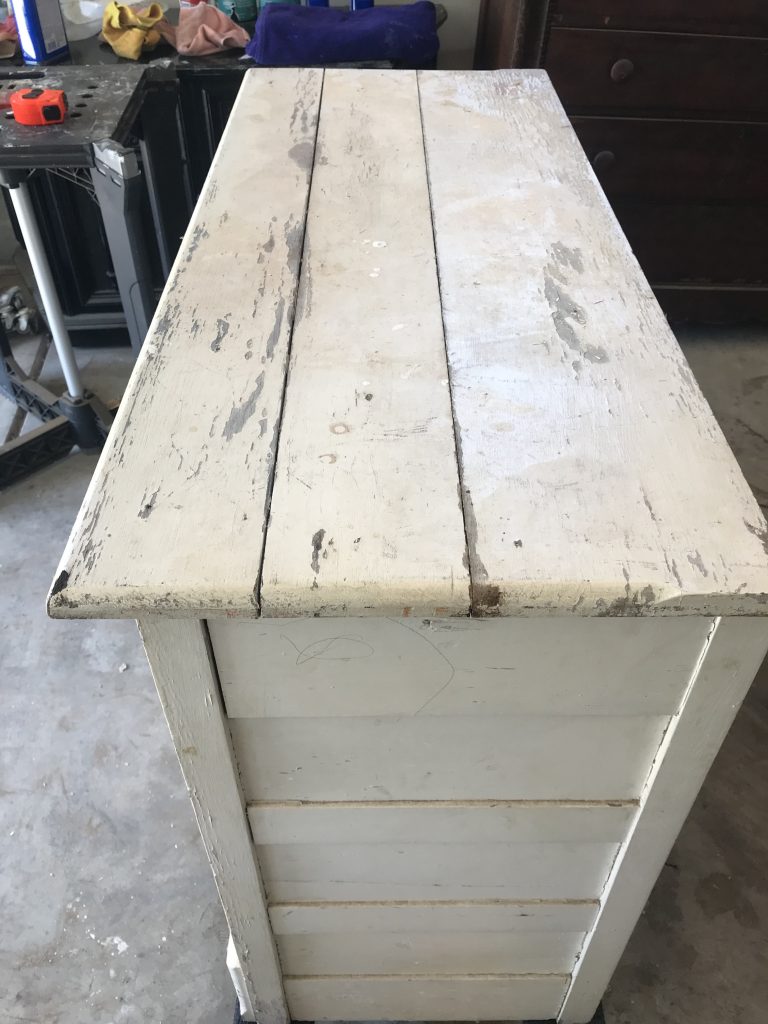
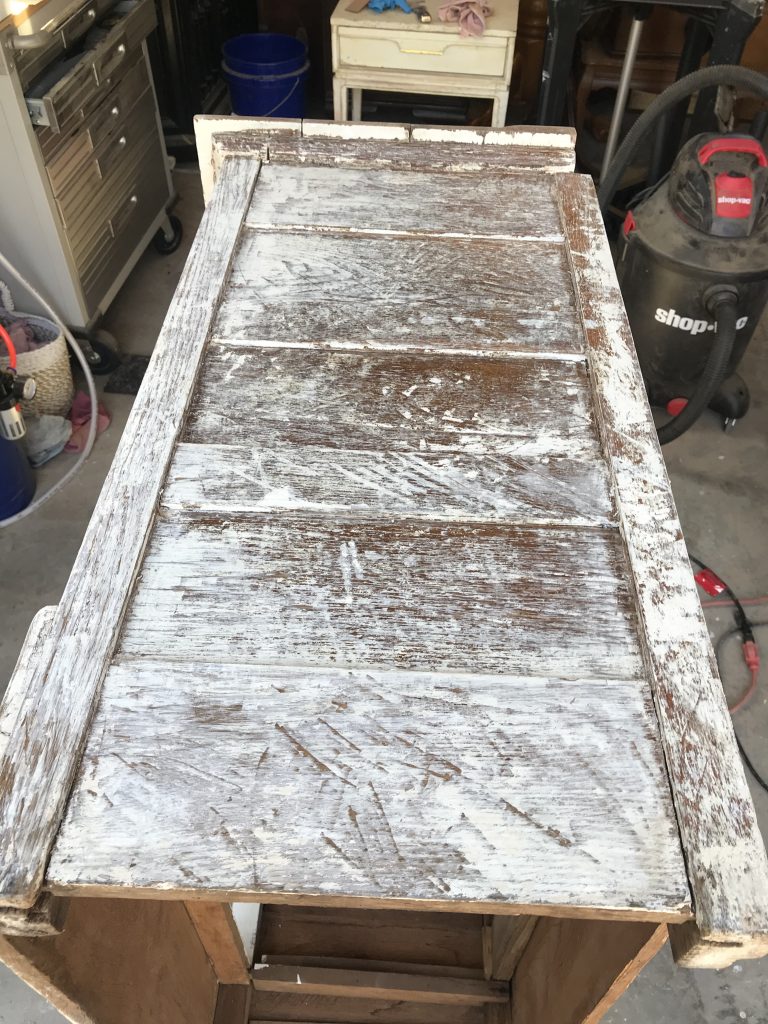
Boy, I gotta tell you, this piece fought me every step of the way! I thought that I would just sand off the old paint and go from there. Whoa, was I wrong! This piece had several layers of oil based paint and sanding it just seemed to “polish” the paint. It wasn’t going anywhere like that. 😏 I really don’t like to use stripper because I find it to be a stinky, gloppy mess. I had no choice here, I had to resort to the least offensive stripper that I have tried – Citristrip https://amzn.to/308Ydid. The process is fairly simple, just use a disposable brush – 3 inch, 24 pack https://amzn.to/2WNntJf to LIBERALLY apply the gel. I have found the most effective method is to cover the piece with plastic wrap for several hours (it could be overnight), making sure that it does not dry. The stripper will bubble up when it’s ready to be scraped off…
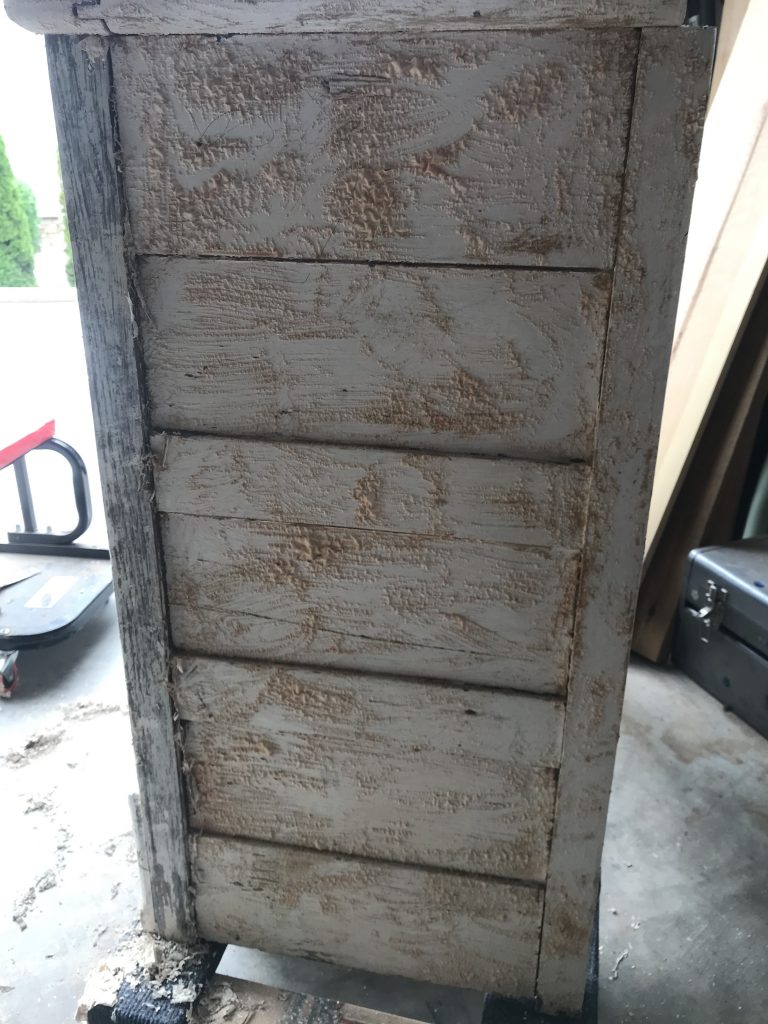
It is recommended that a plastic scraper is used to scrape off the paint, but I find that it really does require a metal one for best results. Just be sure not to gouge the wood with the metal scraper. It took A LOT of elbow grease and scraping and several applications to remove all of the paint. The drawers were especially challenging because of the grove detail on the front. Once all the paint that was going to come off from scraping had been removed, I went back and “scrubbed” the remaining paint with lacquer thinner and 0000 steel wool. Yes, this whole process was as tiring and time consuming as it sounds. 😩 In fact, I don’t think I will ever try and remove oil based paint again. Ok, maybe a little dramatic, but still, PHEW!!
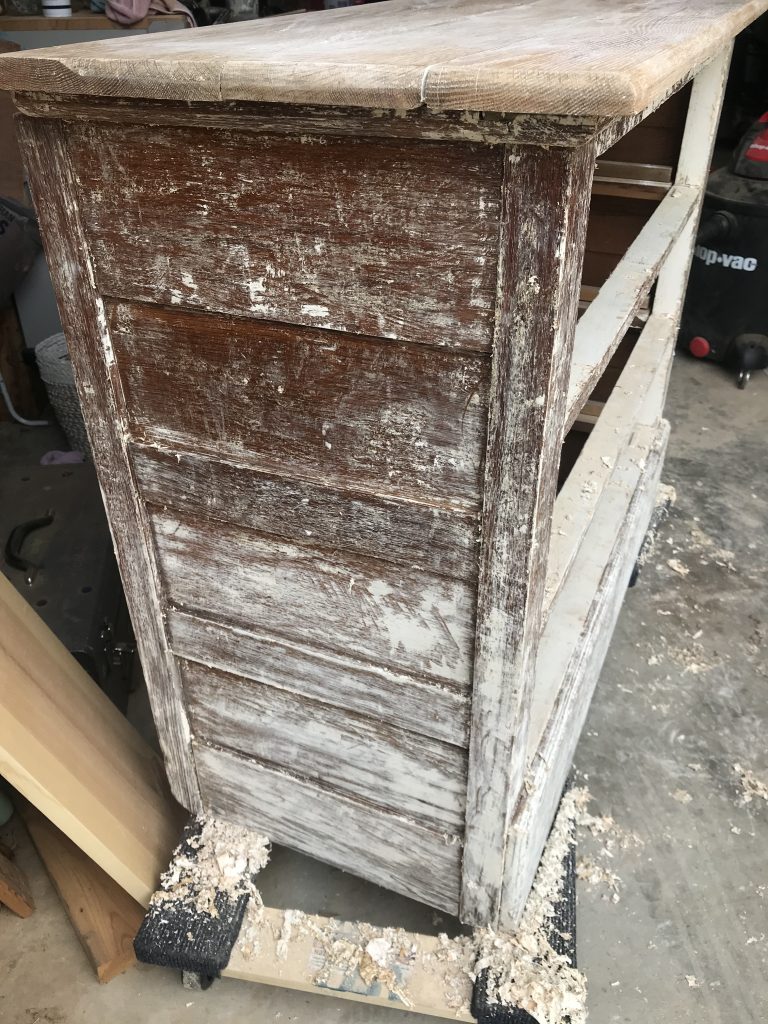
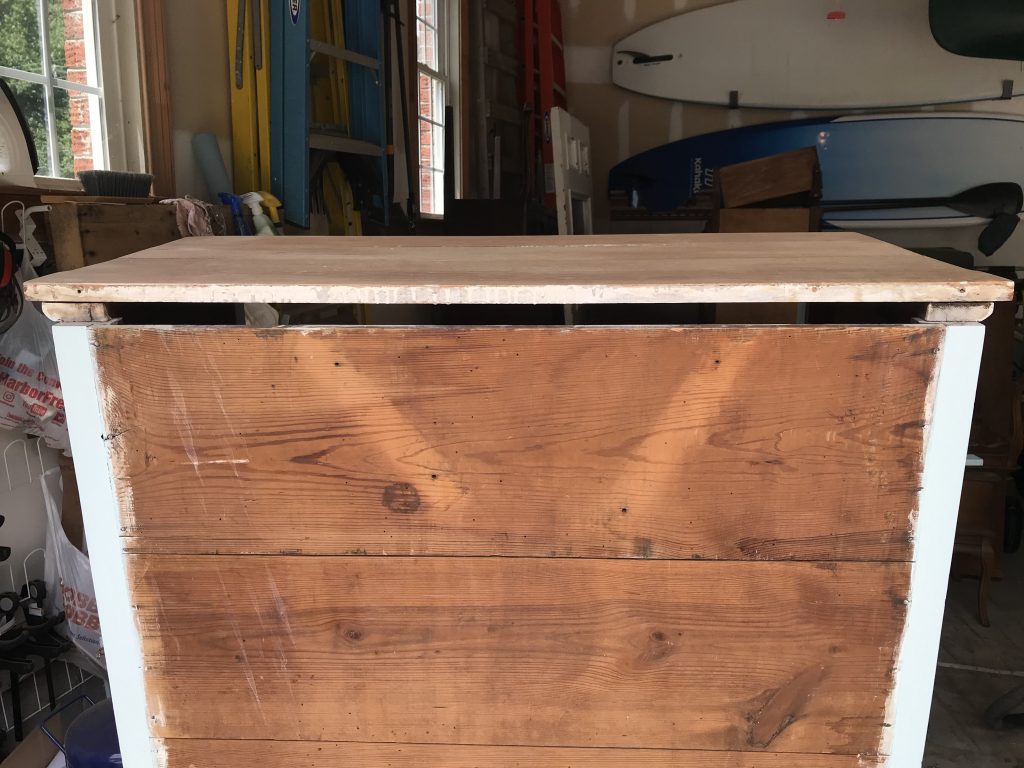
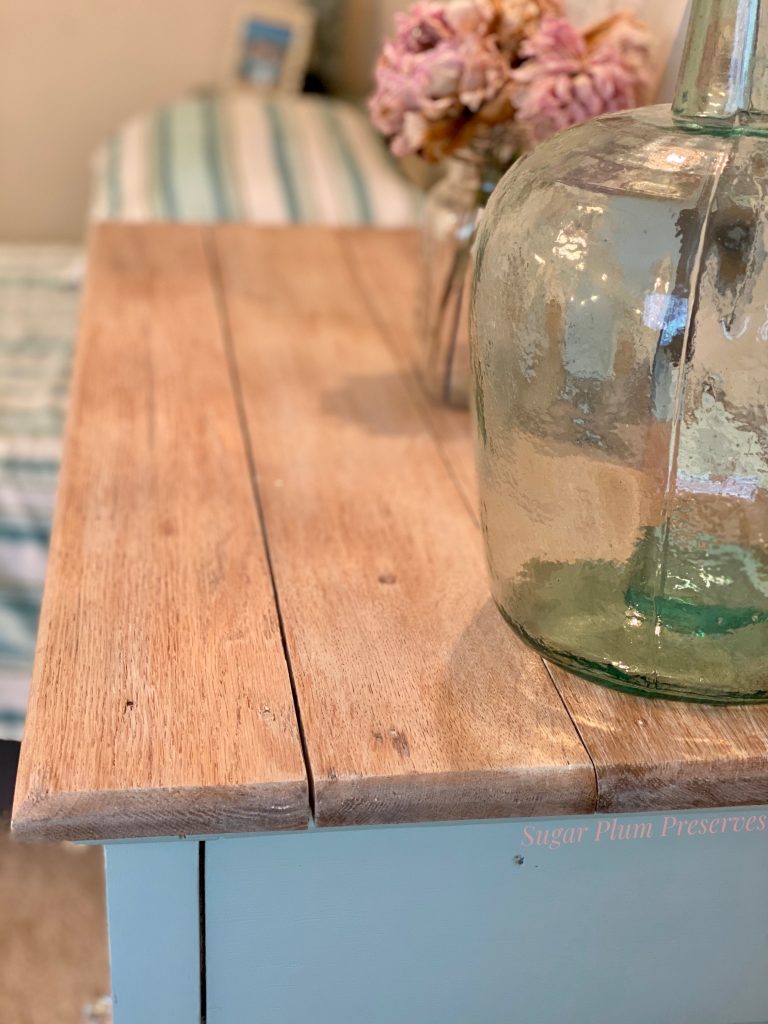
Once the paint was gone, I turned to the repairs that this old piece needed. For one, the top had dark water stains in the wood. I planned on leaving the top natural wood, so these needed to be removed.
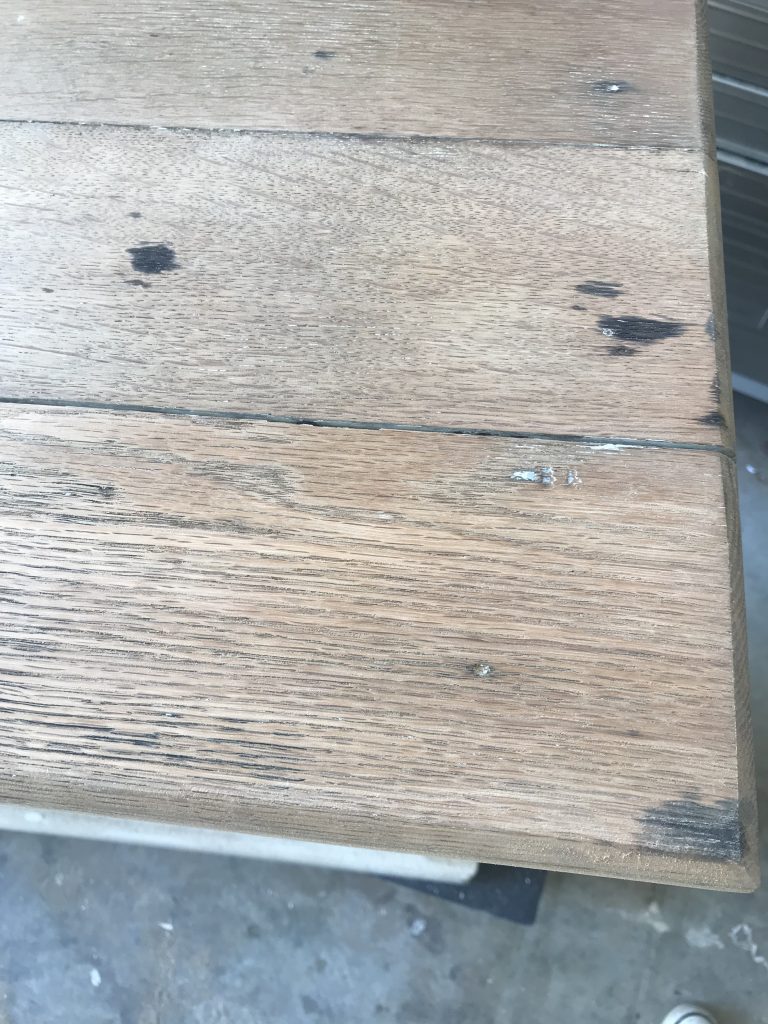
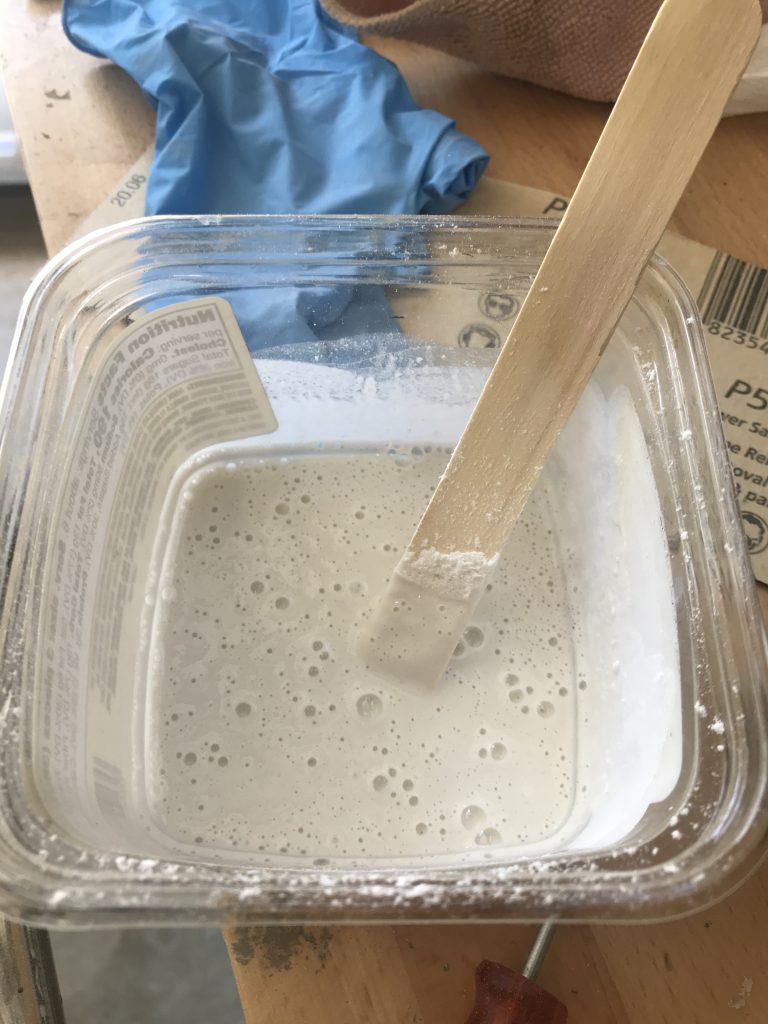
I made a paste out of Bar Keepers Friend and a little water and applied it to the stained areas. Bar Keepers Friend https://amzn.to/343AtgB is oxalic acid and is able to bleach the stains in the wood. Wait until the paste dries (it will turn yellow when it’s lifting the stain) and scrape it off. It took several times repeating this process until the stains were completely lifted.

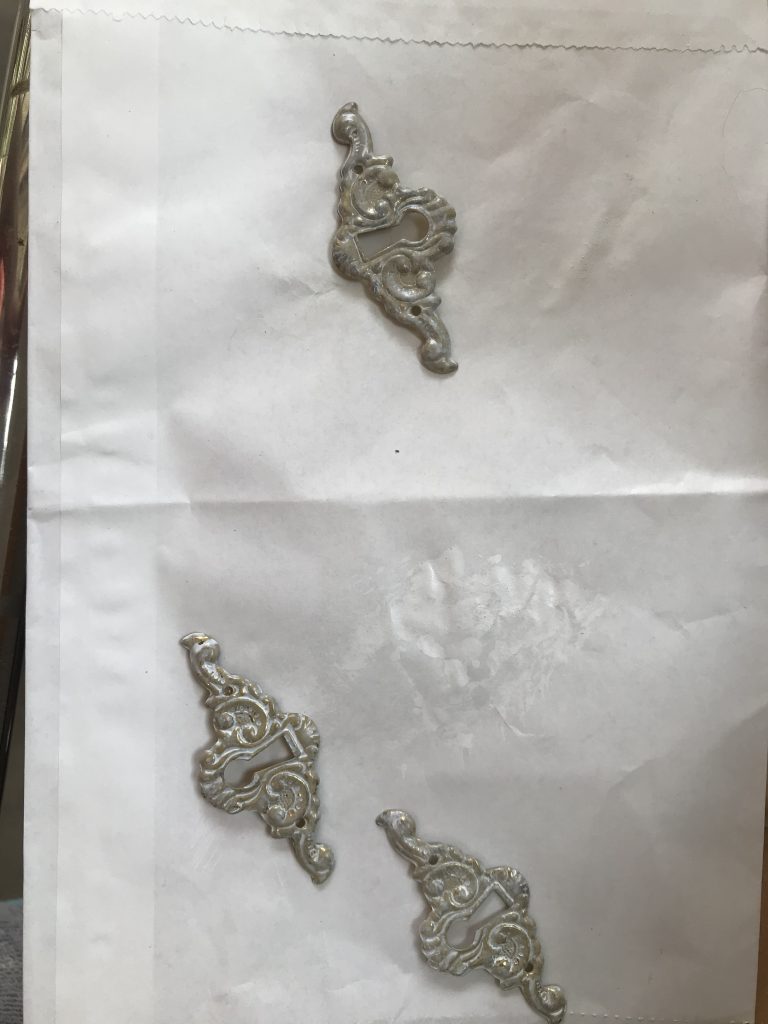
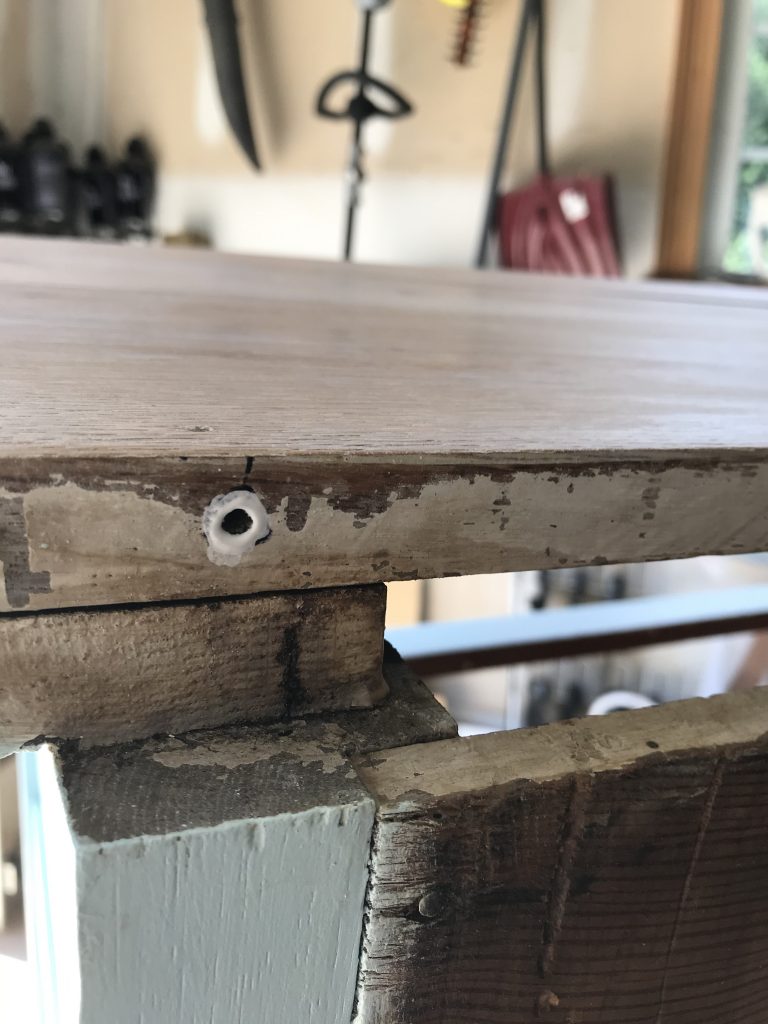
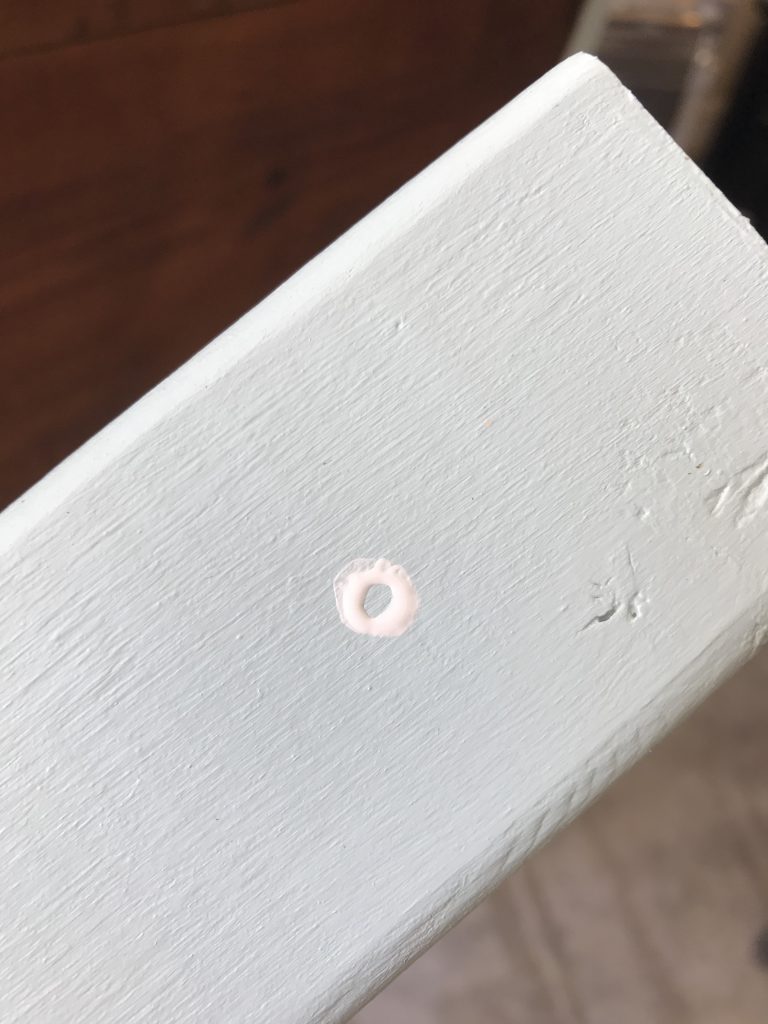
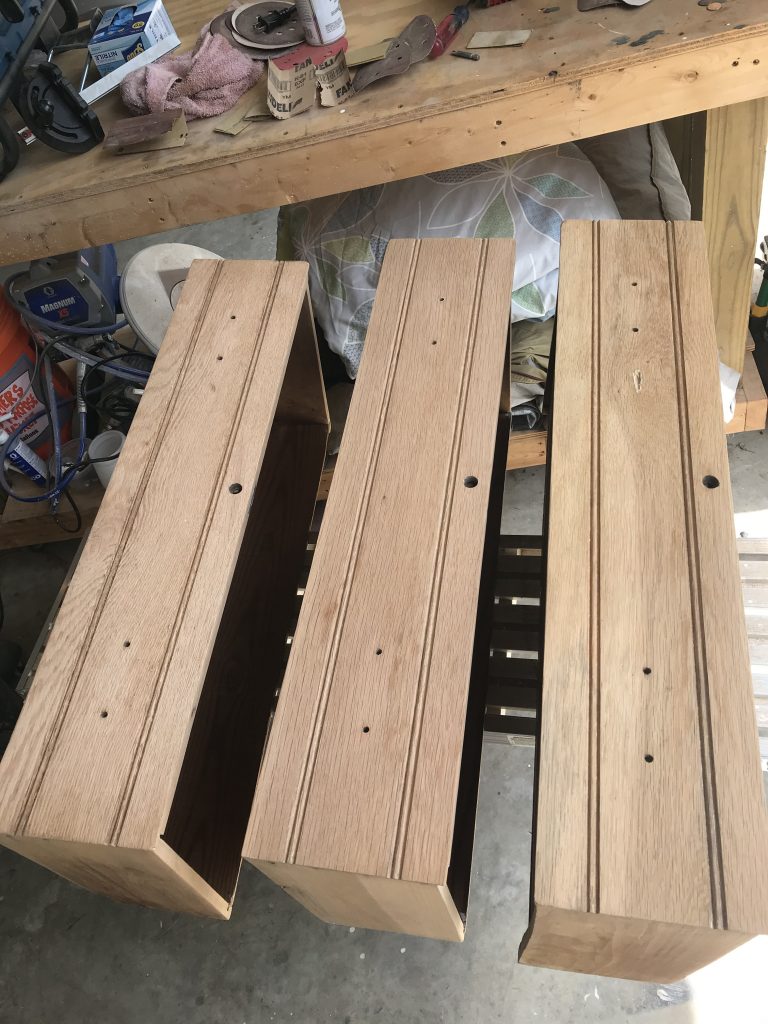
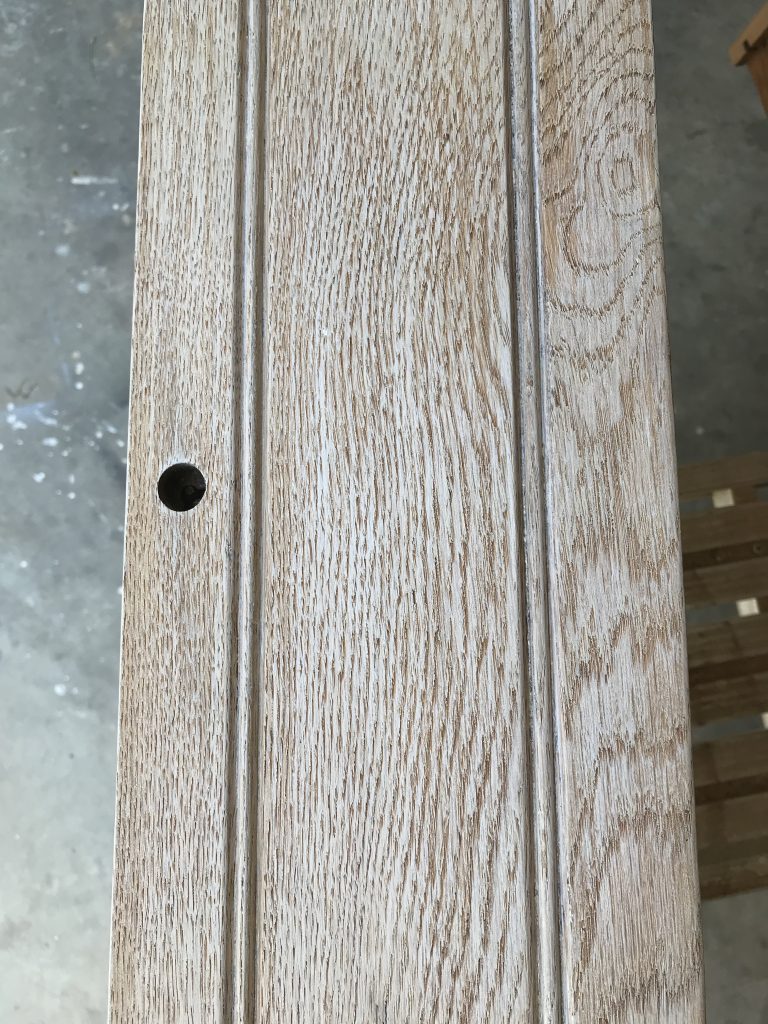
I turned my attention to the drawers. They all had keyholes that had been plugged up with a wooden dowel. I wanted to remove the dowels and add some pretty keyhole covers. I got the dowels out by using my drill (Cordless Drill https://amzn.to/2WOBbf2) and a large drill bit to make a large hole in the center of the dowel. I was then able to just chip the remaining wood out. I found some reproduction keyhole covers at an antique mall. The only problem was that they were a very cheap looking gold. I solved this by lightly dry brushing white paint over the top so that the gold looked more worn and pretty.
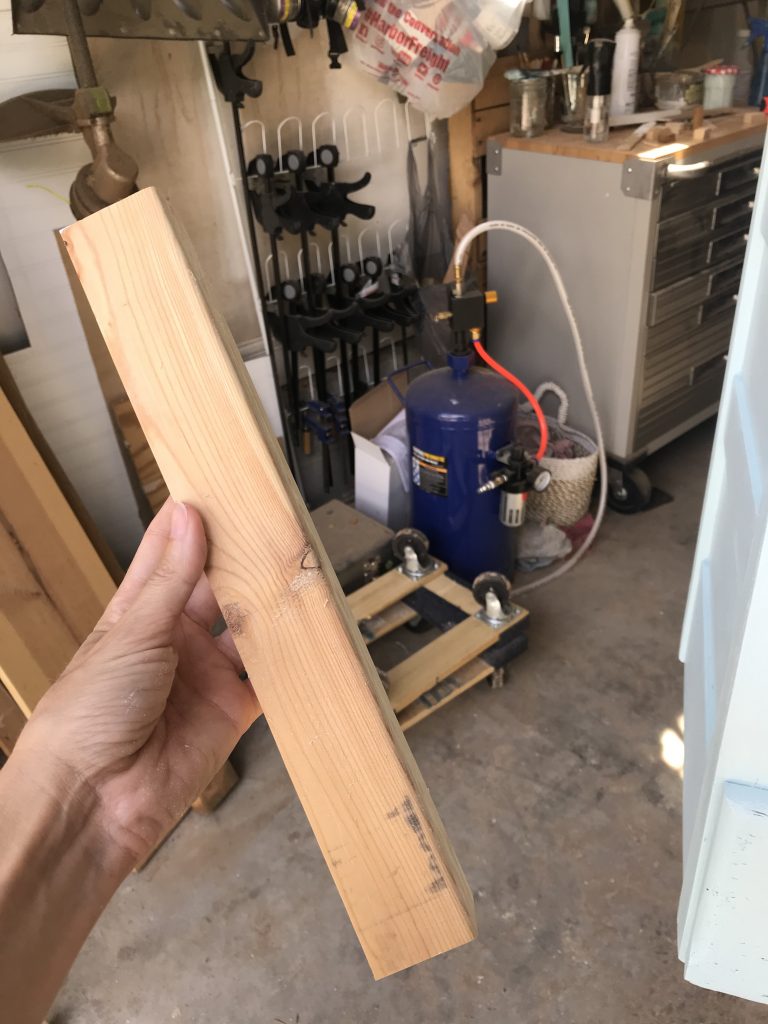
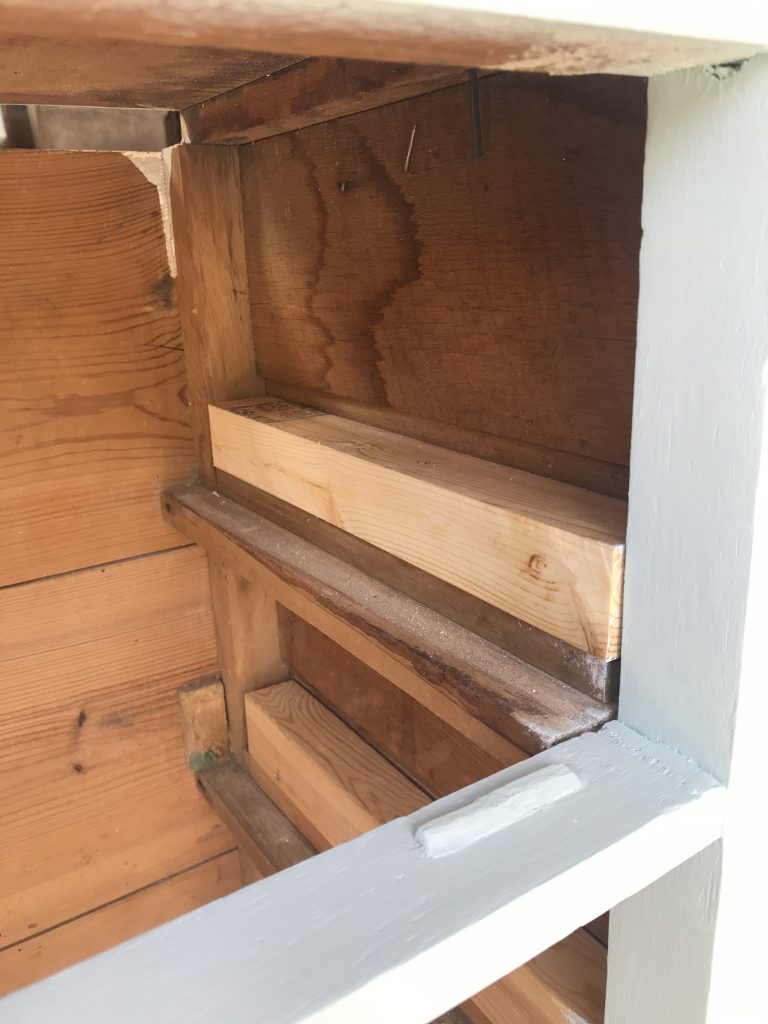
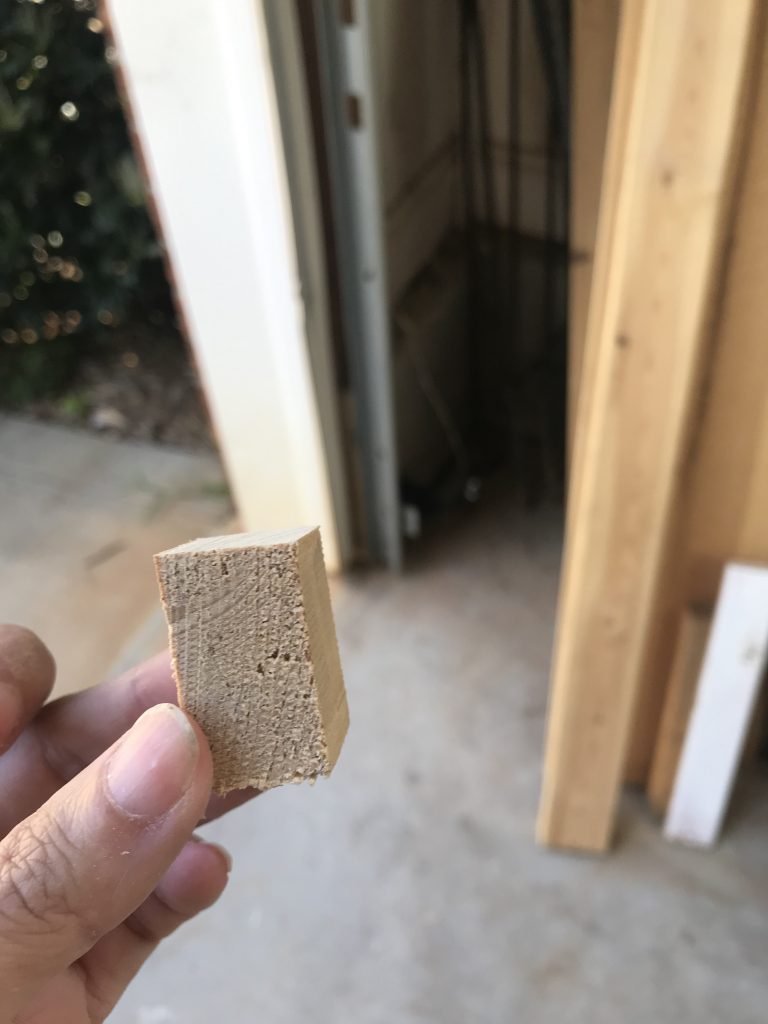
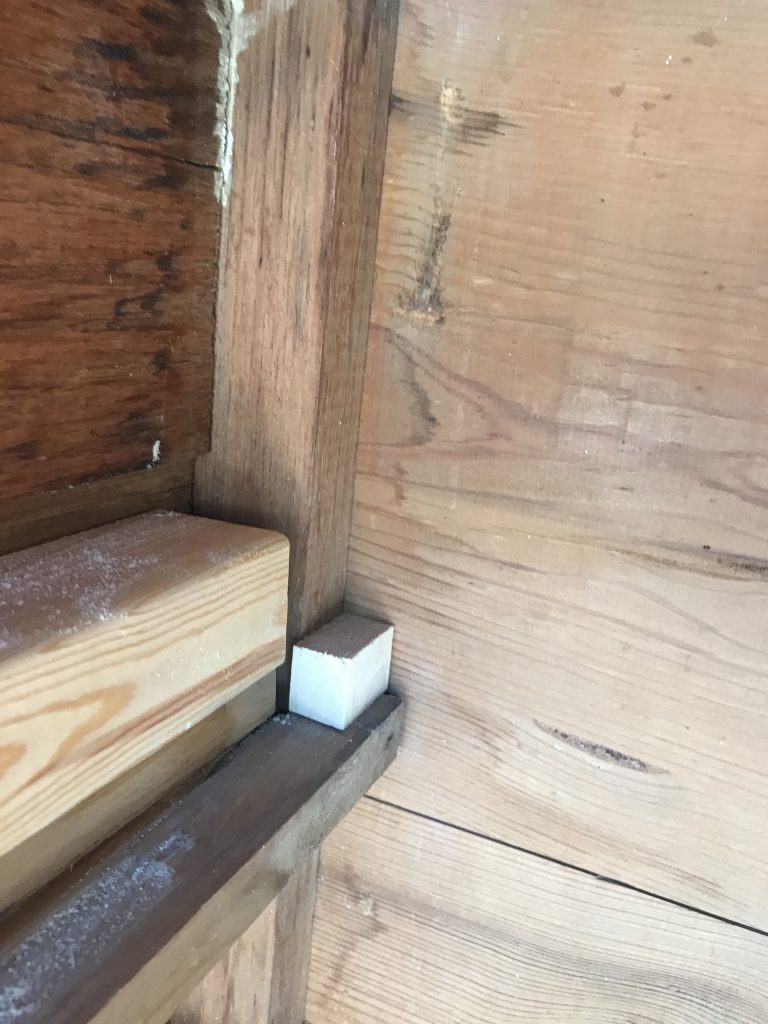
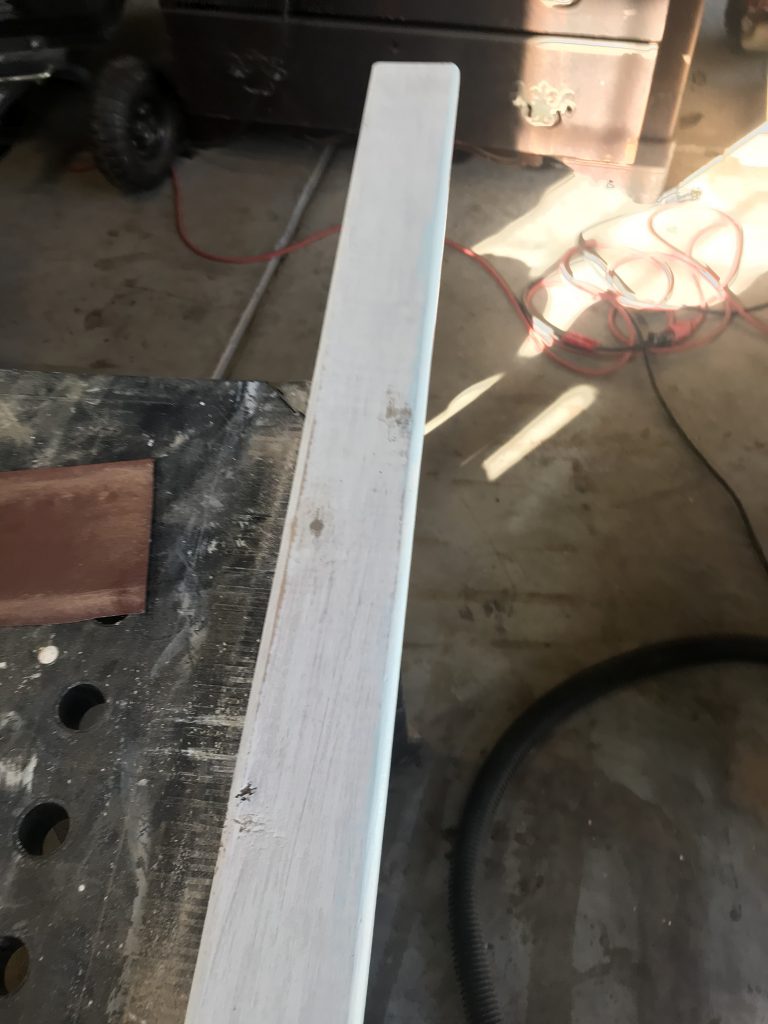
The next issue with the drawers was that they did not slide in and out very easily. As I mentioned, this piece was handmade and quite wonky. The drawers slid around a lot when opening and closing and also did not stop at a uniform depth when closing them. Meaning, they didn’t have appropriate drawer stops in the back and lacked drawer guides to allow them to slide in and out smoothly. I remedied this by measuring, cutting, and gluing (TiteBond Wood Glue https://amzn.to/2LLxIHP) scrap wood on the sides and back of the chest, so that each drawer would close smoothly, level with the sides.
The back of the chest looked like it once had a back piece that was now missing. I had some 1×3 wood on hand, so I measured and cut the wood to size. It had quiet a few knots in it, so I filled those with Dixie Belle Mud https://amzn.to/2zfMdRB prior to priming. I am definitely not an exact measure kind of gal, so I pondered the best way to line up the new back piece with the existing screw holes. 🧐 I really don’t know what the “expert” way to do this would be, but I got creative. I painted around the screw holes and while it was wet, pressed the back piece into place. The result was perfect circles that I could drill through, providing an exact line up with the preexisting screw holes. Brilliant! 🤓 🤩
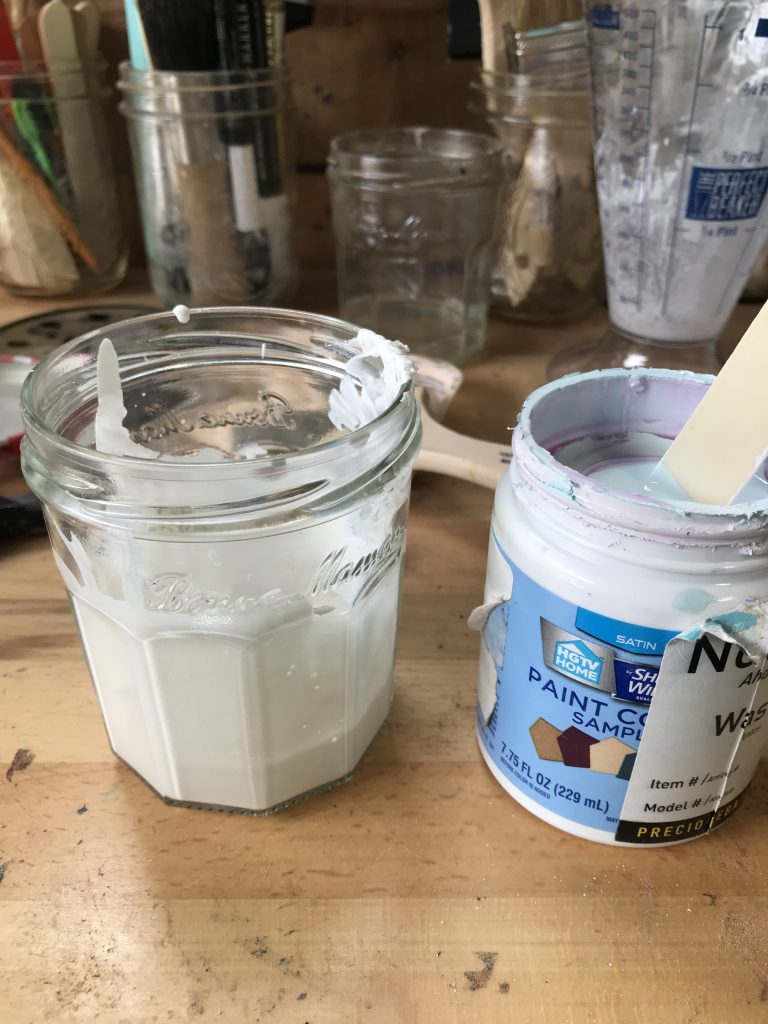
Finally all the repairs were completed and it was time to paint. I primed the body of the piece with my tried and true BIN Shellac Primer, Quart https://amzn.to/3g8fuyb. It took two coats, applied with a throw away chip brush 3 inch, 24 pack https://amzn.to/2WNntJf. I made a chalk paint out of an oops paint that I had on hand. I’ve talked about how to make your own chalk paint before, but basically it’s two parts paint to one part calcium carbonate – Calcium Carbonate https://amzn.to/3ia8lyt.

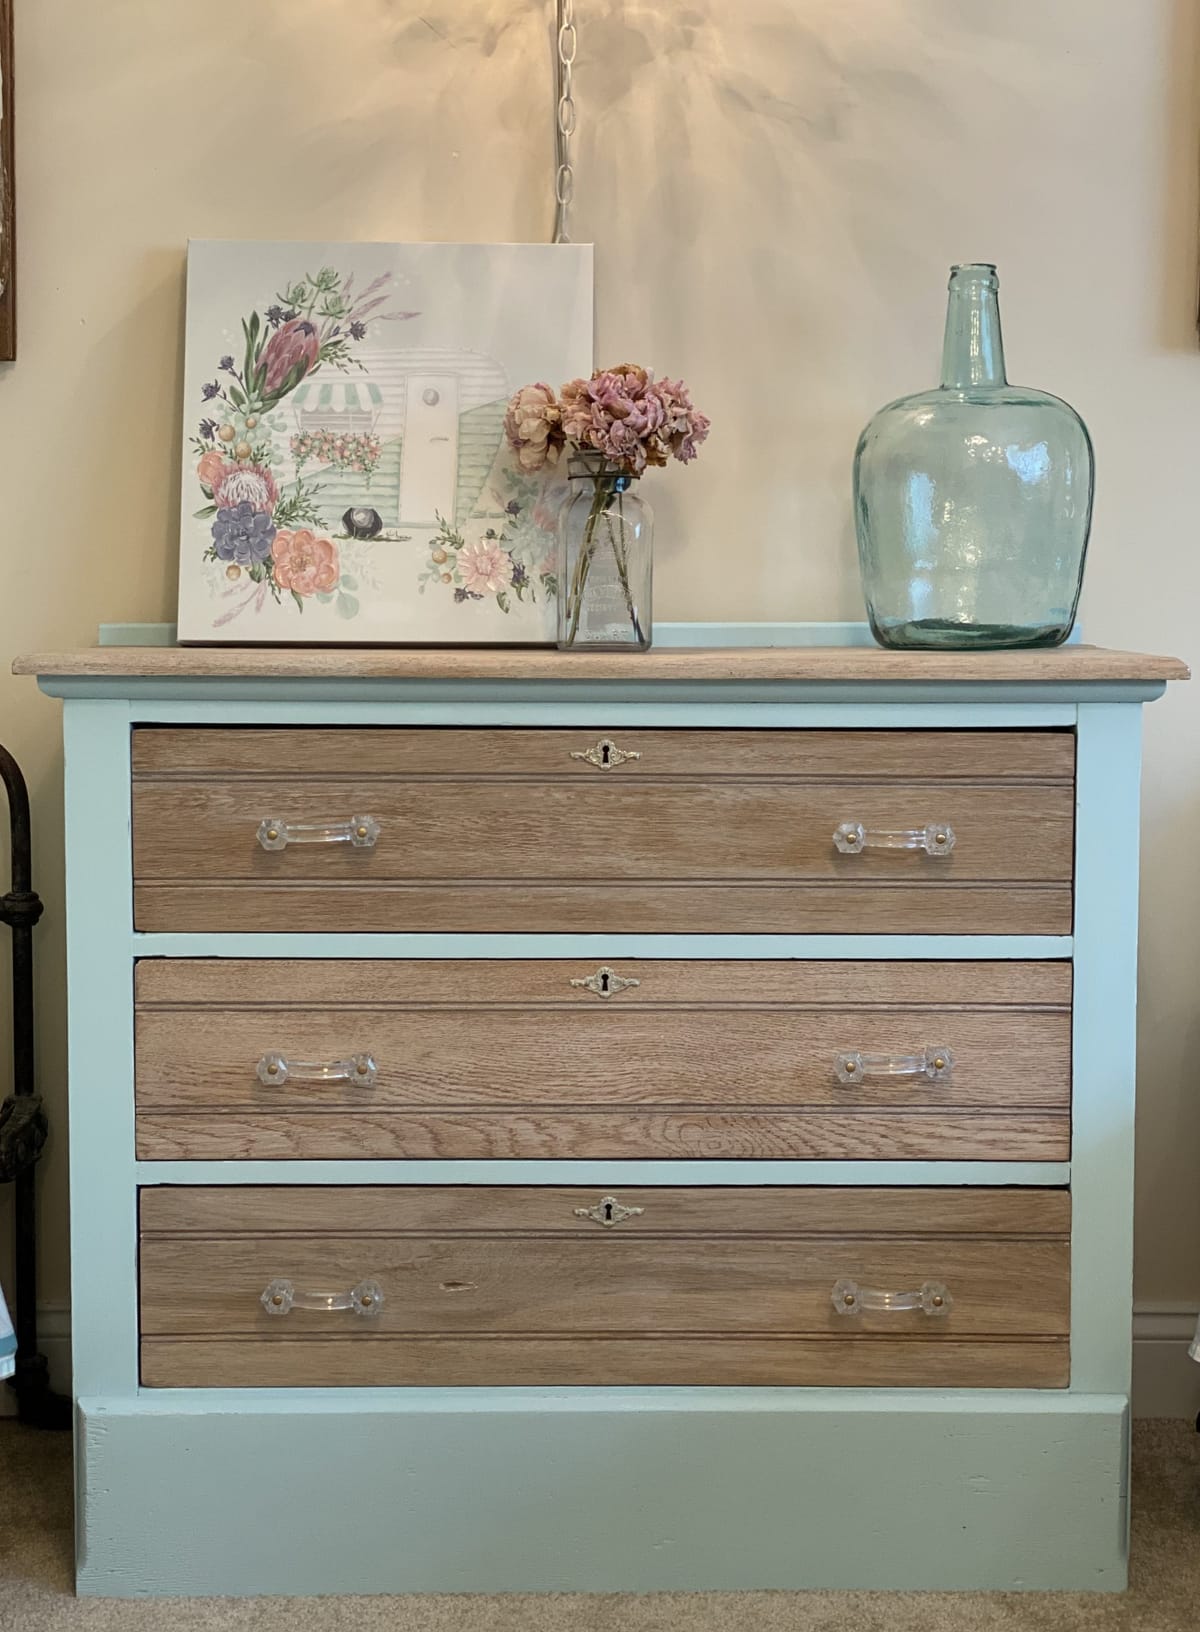
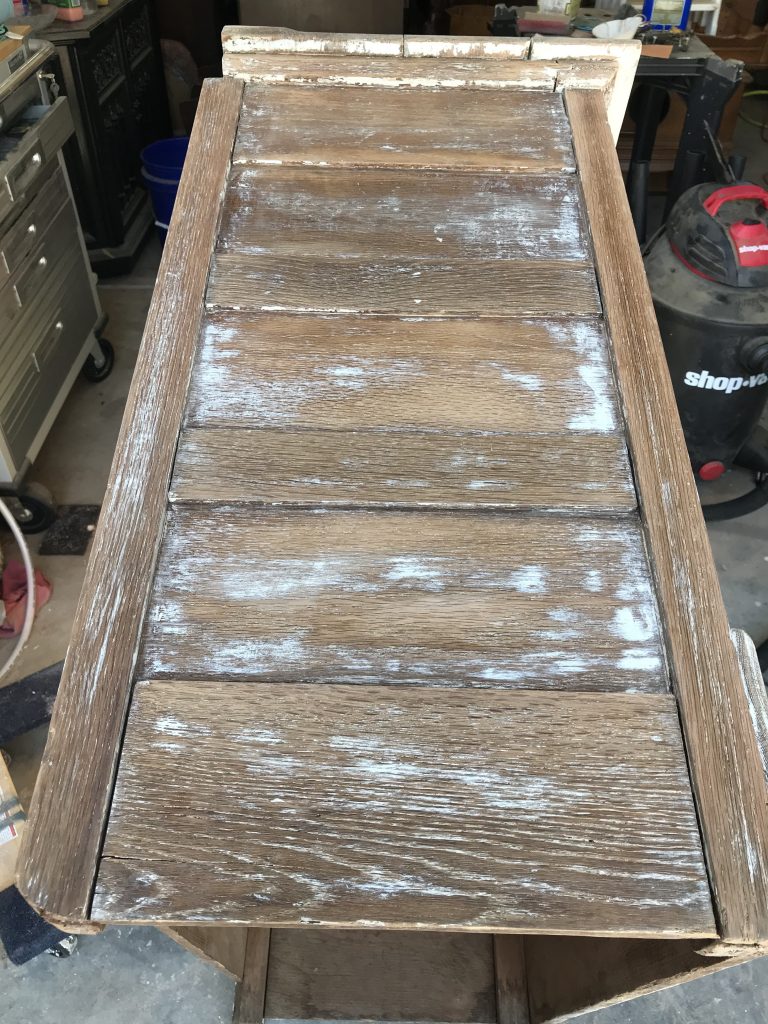
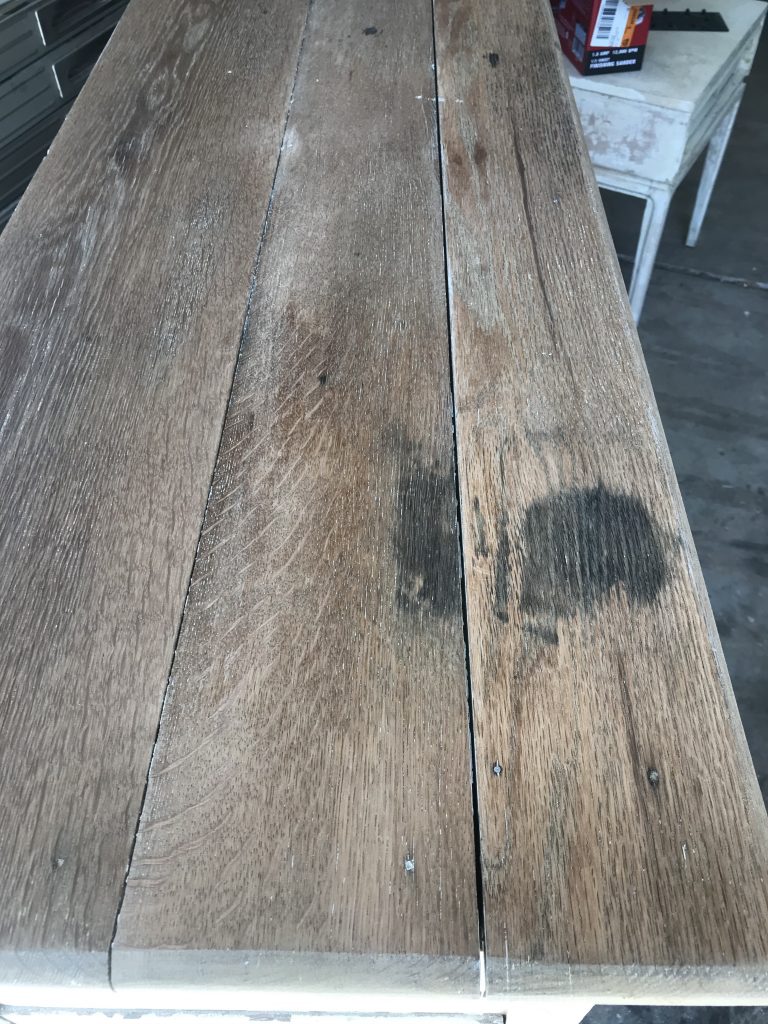
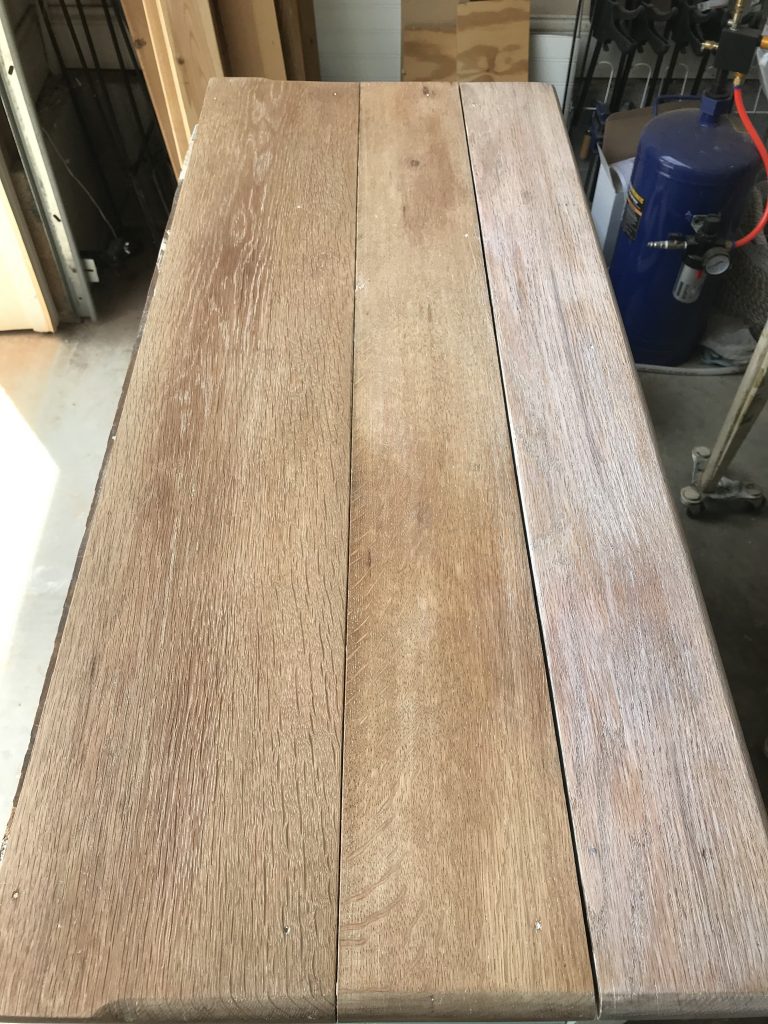
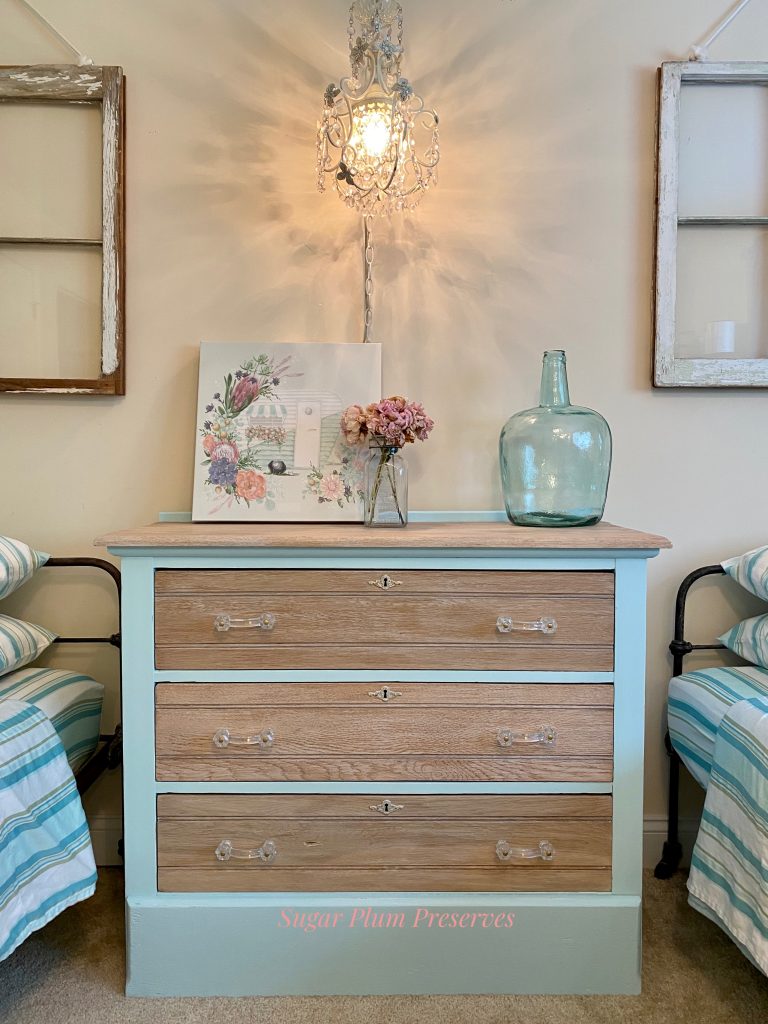
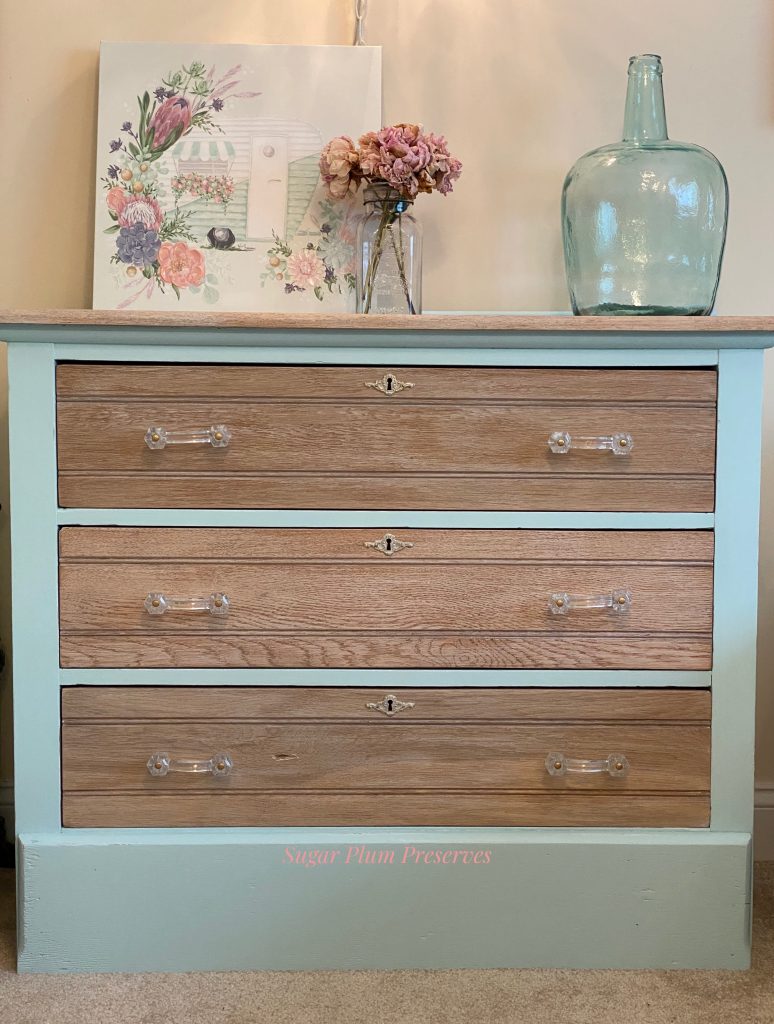
Can you believe that this was an “oops” paint?? The color is so delicious, I want to lick it! 😋 I had been dying to use this color and the rustic nature of the chest made it the perfect style for a driftwood, beachy transformation. The body got three coats of paint with my favorite paint brush, Round 1 inch https://bit.ly/3oI0V9z. Next, I turned my attention to creating the driftwood look on the top and drawer fronts. I was successful in removing the dark spots on the top, but the color of the natural wood wasn’t quite light enough. Also, the drawer fronts were made from a different type of wood and were too orange.
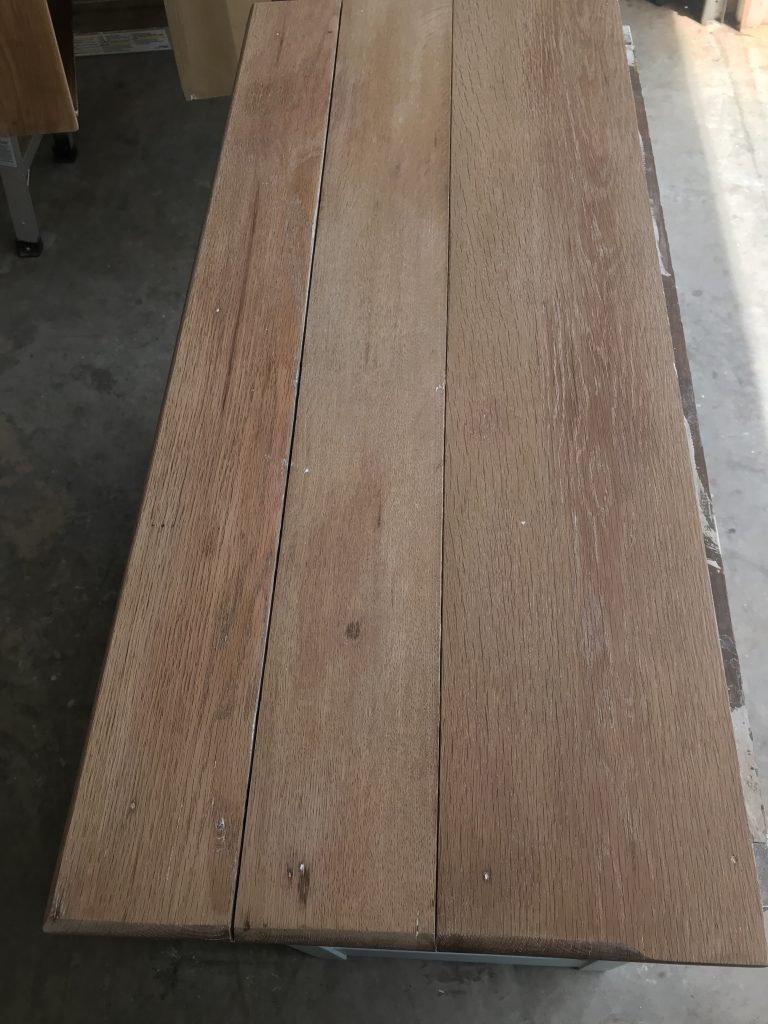
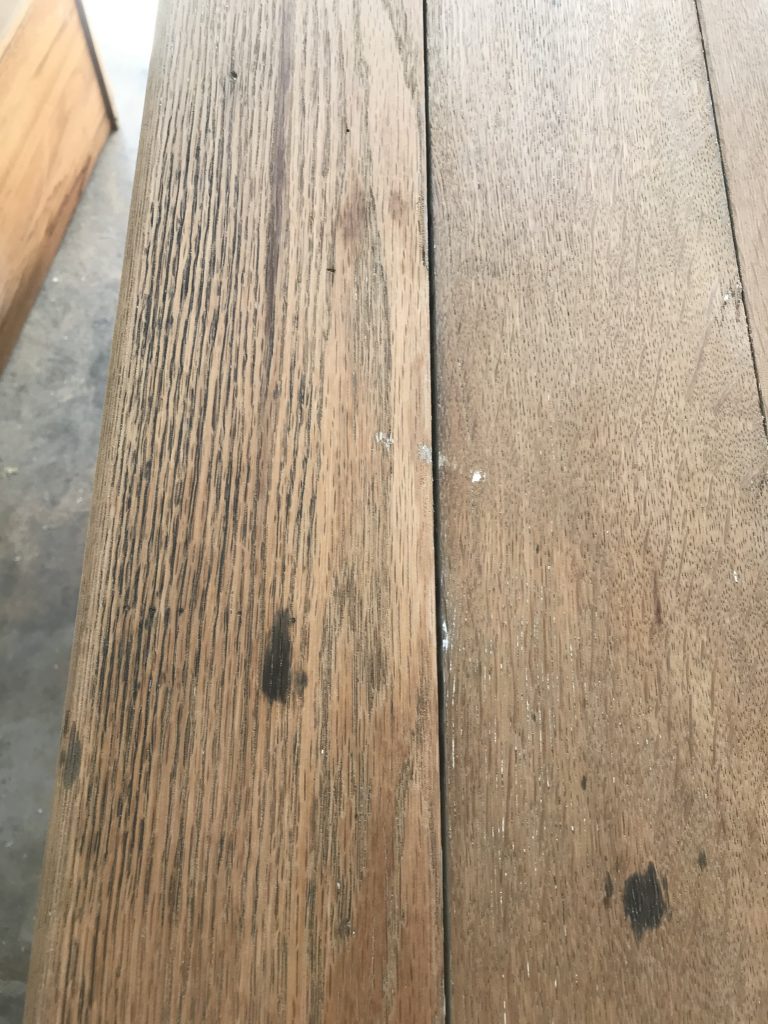
In order to make them match, I applied a whitewash to both. This is simply very watered down white paint applied with a brush (Angled 2 inch Stubby https://bit.ly/3oI0V9z) and removed with a wet rag until you get the look you want. You can see the difference the white wash makes in changing the tone of the wood while still showing the grain.
I fell in love with this beautiful fabric that matched perfectly AND had birds!! I used my trick for lining drawers – go to the dollar store and buy foam core board, cut it to size, cut the fabric slightly larger than the board https://amzn.to/2XfFmj2 , and use spray glue https://amzn.to/2TrcDa1 to attach the fabric. The result is a sturdy drawer liner, cut perfectly to size, and is removable if you want to change it up. 😎 The bird fabric was the perfect excuse to stencil birds on the drawer sides, for added interest. I had the stencil on hand and used the same paint that I used on the body. I think it came out so cute! I sealed the whole piece (including the sides of the drawers to protect the stencil) with three coats of Minwax Water Based Polycrylic, Matte https://amzn.to/36h3kys applied with another one of my tricks – a Car Detail Sponge https://amzn.to/2ANgY0K!
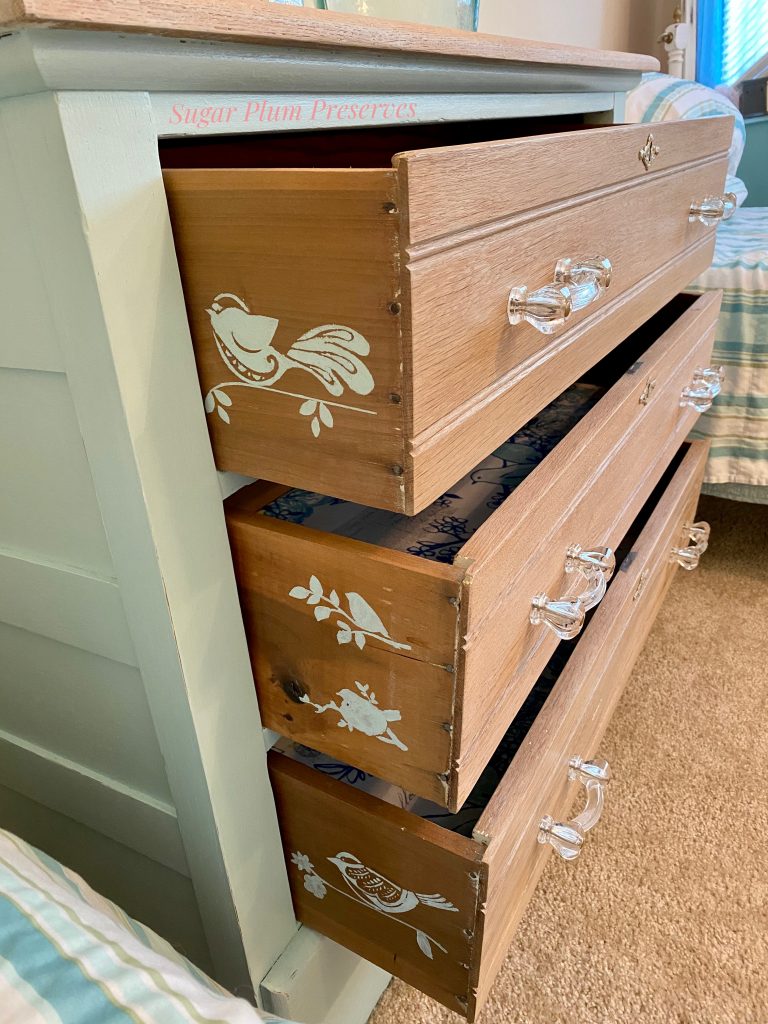
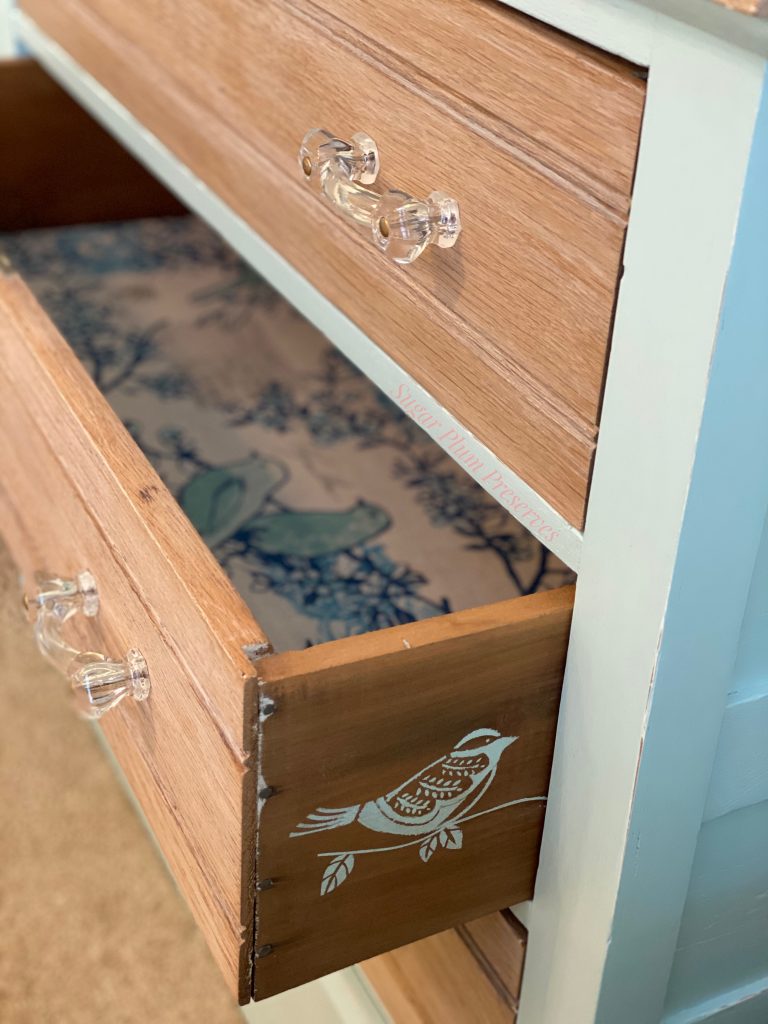
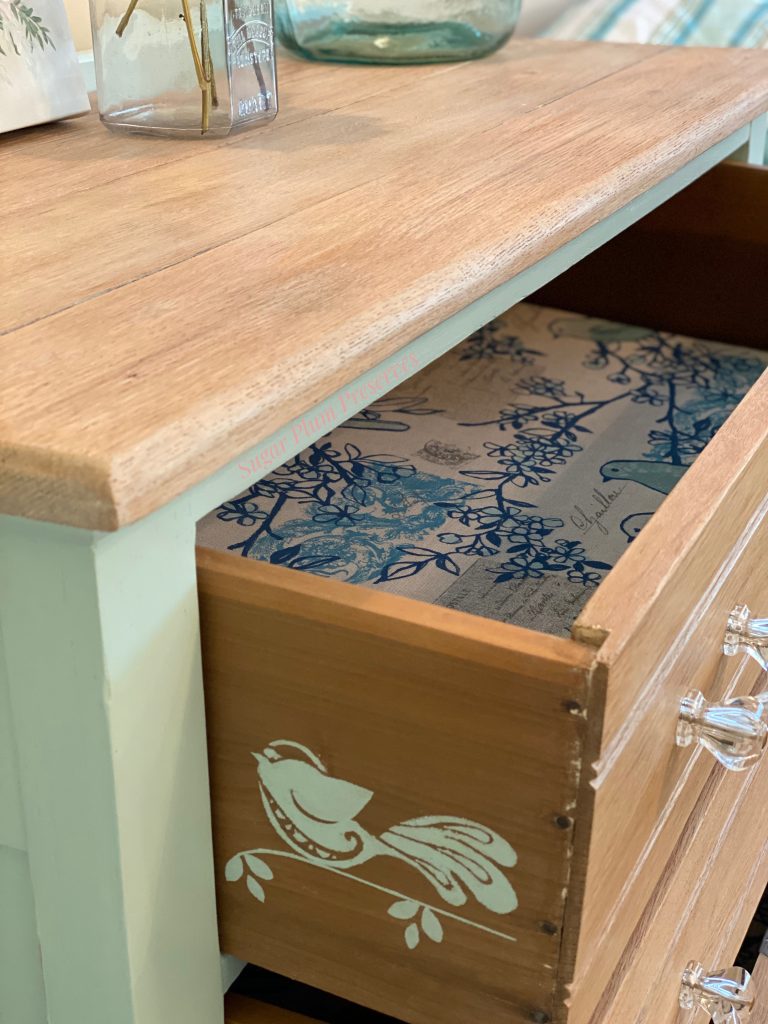
Lastly, I lightly distressed it for a worn look, attached the keyholes, and added these beautiful vintage glass pulls that reminded me of sea glass. Voila!! The perfect beachy driftwood look! This piece looked so beautiful in my guest room, I was sooo tempted to keep it!
Thank you so much for joining me for Sugar Plum Sundae! Please check back every Sunday for more yummy recipes to transform reclaimed “junk” into sweet little treats for the home! 🤗
For more delicious treats, follow Sugar Plum Preserves:
Facebook: https://www.facebook.com/SugarPlumPreserves/
Pinterest: https://www.pinterest.com/pinterest/sugarplumpreserves
Instagram: https://www.instagram.com/sugarplumpreserves/
YouTube: https://youtu.be/tQplTZMCjq0
XOXO
Michele
MATERIALS LIST (may not be all inclusive):
Citristrip https://amzn.to/308Ydid
Chip Brush 3 inch, 24 pack https://amzn.to/2WNntJf
Bar Keepers Friend https://amzn.to/343AtgB
Cordless Drill https://amzn.to/3wvomHW
TiteBond Wood Glue https://amzn.to/2LLxIHP
Dixie Belle Mud https://amzn.to/2zfMdRB
BIN Shellac Primer, Quart https://amzn.to/3g8fuyb
Calcium Carbonate https://amzn.to/3ia8lyt
Round 1 inch Brush https://bit.ly/3oI0V9z
Angled 2 inch Stubby Brush https://bit.ly/3oI0V9z
Painters Tape https://amzn.to/363jJrh
Minwax Water Based Polycrylic, Matte https://amzn.to/36h3kys
Car Detail Sponge https://amzn.to/2ANgY0K
Spray Adhesive https://amzn.to/2TrcDa1
Fabric Rotary Cutting Mat and Tool https://amzn.to/2XfFmj2
*Affiliate disclosure: As an Amazon Associate I may earn a small commission from qualifying purchases from Amazon.com.