Cappuccino with Foam
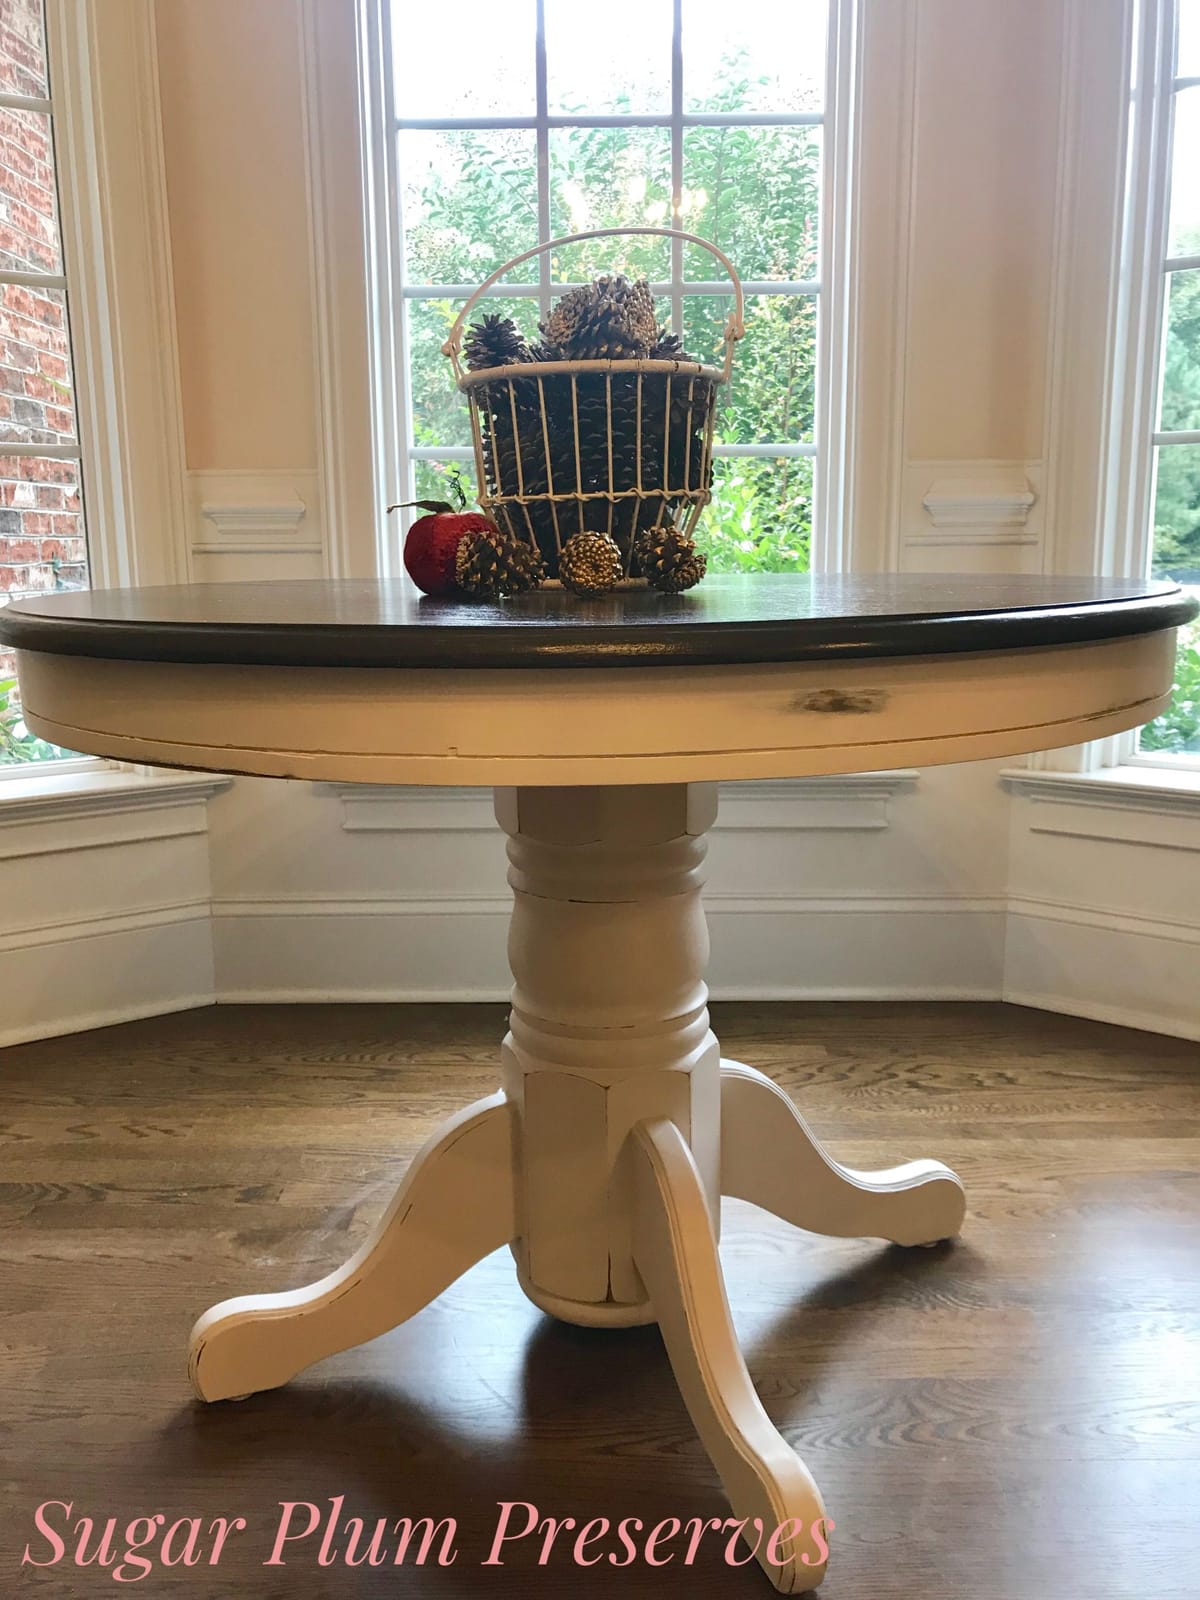
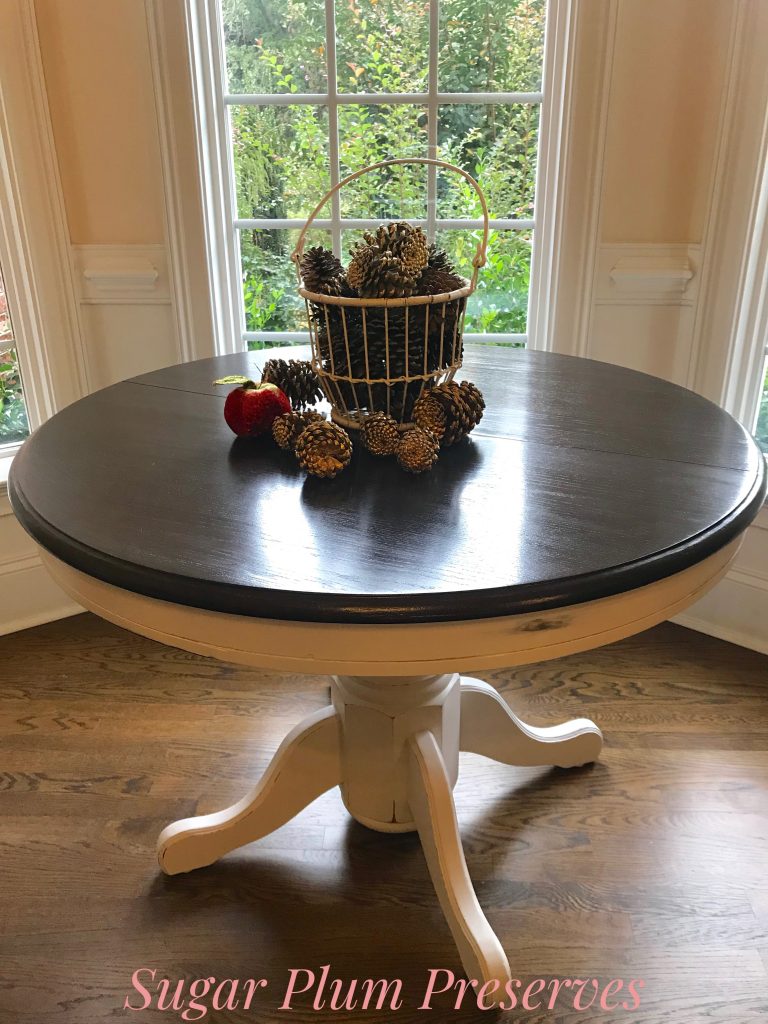
This weeks transformation is a very popular look right now; the base of the table painted, while the top is stained.
~ A Sweet Little Treat for the Home ~
Cappuccino with Foam
Hello My Sweets!
Since this look is so popular, I thought I would share how to get that look. My trusty sidekick found this piece on Market Place for $15 and text me to see if I wanted it!😱 Ummmmm, YES!! He was sweet enough to go and pick it up for me ASAP! It was in decent shape, just outdated. It even had a leaf included!!
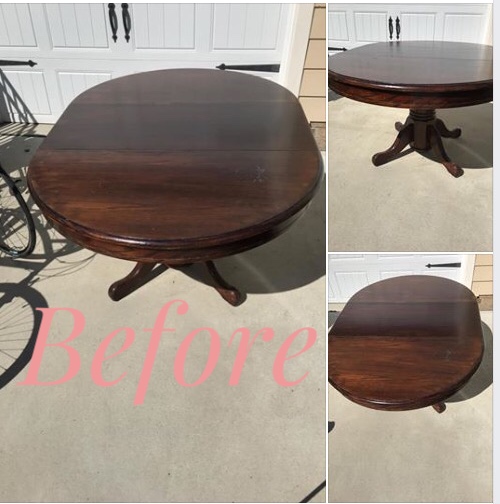
As you can see from the dark finish, I suspected it would bleed through the paint that I planned for the base. After a good cleaning with vinegar, dawn dish soap, and water, I sanded down the top of the table. You may think you do not need to clean it if you are going to sand it anyway, but you would be making a mistake. You would be grinding in dirt and oil into the table and that will show up in your stain. I used my orbital sander to sand the top bare. I started with 80 grit to remove the old finish and repeated the sanding process going up in grit – 150, then 220 to smooth out the grain. I wiped the top with several passes of a clean wet rag. I like to use a wet rag prior to staining to open up the wood and ensure even coverage of the stain. However, make sure the wood is dry prior to applying the stain since it is oil based, otherwise, it will not be absorbed into the wood. My favorite stain is Minwax walnut. You can add several coats to darken the wood, or leave it more sheer. I apply the stain in long even strokes from one end to the other using an applicator pad and the even pressure of my fingers. I slightly overlap the strokes, but go back over the overlap so the stain is not thicker and darker in the overlap. The idea is let the stain soak into the wood, not sit on top. I think people get a little impatient in this step and want the instant gratification of one layer. If you apply it too thick, it will not absorb and remain tacky. This can be a huge bummer because you may need to sand it off and start over depending on how thick the layer is. My point is, with staining, slow and steady wins the race. I will usually wait until the next day to apply another layer of stain, need be.
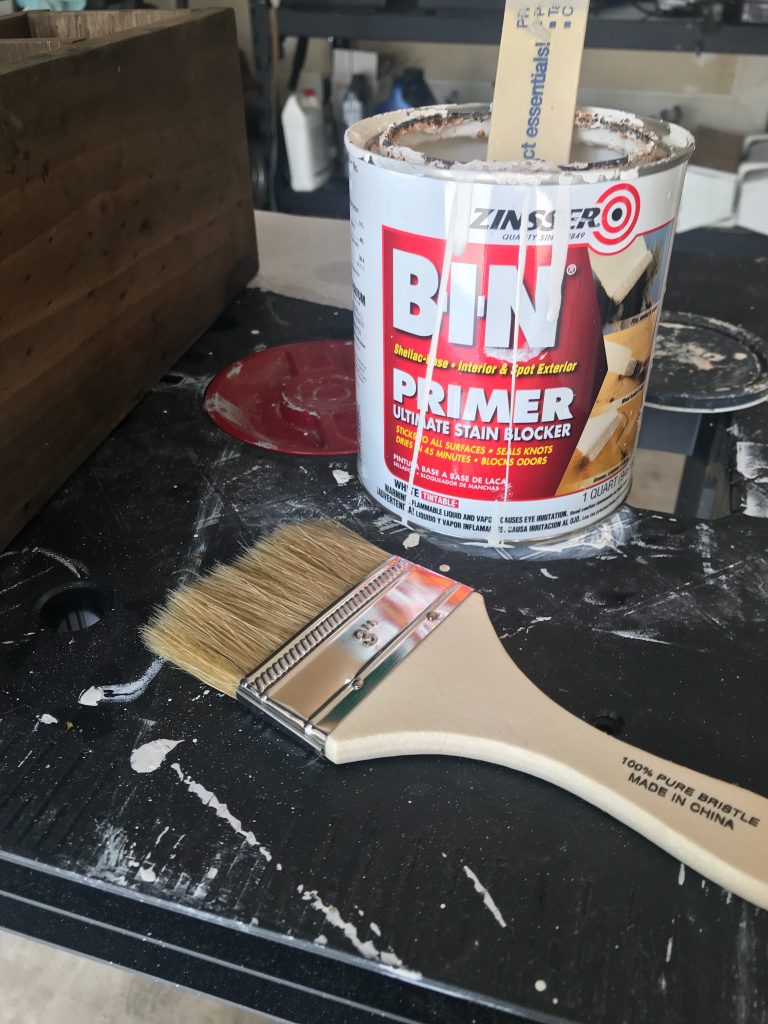
Once the stain was the color that I wanted, I primed the base of the table. I always use the shellac based primer from BIN to ensure there is no bleed through. I have tried other primers because they were less expensive and promised no bleed through, only to have to reprime with the BIN shellac based primer. It is the one in the red can and there is a link to it in the materials list at the end. It is very sticky and will be impossible to clean out of your good brushes, so be sure to use a cheap disposable brush for the application. Going on, it looks a mess, but don’t worry. Usually one coat will do, but wait until it dries and see if you see any discoloration of the white primer. If you do, add a second coat. It will have a texture to it and will show brush marks in your paint if you do not sand it before adding paint. Use 220 grit to knock back the texture and smooth it out before you paint.
For the base, I opted to use a homemade chalk paint because I wanted that velvety finish that chalk paint has. I used a simple recipe of one part calcium carbonate (chalk) to two parts paint. There is a link to the calcium carbonate that I use in the materials list at the end. Mix the calcium carbonate in a little water first to liquify it and get out any clumps. Once the calcium carbonate is mixed well and liquid, add it to the paint. I chose Bit of Sugar by Behr and applied two coats to the base and trim on the table top.

I mentioned the velvety finish of chalk paint. With a light sanding, the finish becomes so smooth and lovely. I went over all of the painted areas with 220 grit sand paper. With just a little bit of sanding, the paint takes on this gorgeous velvety feel. Another reason that I love chalk paint for this type of piece is how beautifully it distresses. To distress, I choose areas that would naturally be worn, like edges and trim. I wet the area with a mister spray bottle and lightly sand with 220 grit sand paper. Go lightly in this step. You can always sand a little more off if you would like more distressing. It is much harder to have to repaint an area if you’ve taken too much off.
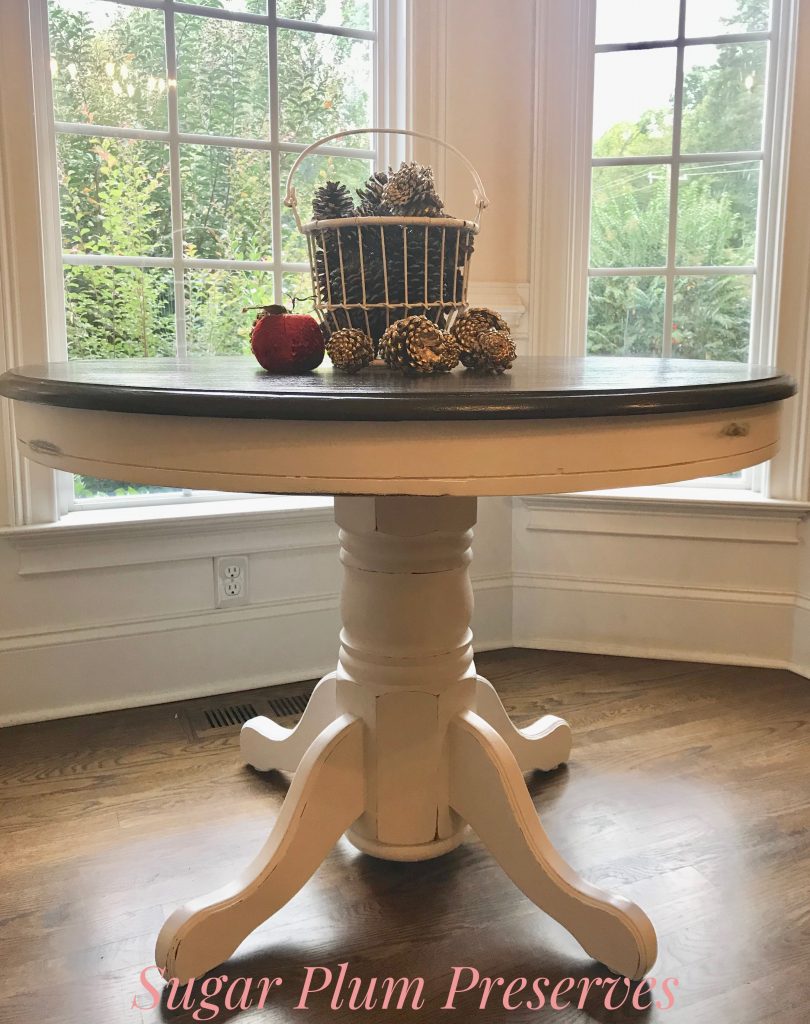
The whole piece was sealed in Dixie Belle Clear Coat for added durability, applied with a car detailing sponge. It’s that simple to transform a dated old table into something more modern and beautiful!
Thank you so much for joining me for Sugar Plum Sundae! Please check back every Sunday for more yummy recipes to transform reclaimed “junk” into sweet little treats for the home! 🤗
For more delicious treats, follow Sugar Plum Preserves:
Facebook: https://www.facebook.com/SugarPlumPreserves/
Pinterest: https://www.pinterest.com/pinterest/sugarplumpreserves
Instagram: https://www.instagram.com/sugarplumpreserves/
YouTube: https://youtu.be/tQplTZMCjq0
XOXO
Michele
MATERIALS LIST (may not be all inclusive):
Angled 2 inch Stubby https://bit.ly/3oI0V9z
Minwax Dark Walnut Stain https://amzn.to/3e7D1h8
Stain Applicator Pad https://amzn.to/2Xfun9d
Calcium Carbonate https://amzn.to/2TmGmRa
BIN Shellac Primer, Quart https://amzn.to/3g8fuyb
Chip Brush, 3 inch, 24 pack https://amzn.to/2WNntJf
Dixie Belle Clear Coat Satin https://amzn.to/3bNuzlp
Topcoat Applicator, Car Detail Sponge https://amzn.to/2ANgY0K
Orbital Sander https://amzn.to/3e7nwWl
3 Wheel Dolly, 4 pack https://amzn.to/3bKfilf
Bit of Sugar, Behr
*Affiliate disclosure: As an Amazon Associate I may earn a small commission from qualifying purchases from Amazon.com.