Earl Gray Macaron
This week's feature is a great little French Provincial coffee table that just needed an update.
~ A Sweet Little Treat for the Home ~
Earl Gray Macaron
Hello my Sweets!
This is the fifth post, in a series of blog posts, about transforming our bedroom. I will post a new piece each week that I have transformed. Once all of the pieces have been completed, I will post an entire before and after of our bedroom with all of the pieces included. If you missed any of the previous blog posts:
You can check out the first transformation here: https://sugarplumpreserves.com/snowball-cookie/
You can check out the second transformation here: https://sugarplumpreserves.com/madeleine/
You can check out the third transformation here: https://sugarplumpreserves.com/snowball-cupcake/
You can check out the fourth transformation here: https://sugarplumpreserves.com/chou-a-la-creme/
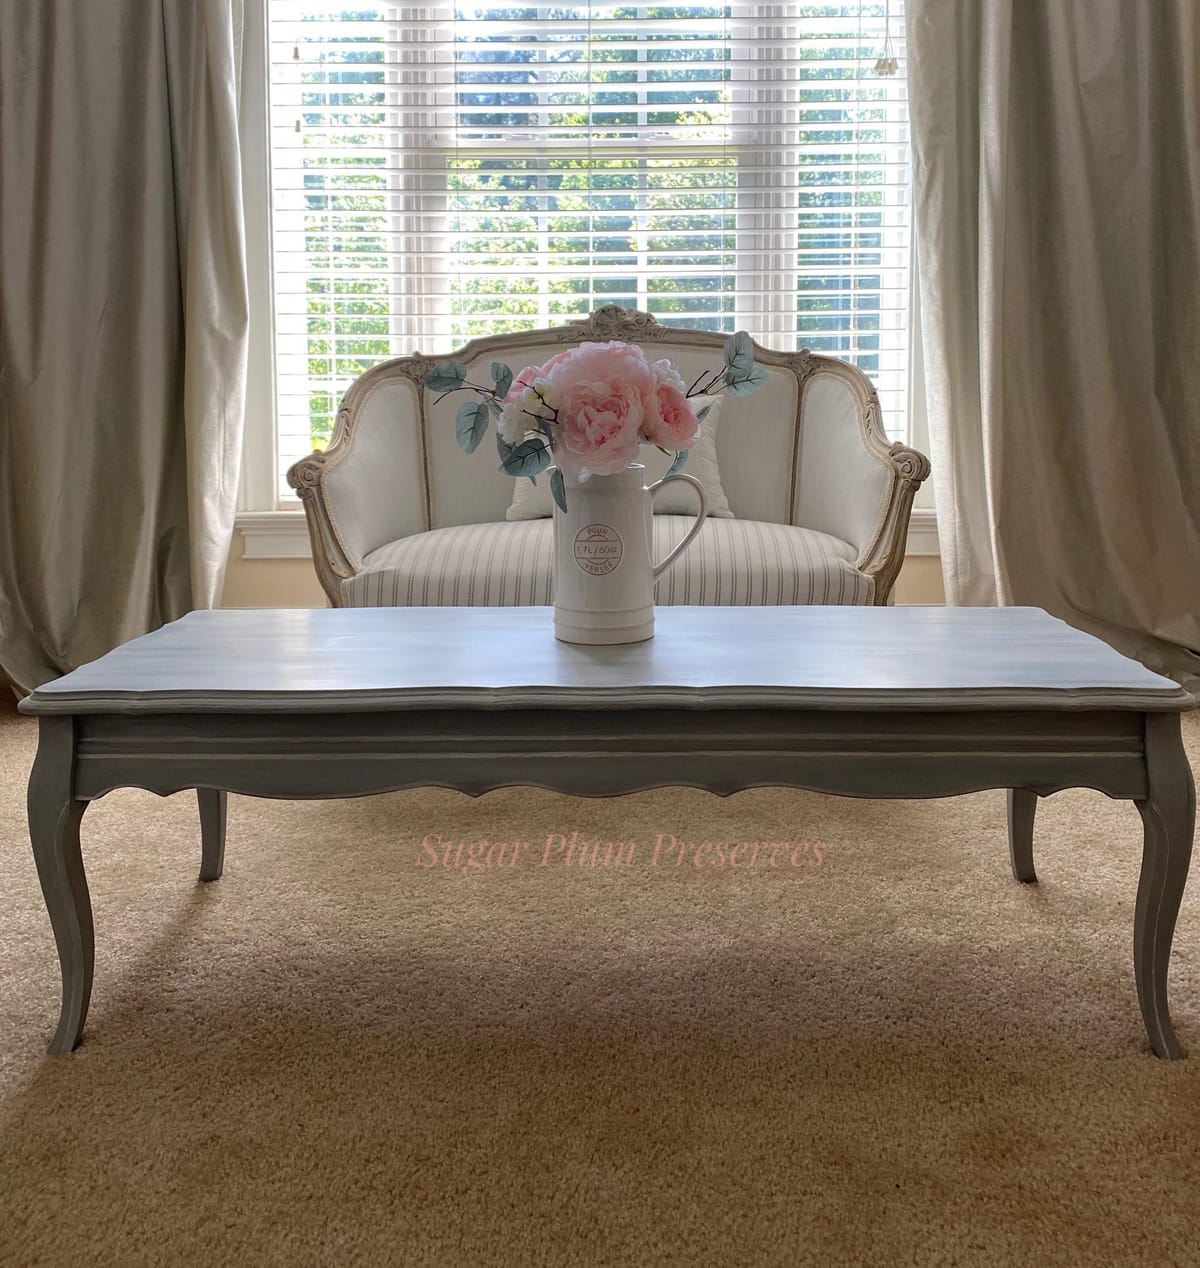
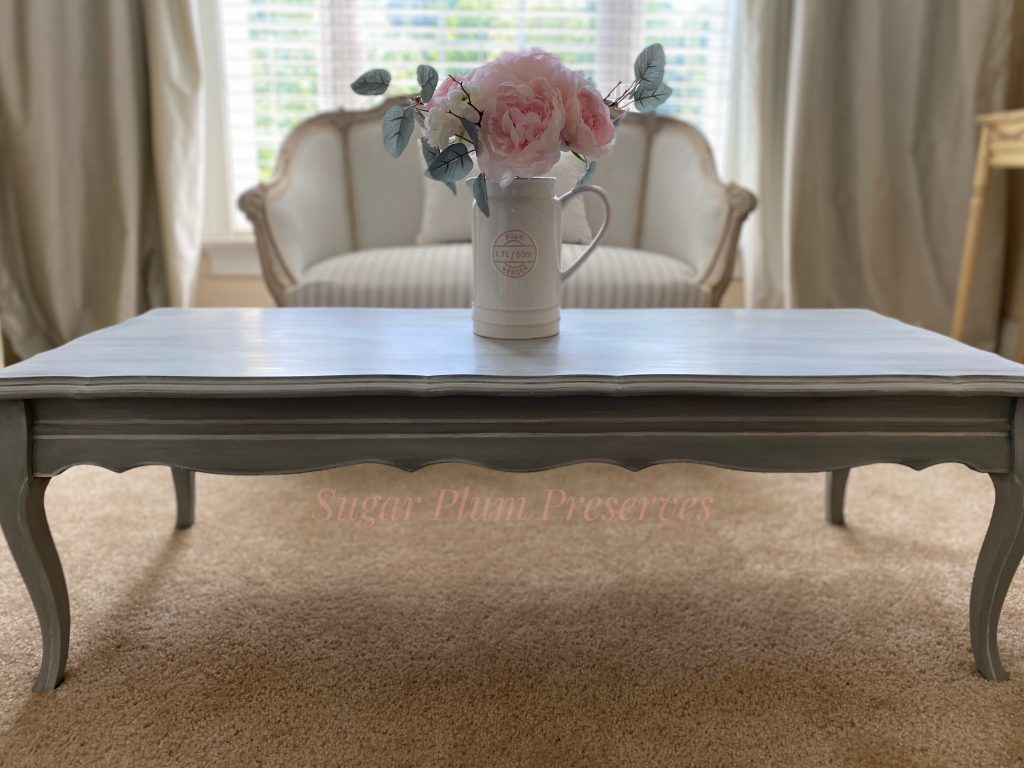
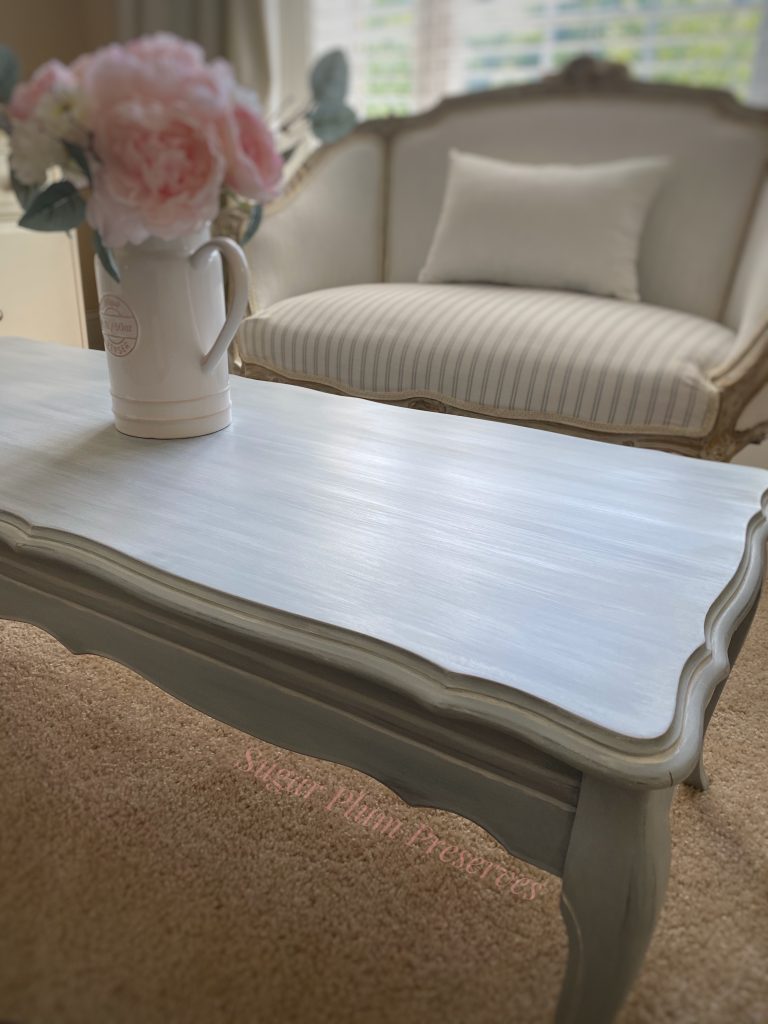
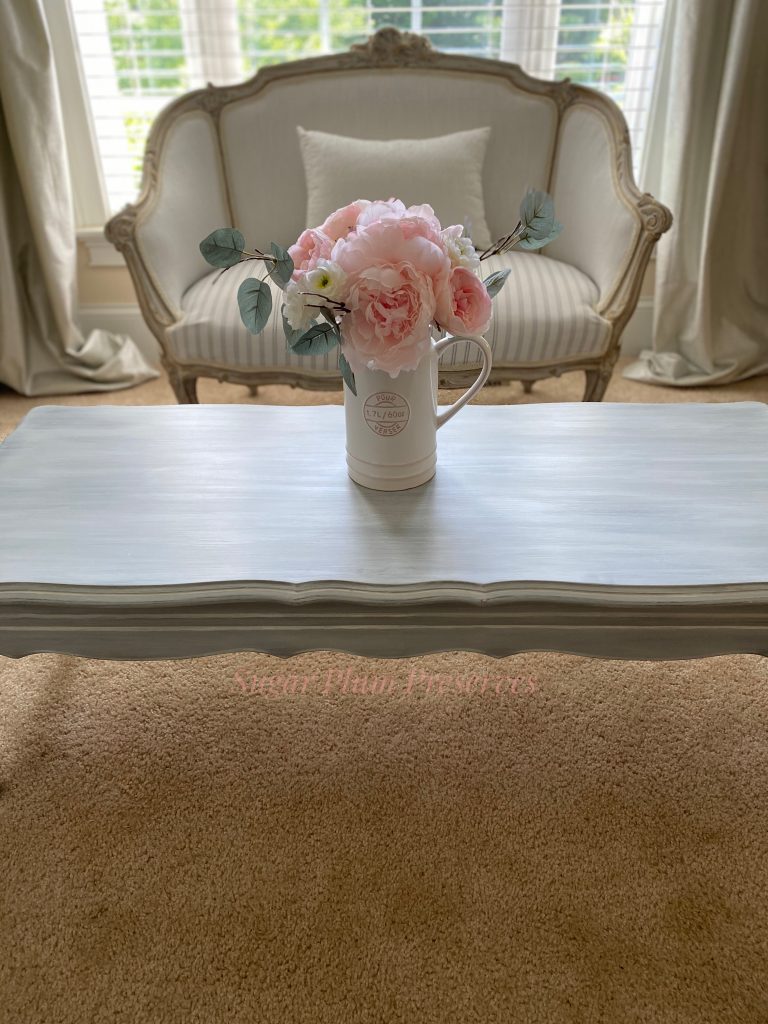
Every sitting room needs a coffee table, so after I completed Chou A La Creme, that was next on the list. I got this French Provincial coffee table and two matching side tables at an estate sale for $20. The side tables didn’t work in the sitting area, so they will be saved for a later project. I decided to keep the table simple, and paint it gray with a white wash and light distressing. Check out the before and continue reading to see how I got to the after.
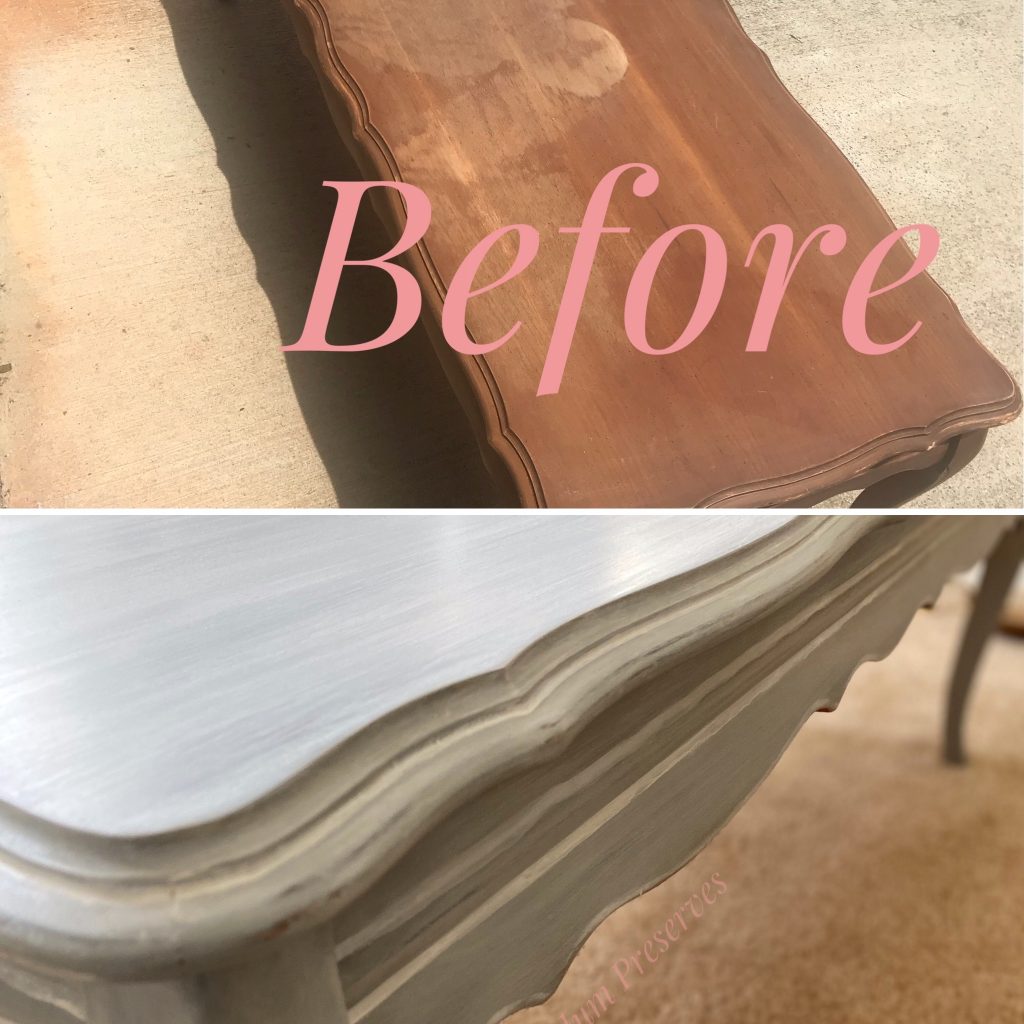
As you can see above, there was some water damage on the top, but that didn’t bother me since I love the “lived in” look. As I’ve said before, I like to describe my style as “lived in glamour”. I don’t really like anything that is too “perfect” anyway. This transformation was fairly simple – I cleaned the table with my usual water/dawn/vinegar solution, lightly sanded to give the paint some “teeth”, and painted until I liked the look. I started with a base coat of Manatee Gray from Dixie Belle.
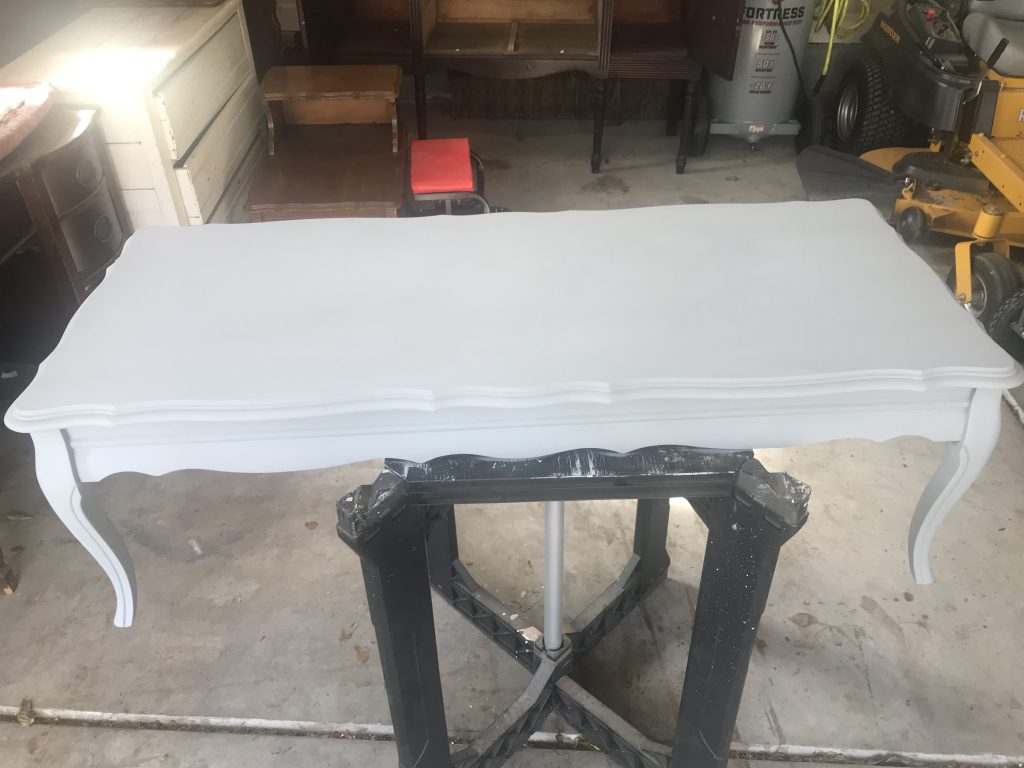
Once that was dry, I dry brushed a white custom made chalk paint over the whole piece. That is basically what it sounds like, just getting a small amount of paint on your brush and dragging it over the piece. It creates a little worn/driftwood look. After this step was completed, I took a step back and thought that all of those French Provincial details just blended in. **tsk tsk!** To help with that, I grabbed a chalk paint pen and went into the crevices of the legs and curvy details of the skirt. It was starting to come to life when my pen ran out. Whomp!😤 I had quite a bit of trim left, so I grabbed an artist brush and continued where I left off with the white chalk paint. It was at this moment that I realized God never meant for me to be a surgeon! My hand is not the steadiest to be painting freehand lines, but as I said, I gravitate to the imperfect, so it was fine with me. I just continued along with my brush and white chalk paint until I outlined all the curves.
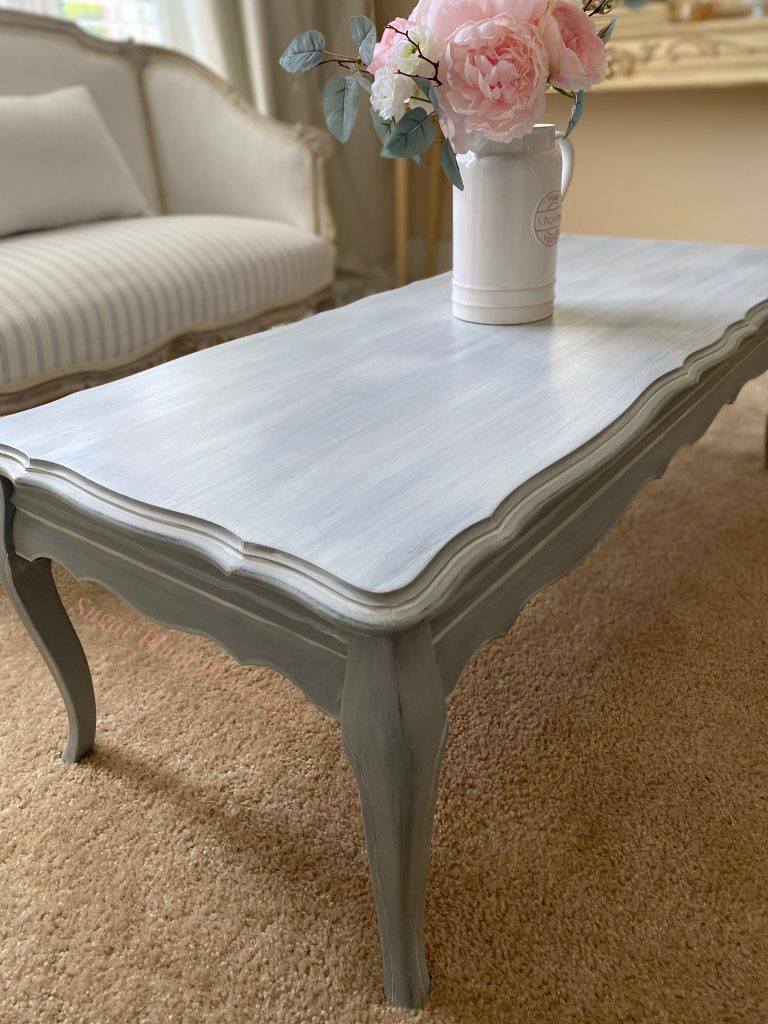
I thought it looked pretty good after that, so I sealed it with a matte polycrylic topcoat and placed it in my sitting room. It was then that I realized the gray color was off – it had too much blue for my taste. Back to the shoppe it went. I mixed up some of the white chalk paint with water – about 50/50 to create a wash. I haphazardly painted on the watery mixture and went back over it with a wet rag to blend and remove paint. I did this over the top, skirt, and legs. I loved the layered look that was being created, so I decide to distress the curves, top, and high points on the table. I did this by wet sanding with 220 grit sand paper and a mister bottle.
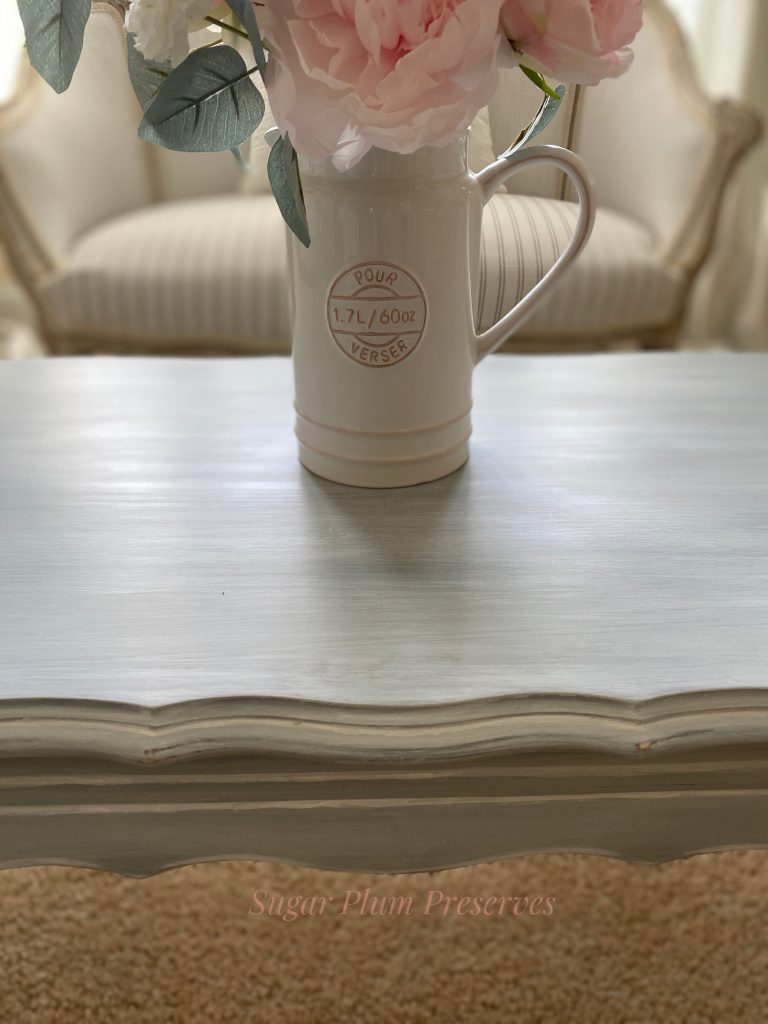
Back into the sitting room it went! Yay!……Only to see that it was still too blue for the gray in the surrounding space! Mehhhhh!😩 Annnnnnd back to the shoppe. I went back over the piece with the white wash blend that I made, but a little bit heavier this time. I also decided to tone down the blue in the gray by dry brushing another, more greige gray. I chose a paint that I already had on hand called La Palloma Gray. I used the tiniest bit of the gray and white washed again. That did it! It had that lived in, worn look that I love. Back into the sitting room it went……………. where it stayed this time! ☺️ I think it adds a nice anchor to the sitting room and a beautifully worn French flair. Whatta you think??

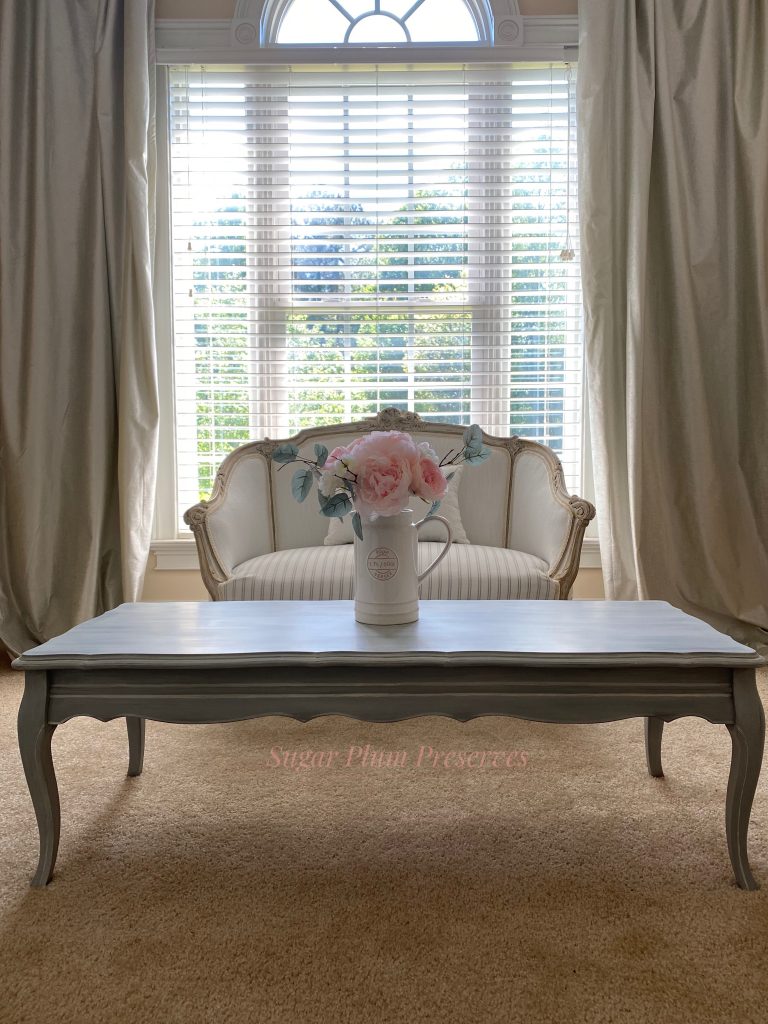
This transformation is the fifth piece added to our bedroom in the hopes of creating a cohesive, beautiful, restful retreat in a time of uncertainty and stress. Check back in next week for the sixth transformation in our journey.
Thank you so much for joining me for Sugar Plum Sundae! Please check back every Sunday for more yummy recipes to transform reclaimed “junk” into sweet little treats for the home! 🤗
For more delicious treats, follow Sugar Plum Preserves:
Facebook: https://www.facebook.com/SugarPlumPreserves/
Pinterest: https://www.pinterest.com/pinterest/sugarplumpreserves
Instagram: https://www.instagram.com/sugarplumpreserves/
YouTube: https://youtu.be/tQplTZMCjq0
XOXO
Michele
Materials List (may not be all inclusive):
Detail Sander https://amzn.to/3eauZEb
Dixie Belle Chalk Paint, Manatee Gray https://amzn.to/2TokqoN
Paint Brush, Angled 2 inch https://bit.ly/3oI0V9z
Detail Brush, Royal Brush Crafters Choice Variety https://amzn.to/2Xjc0jI
Calcium Carbonate https://amzn.to/2TmGmRa
Chalk Paint Pen https://amzn.to/2Id5Huw
Minwax Water Based Polycrylic, Matte https://amzn.to/36h3kys
Topcoat Applicator, Car Detail Sponge https://amzn.to/2ANgY0K
Sand Paper https://amzn.to/34AUFqt
La Paloma Gray, Benjamin Moore
Bit of Sugar, Behr
*Affiliate disclosure: As an Amazon Associate I may earn a small commission from qualifying purchases from Amazon.com.