Eclair au Chocolat
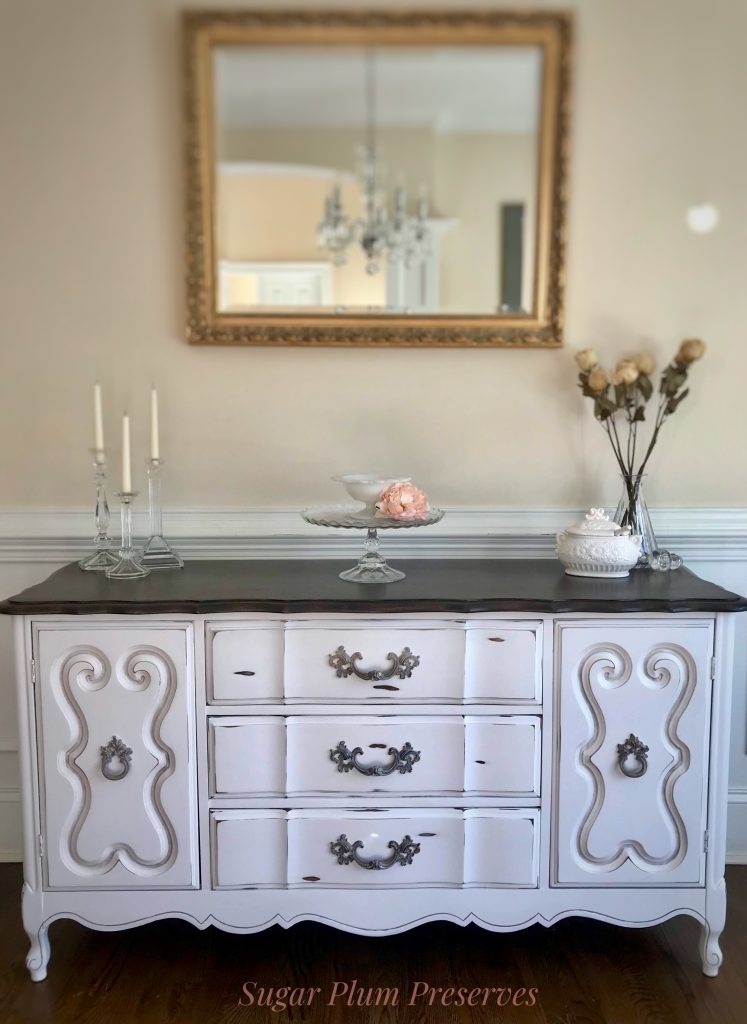
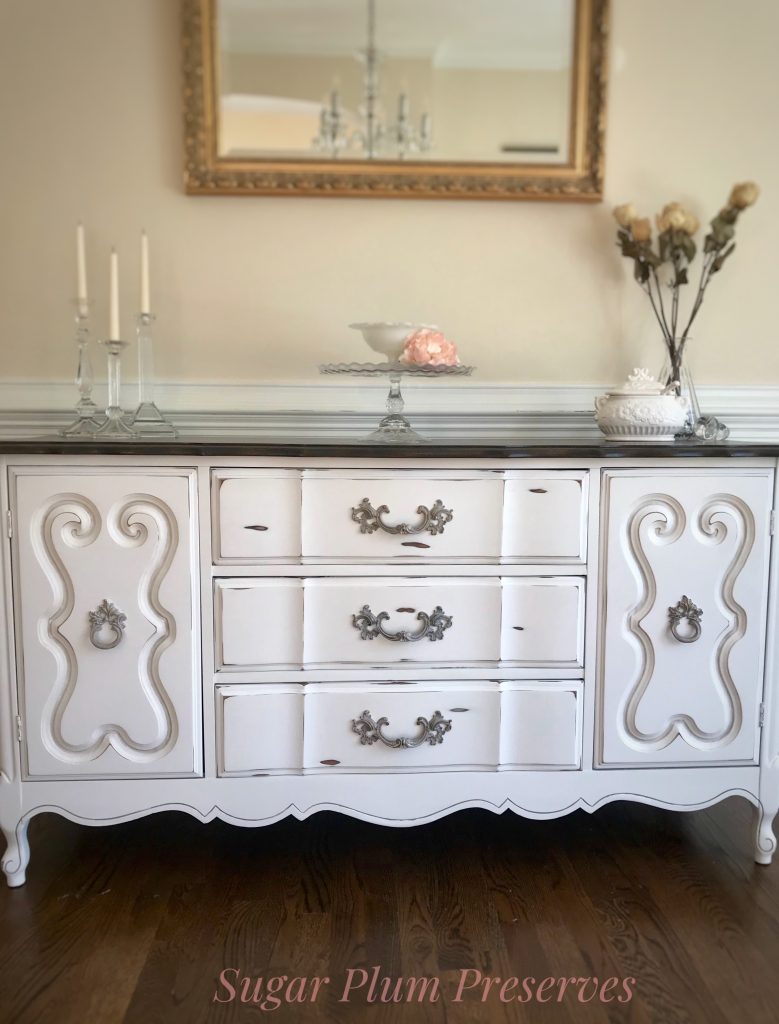
This week's feature is a simple, but popular look ~ white distressed farmhouse look with a dark stained top.
~ A Sweet Little Treat for the Home ~
Eclair au Chocolat
Hello My Sweets!
For this transformation, I used a custom made chalk paint which made the finish velvety smooth and added some pretty, surprise details on the drawers. Read on to see how you can turn a dated buffet into a bright, beautiful showpiece!
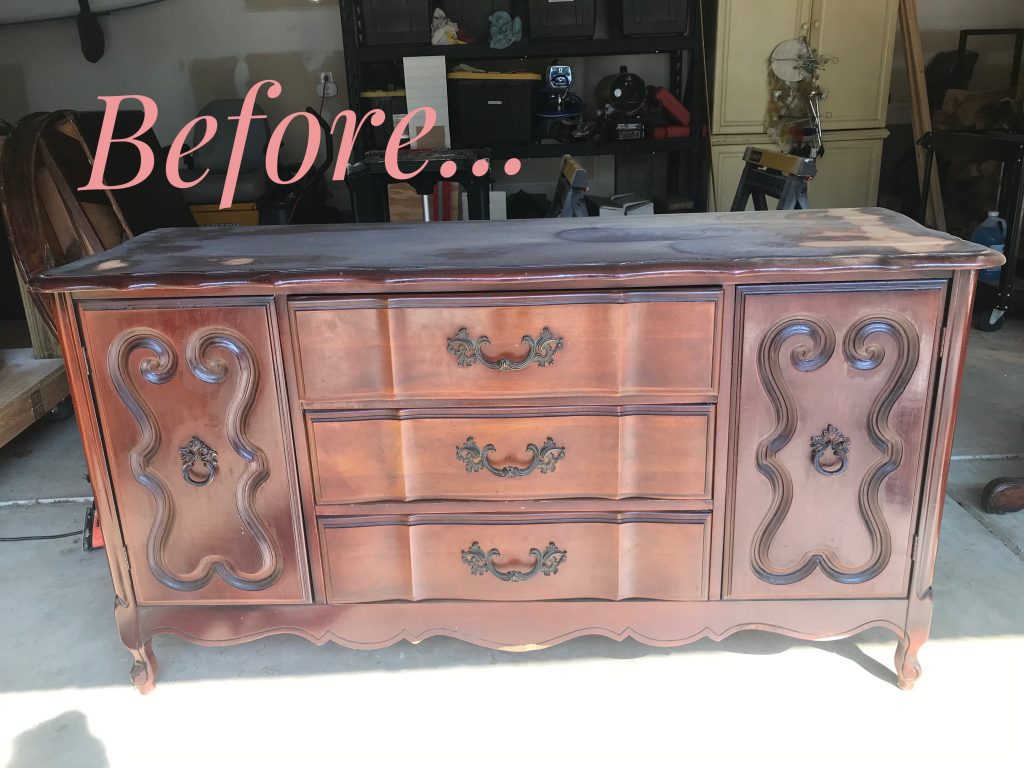
This was what I started with. I loved the pretty details on the cabinets, the lovely legs, and the french provincial vibe of it. What I didn’t love was the layers of furniture polish, wear, and dated color.
I started with a good wipe down with mineral spirits to remove residual wax. Even though I planned on sanding the top down to the bare wood, I wanted to remove the wax first so that I didn’t grind it further into the wood while sanding. I then cleaned the whole piece with Krud Kutter Cleaner/Degreaser https://amzn.to/3ciVtIm.
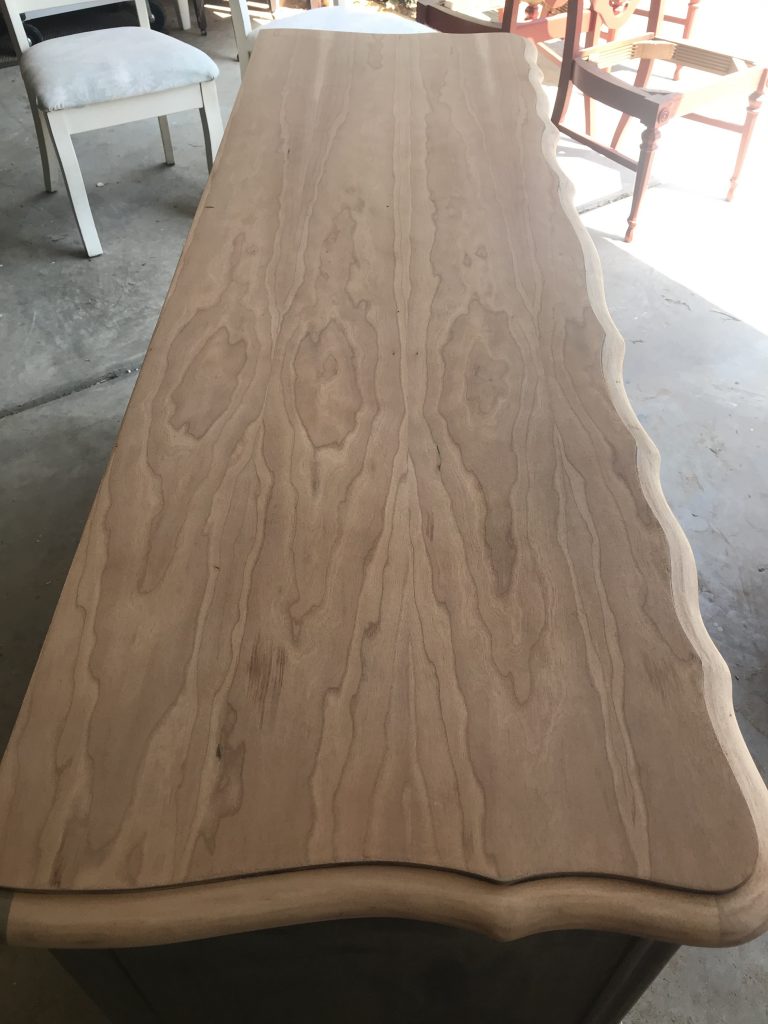
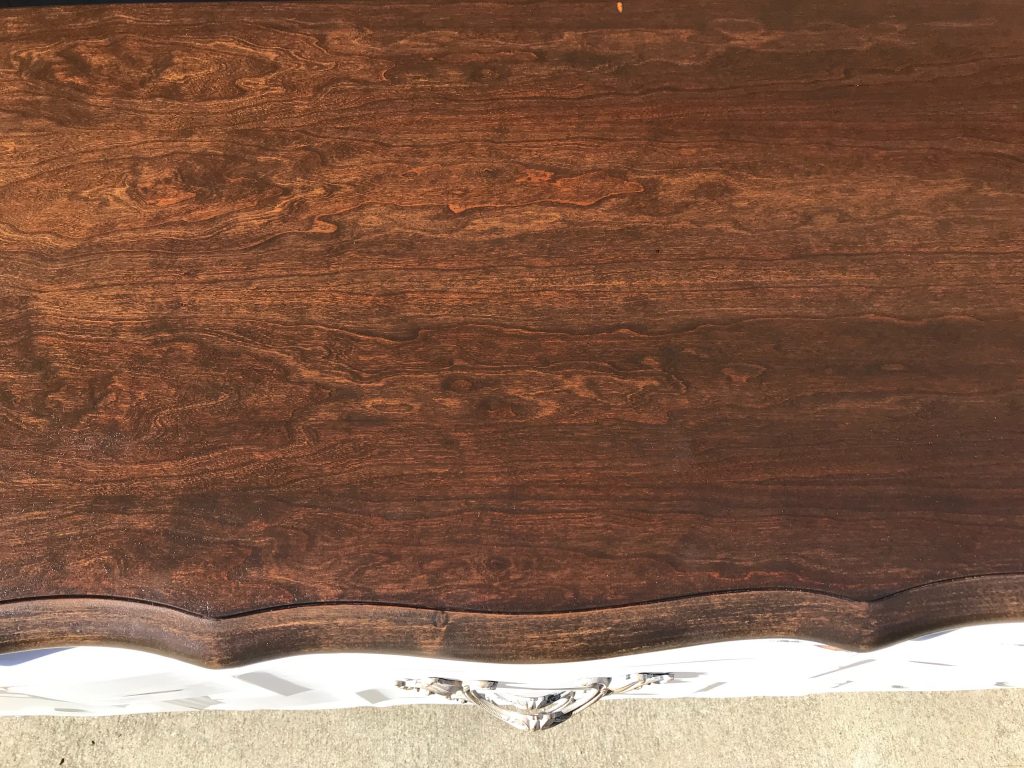
I got to work on the top with my orbital sander https://amzn.to/3mOzGsi, starting with 80 grit, moving up to 120 and finally 220 to smooth it out. Once the old finish was removed, I was pleasantly surprised at how beautiful the grain was! It had been hidden under the stain. I knew right then that even though I was going to use a dark stain, I would only apply a layer or two to allow the grain to shine.
On the body, I hand sanded with 220 grit, just to smooth out the surface and to give it some “teeth” for the paint to adhere to. I knew that the old finish would most likely bleed through to the white paint I was planning on using. As a rule, when in doubt, PRIME! It is a huge bummer to work so hard on a piece only to have it turn pink or yellow once you add the topcoat. It is not the topcoat that is causing the discoloration, it is the tannins from the original finish coming through. At that point, there is no fix other than to prime it and paint again. Trust me, you’ll only make that mistake once! Be kind to yourself and prime with BIN Shellac based primer https://amzn.to/3g8fuyb. I buy it by the gallon https://amzn.to/3g8f0In so that I always have it on hand and have no excuse to skip this step.
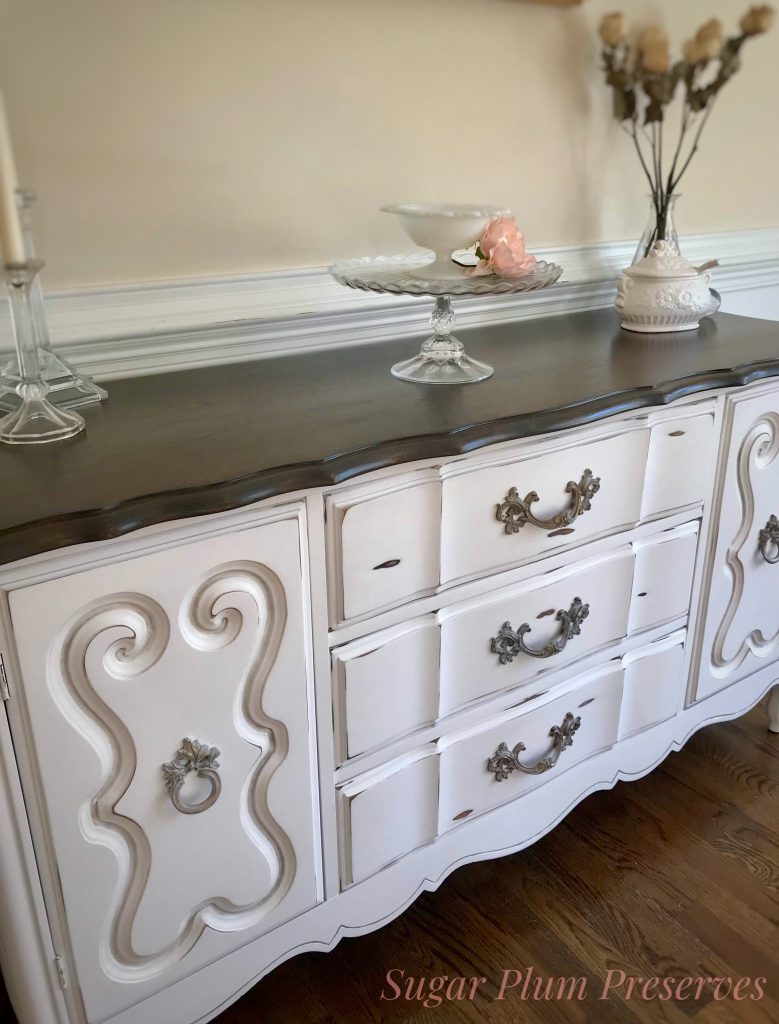
Ready to paint! I wanted this piece to have a beautiful smooth finish, so I decided to use my sprayer ~ Hand Held Wagner Sprayer https://amzn.to/399ETG9. I made a custom chalk paint by mixing 2 parts paint (Behr Bit of Sugar) to one part calcium carbonate https://amzn.to/3ia8lyt. Mix the calcium carbonate with a little water prior to mixing it with the paint to dissolve any chunks. In order to use the chalk paint with the sprayer, thin it out further with water so that it flows more easily through the sprayer. I covered the top with plastic and tape to prevent overspray from getting on my newly sanded top. The result was a flawless finish!
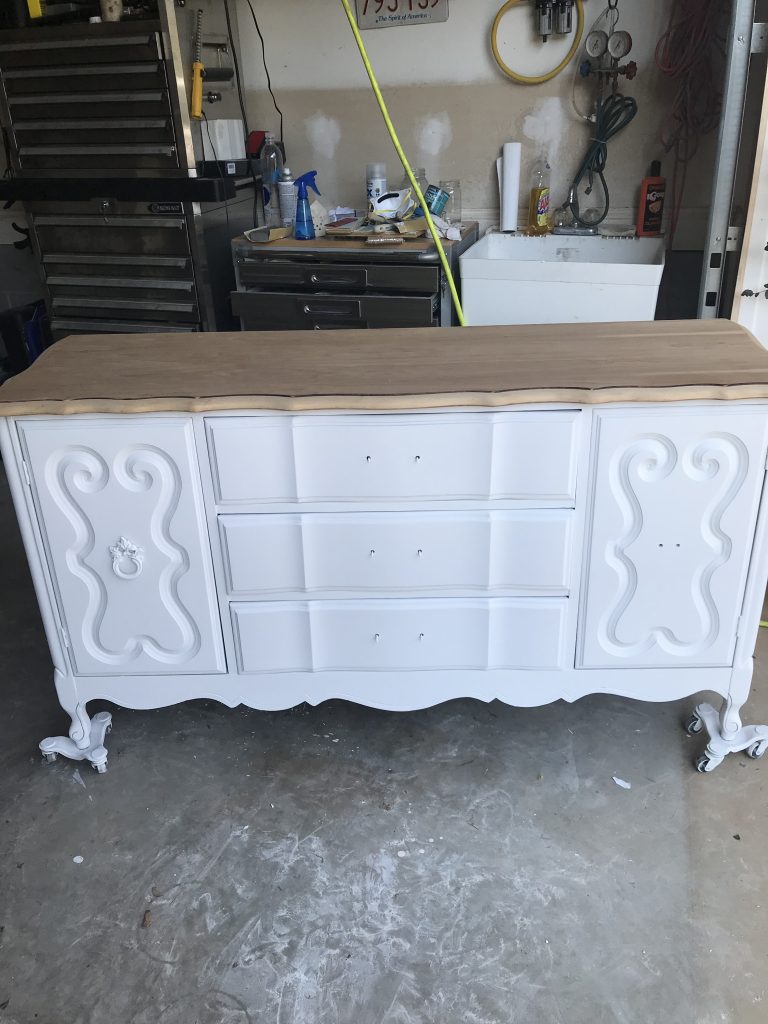
Pro tip! Put your piece on these dollies https://amzn.to/3bKfilf so that you can spray all they way to the bottom of the legs. They also allow you to easily move the piece around as you are painting. Pro tip #2! As you can see above, I put screws in the holes for the pulls. This makes it easy to open the drawers when it is dry and prevents paint overspray from getting into the drawers while spraying. Trial and error have taught me these little tricks to work smarter, not harder!
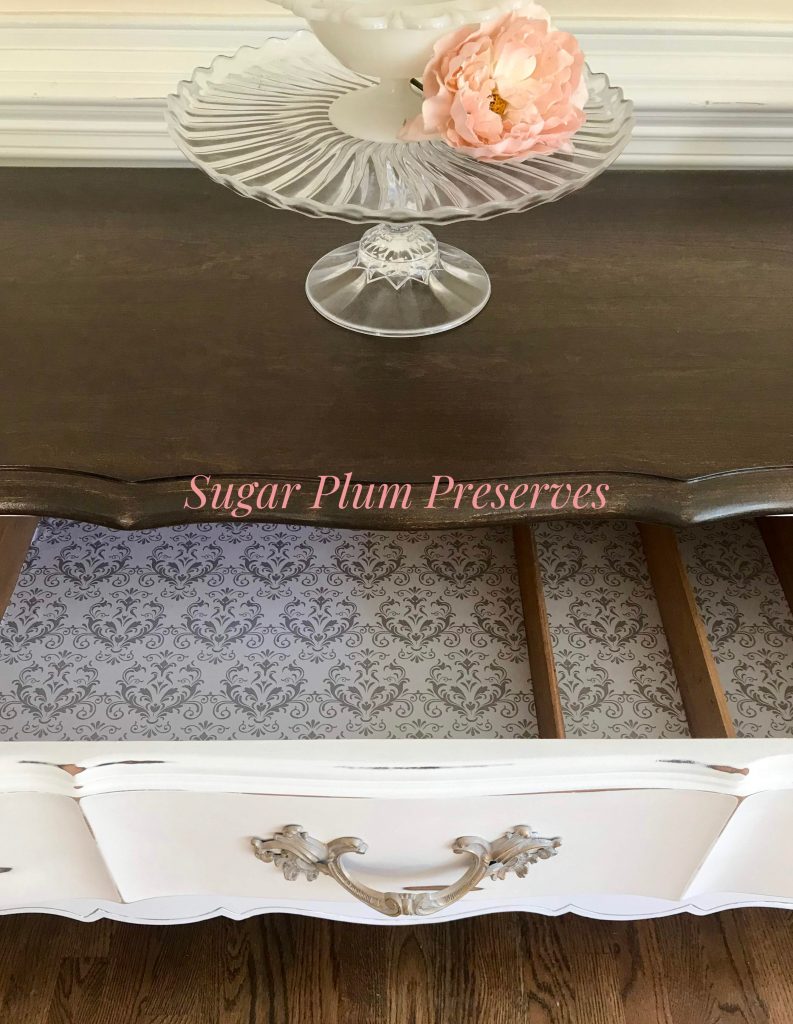
Now that the body was painted, I was ready to stain the top. I used Minwax Dark Walnut stain https://amzn.to/3e7D1h8 applied in long even strokes with a staining pad https://amzn.to/2Xfun9d. I find this method to be the best way to get an even, streak free finish. I applied two coats to prevent the finish from being so opaque that it hid the grain.
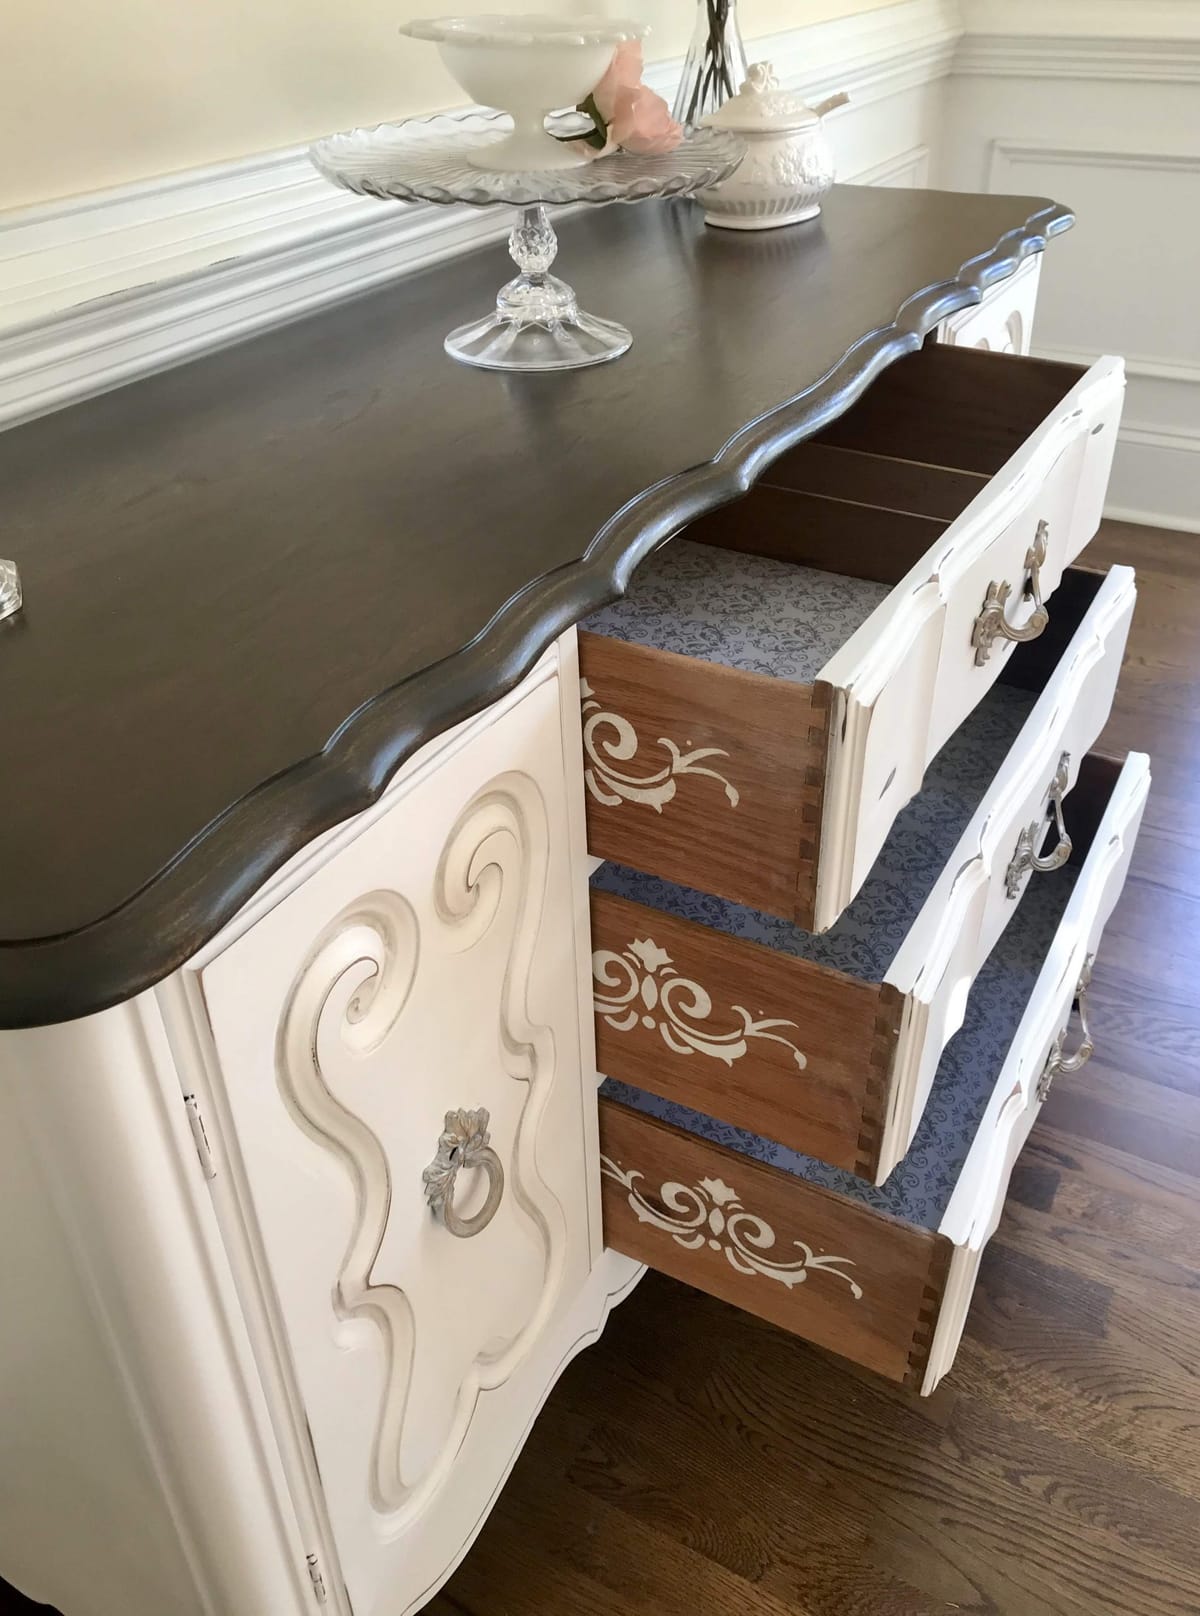
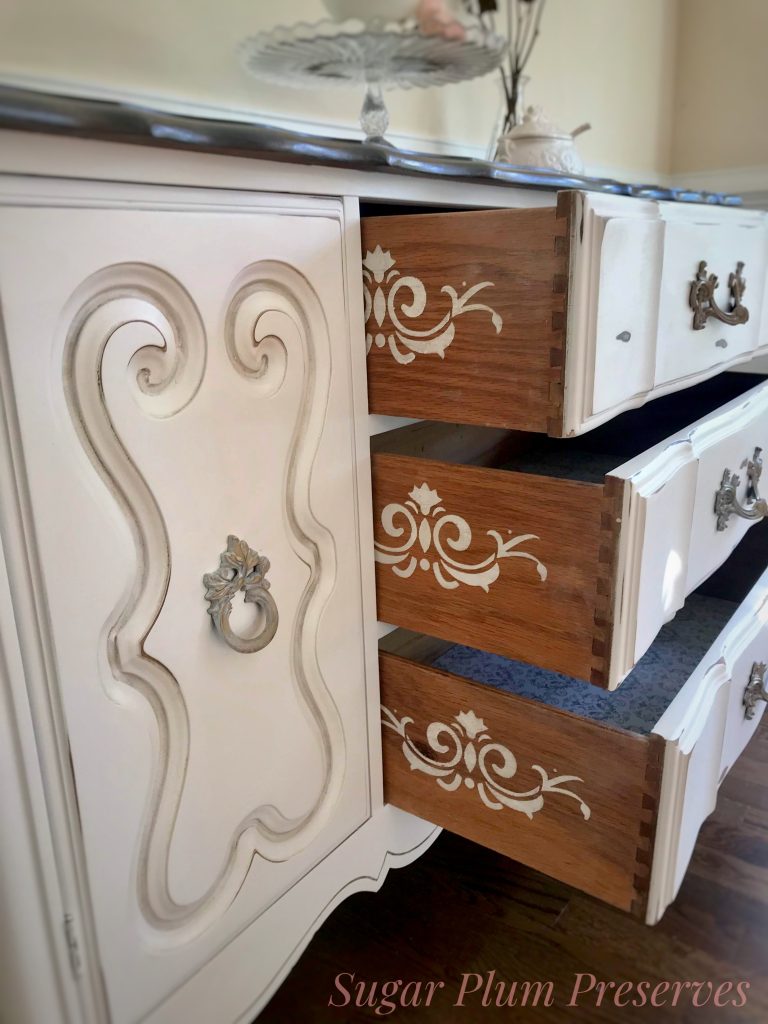
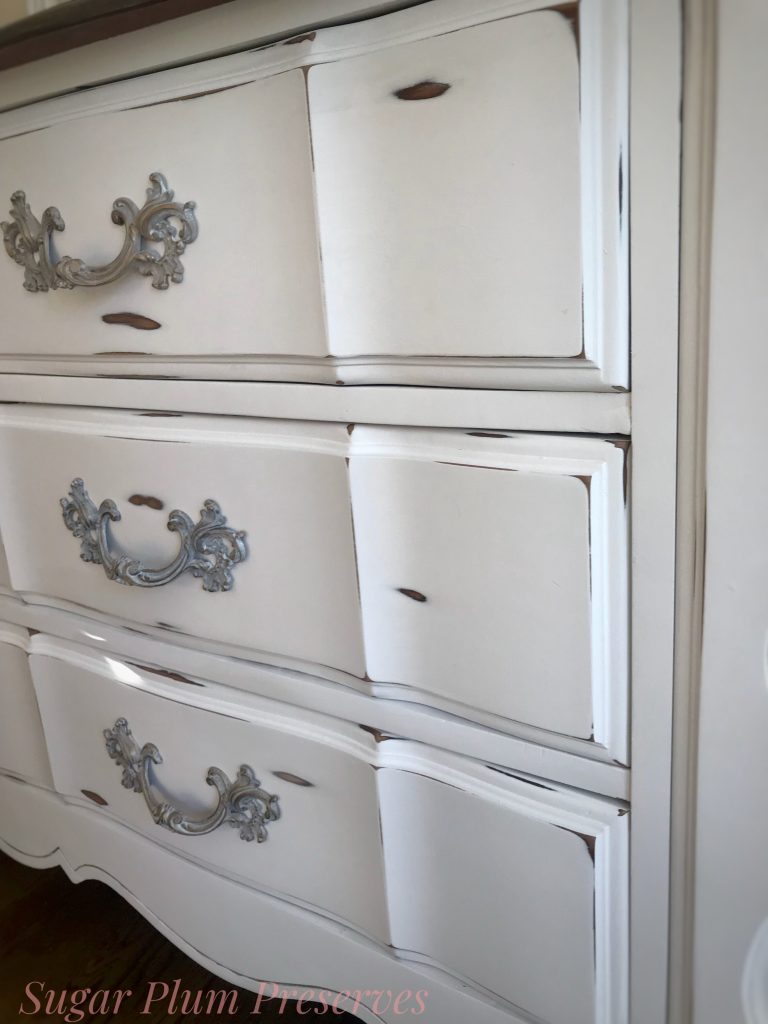
I usually like to add a little something to each piece to make it special. I decided to add a swirly stencil https://amzn.to/3efSaQH to the sides of the drawers to mimic the swirl pattern on the fronts of the cabinets. I love the idea of a pretty little surprise when the drawers are open. I used the same chalk paint as above in a pouncing motion over the stencil. The key is to use very little paint each time and build layers slowly. I also lined the drawers and cabinets with matching fleur di lis contact paper.
To add a little “wear” to the piece, I decided to distress it. I did this by choosing areas that would naturally wear over time and wet sanding them. This process is basically what it sounds like: using a mister to wet the area and gently sanding with 220 grit paper until you have the level of distressing that you want. This is super easy to do with chalk paint and leaves a nice, natural looking wear.
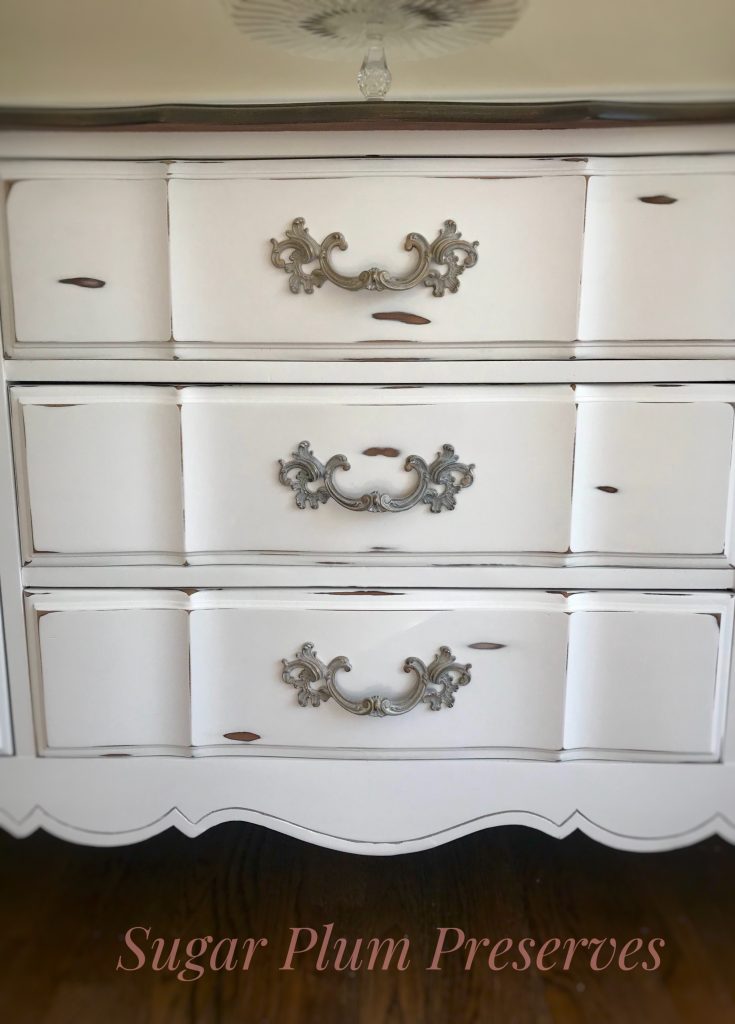
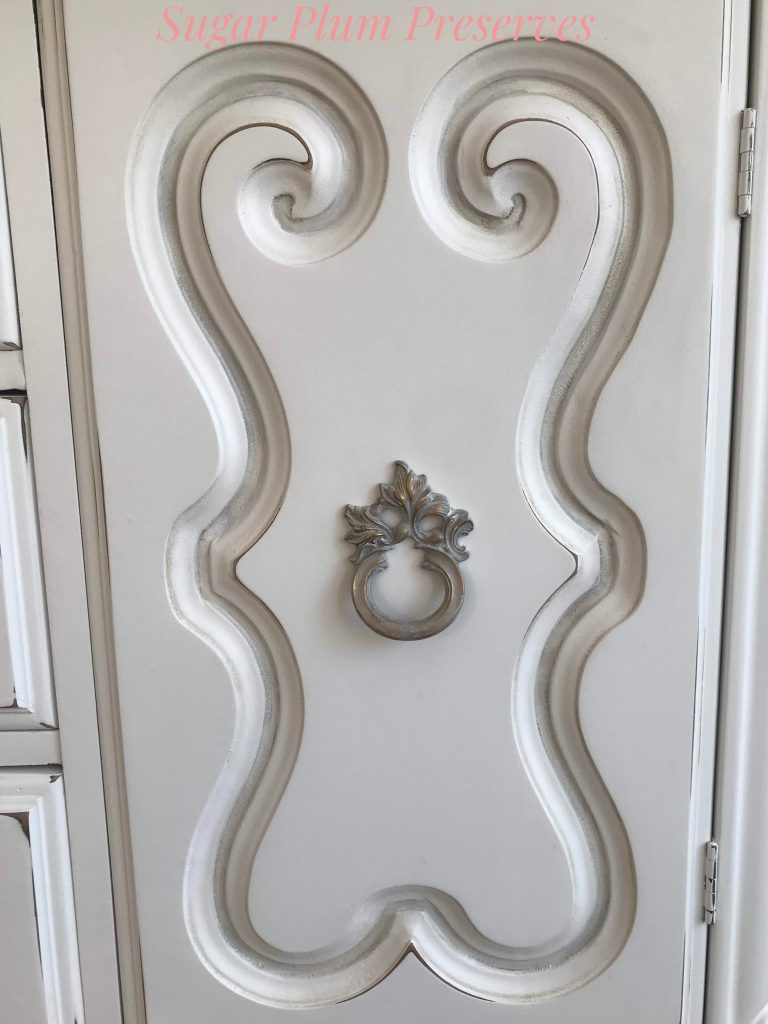
I lightly sanded the rest of the piece to give it a beautiful velvety finish and sealed the whole piece with Minwax Polycrylic https://amzn.to/36h3kys applied in long even strokes with a slightly damp car detail sponge https://amzn.to/2ANgY0K. Again, after much trial and error, I have found that this is the best method for a streak free finish. I kept the original pulls and planned on spray painting them gold. However, one of the pulls on the cabinets just would not come off, so I went with it. I changed my plan and used gold rub n buff https://amzn.to/2AGEg8k to create an aged finish.
There you have it, a simple (but still special) piece that is updated, versatile, and one of a kind!
Thank you so much for joining me for Sugar Plum Sundae! Please check back every Sunday for more yummy recipes to transform reclaimed “junk” into sweet little treats for the home! 🤗
For more delicious treats, follow Sugar Plum Preserves:
Facebook: https://www.facebook.com/SugarPlumPreserves/
Pinterest: https://www.pinterest.com/sugarplumpreserves/
Instagram: https://www.instagram.com/sugarplumpreserves/
YouTube: https://youtu.be/tQplTZMCjq0
XOXO
Michele
Materials List (may not be all inclusive):
Krud Kutter Cleaner/Degreaser https://amzn.to/3ciVtIm
Orbital Sander https://amzn.to/3mOzGsi
BIN Shellac based primer https://amzn.to/3g8fuyb
BIN Shellac based primer, gallon https://amzn.to/3g8f0In
Hand Held Wagner Sprayer https://amzn.to/399ETG9
Calcium Carbonate https://amzn.to/3ia8lyt
Dollies https://amzn.to/3bKfilf
Minwax Dark Walnut stain https://amzn.to/3e7D1h8
Staining Pad https://amzn.to/2Xfun9d
Stencil https://amzn.to/3efSaQH
Minwax Polycrylic https://amzn.to/36h3kys
Car Detail Sponge https://amzn.to/2ANgY0K
Gold Rub n Buff https://amzn.to/2AGEg8k
*Affiliate disclosure: As an Amazon Associate I may earn a small commission from qualifying purchases from Amazon.com.