Hazelnut Frappe
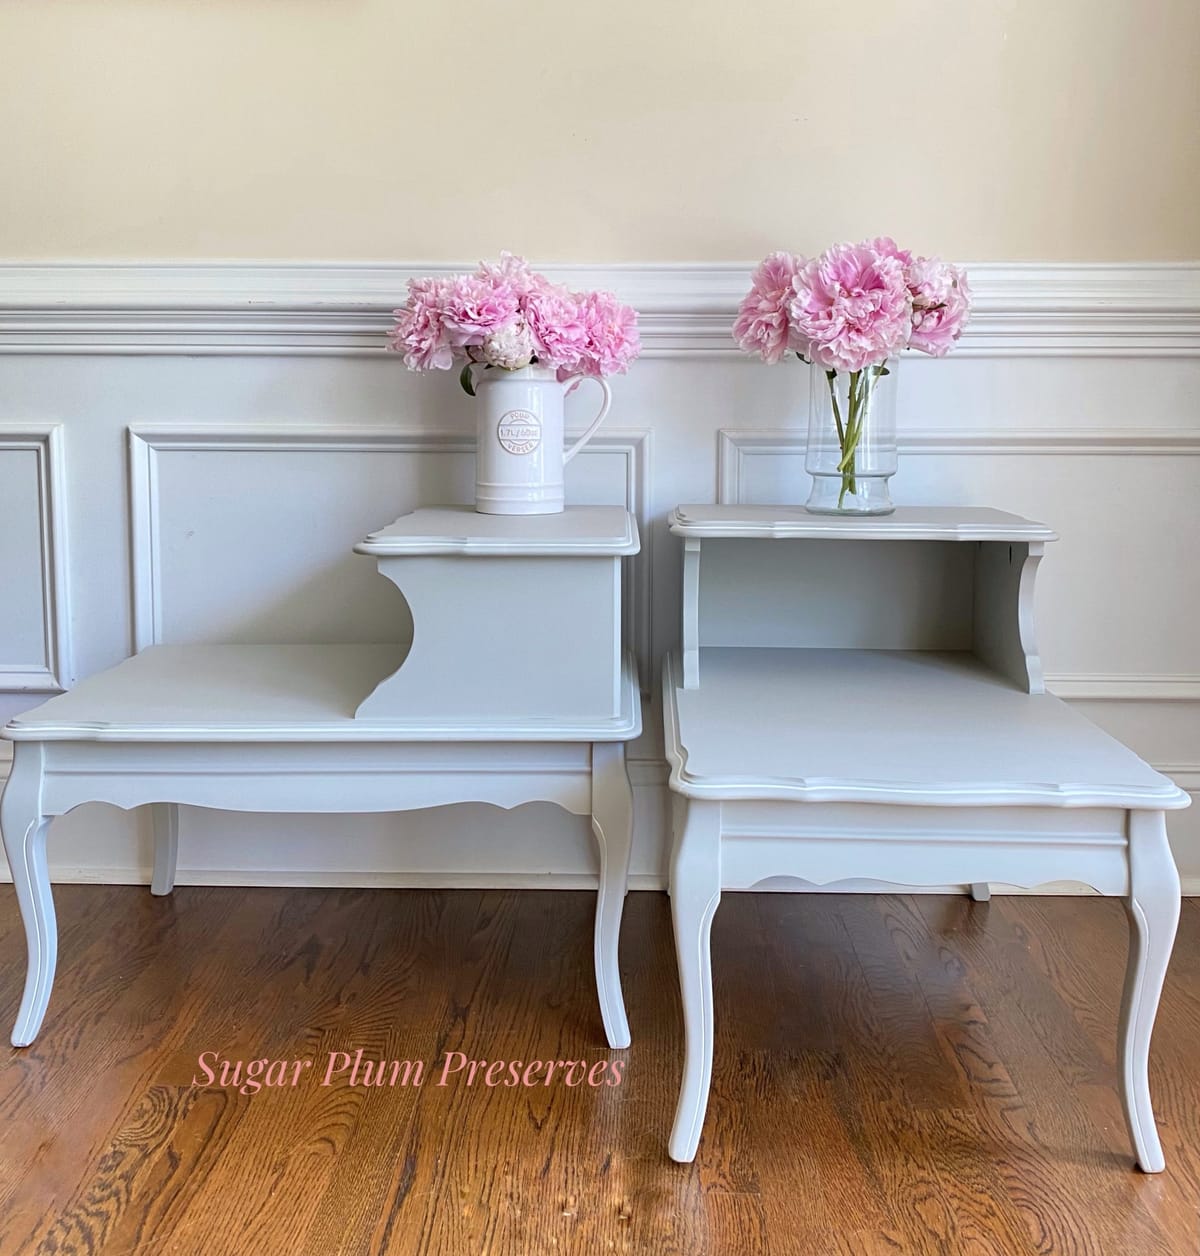
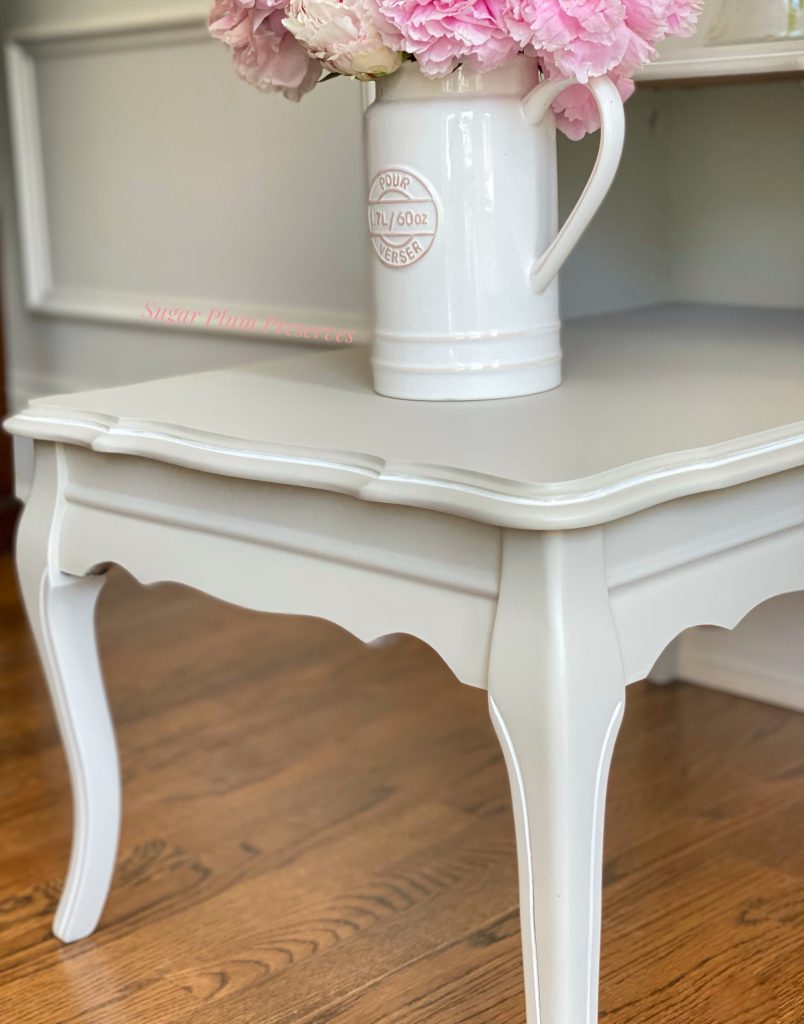
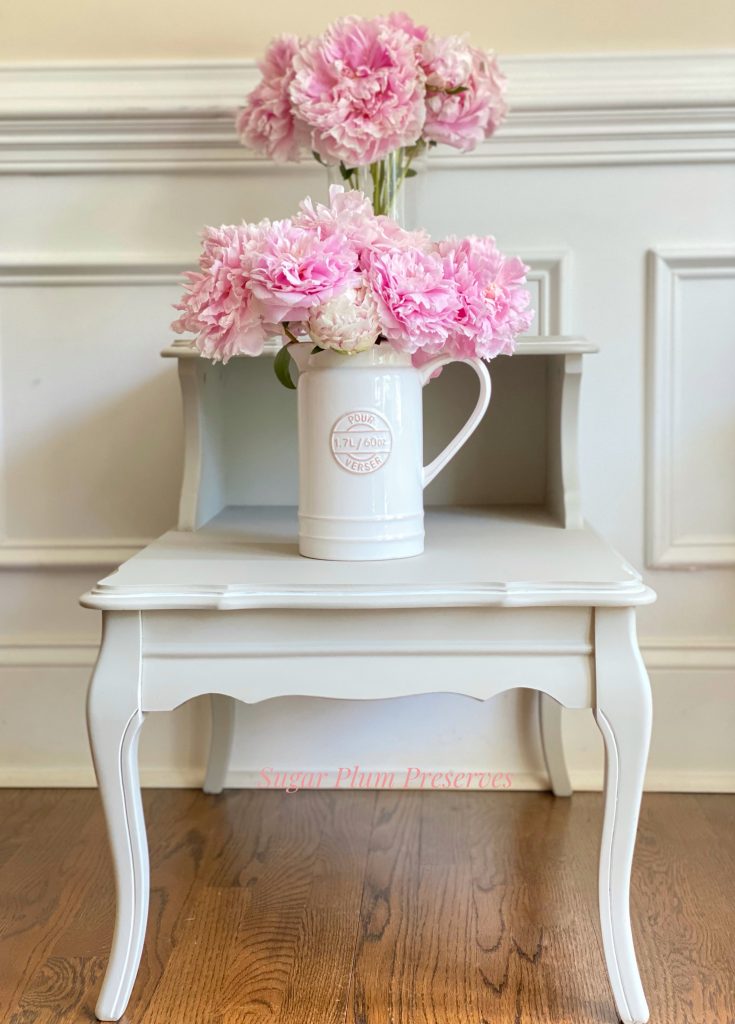
This week’s feature is a cute little set of vintage French Provincial end tables.
~ A Sweet Little Treat for the Home ~
Hazelnut Frappe
Hello My Sweets!
I love French Provincial because the style easily can handle over the top glamour, like gold leaf or bold accents (which my glamour-loving heart flutters for!). 💞 But to be honest, I surprised myself with what I was drawn to do with these little cuties. I didn’t have the urge to glam them up with bold color, or metallic details. 🤷🏻♀️ Was something wrong with me?? I didn’t know, but I went with what was speaking to me ~ clean and classic. My inspiration for these pieces was the crisp, clean style of a linen pillow with white piping detail. Hmmmm, wellllllll, okay, when the furniture speaks to me, I listen!
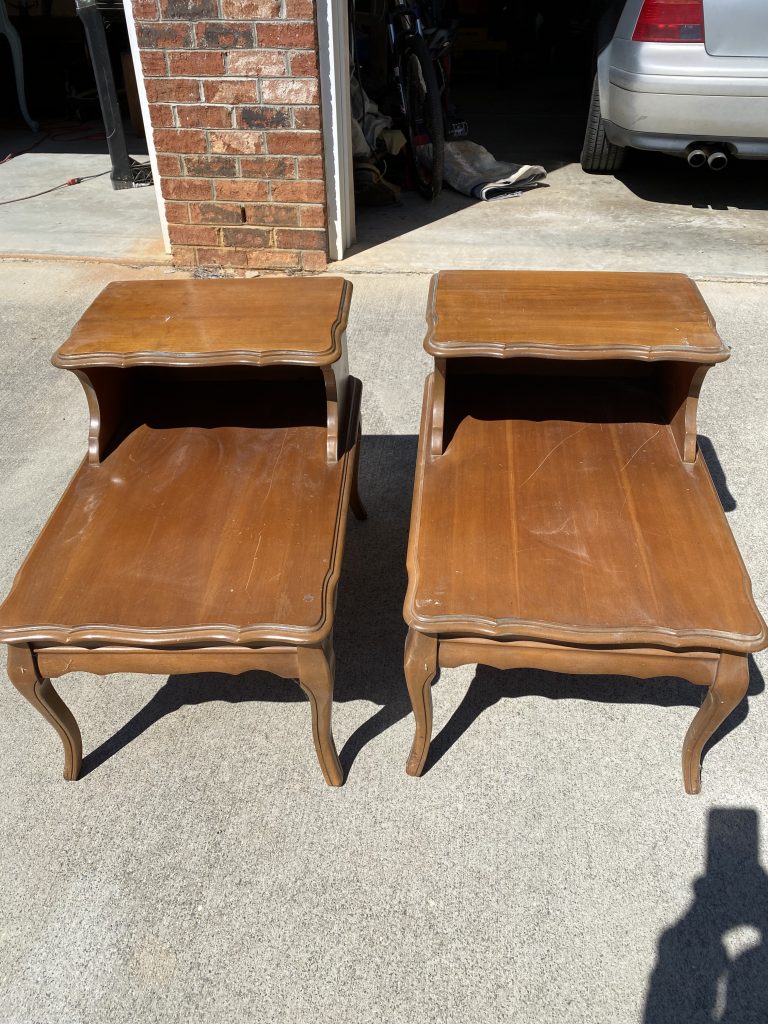
I started with these two yard sale finds. They were in good shape structurally, solid wood, and had beautiful lines. The negatives were the ugly outdated orange stain and some deep scratches on the top. Here’s what we started with:
First thing’s first, a good cleaning! I scrubbed these down with Krud Kutter https://amzn.to/3ciVtIm, which not only helped with the dirt, but also the glossy coating. Next up was sanding. I scuff sanded most of the table by hand with a 220 grit sandpaper https://amzn.to/34AUFqt. If the 220 isn’t doing the trick, you can move down to 150 grit. Pro tip! I like to cut the sheet into quarters, then fold each square into thirds. This size fits perfectly in your hand and you won’t waste any of the sandpaper. When one side is used up, simply turn it over and sand with the fresh side. There is also a fresh side inside of the two folds (because you folded it in thirds). Following? I will take a picture of the sandpaper in a future blog to show you. Another handy tip I recently stumbled upon is to use a sandpaper cleaner to remove those areas that have built up finish on them. This also saves having to get a new sheet frequently! Who Knew?! Sandpaper cleaner https://amzn.to/3n7lYBk. The table tops were fairly scratched up so I used my detail sander https://amzn.to/2Yf42cT on those to get the deeper scratches out.
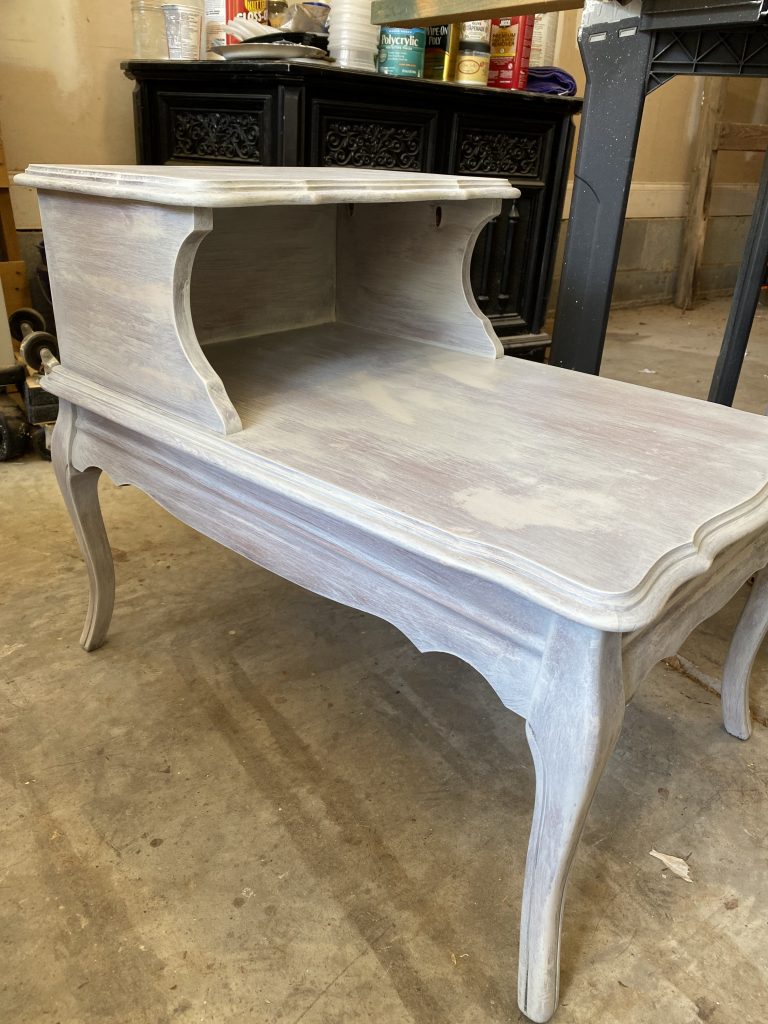
I chose a light color for the tables, so I was concerned about bleed through from the old orange stain. For this reason, I primed them first with the only primer that I use to prevent bleed through, BIN Shellac Primer https://amzn.to/3g8fuyb. I always apply this with a disposable chip brush https://amzn.to/2WNntJf because I don’t want to ruin my good brushes and it’s a pain to remove it from them. The only downside is that they are cheap, and do tend to lose bristles. Just be aware of that and pick them out of the primer as you go. You will need to sand the primer anyway to knock down the texture and create a smooth base for your paint. It doesn’t look pretty, but it does the trick every time.
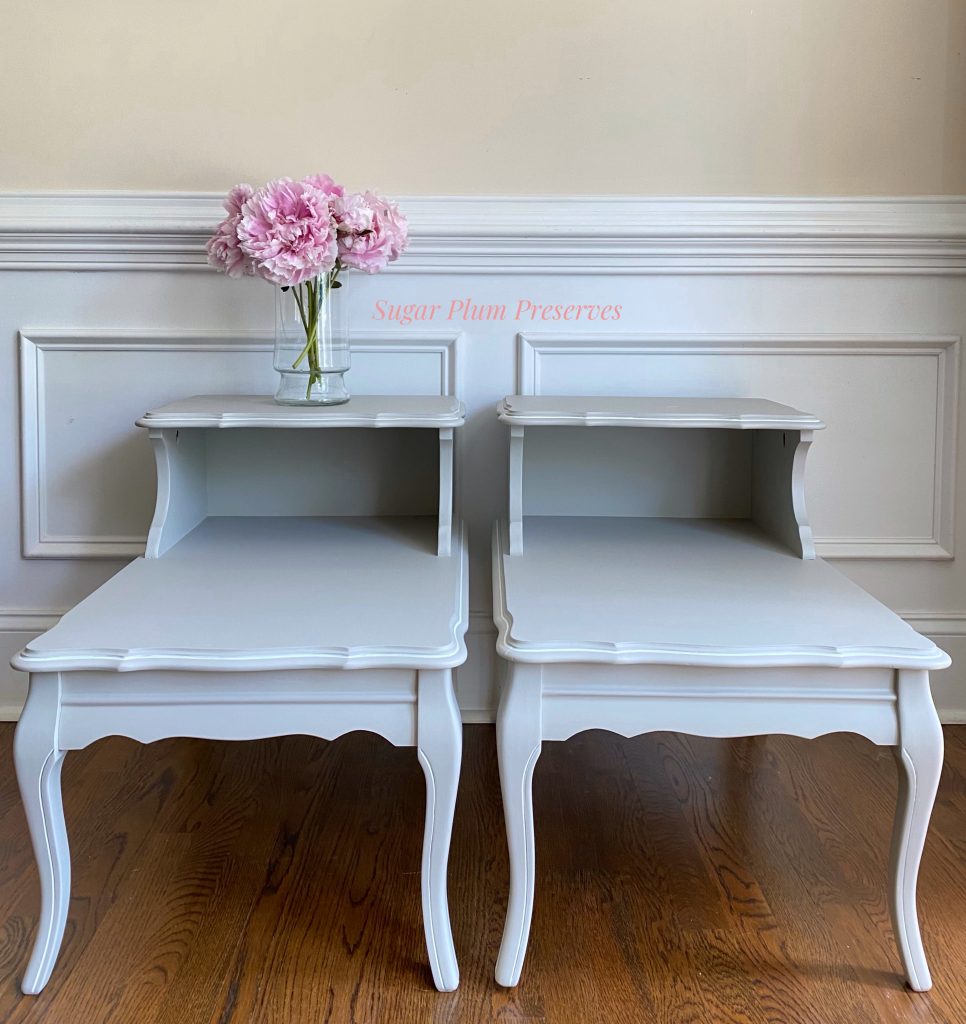
So here is the part that I surprised myself with ~ the paint color. I was drawn to this sample paint that I had on hand from Lowes. It was called Frappe by Valspar. It is the most lovely extra light coffee color (maybe?). When I looked at it, I thought of crisp linen pillows with a clean white piping stitched around them. And that was it. That was vibe that the tables wanted to have, and who was I to argue? 😜 I can’t say that I didn’t pause though ~ umm what about midnight blue with gold metallic, accenting all of those delicious curvy details?? No? Okay, how about extra girly with bright pink and gold leaf?? No? Still want crisp and clean? Alllllllright. 😤 I painted each table with three coats of paint using my favorite brushes, Zibra angled 2 inch stubby https://bit.ly/3oI0V9z, sanding lightly between each coat with 400 grit sandpaper. To make it easier on myself when painting the details, I decided to use a chalk paint pen https://amzn.to/2Id5Huw instead of a brush and paint. It was much faster and I was able to keep a straight line much easier. Brilliant! If I do say so myself! 🤓 I really wanted that crisp, clean look, so I decided to seal the tables using my sprayer, https://amzn.to/399ETG9. I thinned the Minwax topcoat https://amzn.to/36h3kys slightly with water and sprayed several thin coats to keep it smooth and drip free. The sprayer can take a bit of practice but once you get the hang of it, it provides a dream finish! What do you think? Did I make the right color choice? I think they are neutral enough to go with any decor, but glamorous enough to elevate the look of any room!
Thank you so much for joining me for Sugar Plum Sundae! Please check back every Sunday for more yummy recipes to transform reclaimed “junk” into sweet little treats for the home! 🤗
For more delicious treats, follow Sugar Plum Preserves:
Facebook: https://www.facebook.com/SugarPlumPreserves/
Pinterest: https://www.pinterest.com/sugarplumpreserves/
Instagram: https://www.instagram.com/sugarplumpreserves/
YouTube: https://youtu.be/tQplTZMCjq0
XOXO
Michele
Materials List (may not be all inclusive):
Krud Kutter Cleaner/Degreaser https://amzn.to/3ciVtIm
220 Grit sandpaper https://amzn.to/34AUFqt
Sandpaper cleaner https://amzn.to/3n7lYBk
Detail sander https://amzn.to/2Yf42cT
BIN Shellac Primer https://amzn.to/3g8fuyb
Disposable chip brushes https://amzn.to/2WNntJf
Zibra Paint Brushes https://bit.ly/3oI0V9z
Zibra angled 2 inch stubby https://bit.ly/3oI0V9z
Chalk paint pen https://amzn.to/2Id5Huw
Hand Held Wagner Sprayer https://amzn.to/399ETG9
Minwax Water Based Polycrylic, Matte https://amzn.to/36h3kys
*Affiliate disclosure: As an Amazon Associate I may earn a small commission from qualifying purchases from Amazon.com. This does not affect your cost for the item in any way.