Snowball Cupcake
This week's feature is the counterpart to another refinished piece, Snowball Cookie. It made a cute addition to the other bedside table.
~ A Sweet Little Treat for the Home ~
Snowball Cupcake
Hello my Sweets!
This is the third post, in a series of blog posts, about transforming our bedroom. I will post a new piece each week that I have transformed. Once all of the pieces have been completed, I will post an entire before and after of our bedroom with all of the pieces included.
You can check out the first transformation here: https://sugarplumpreserves.com/snowball-cookie/
You can check out the second transformation here: https://sugarplumpreserves.com/madeleine/
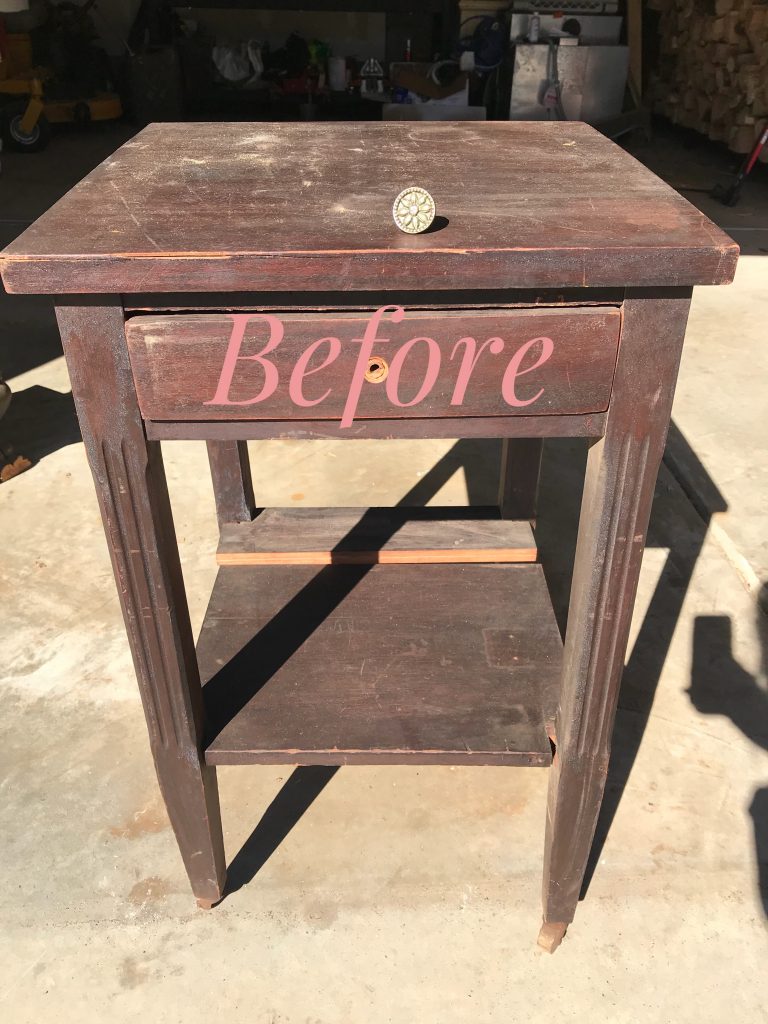
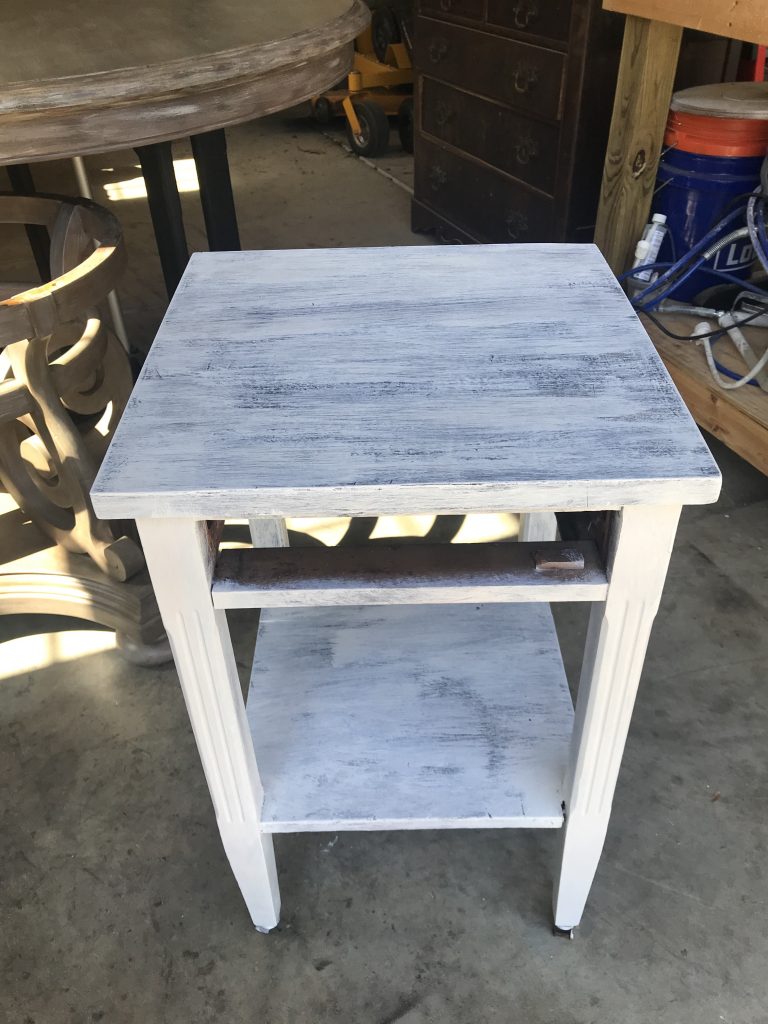
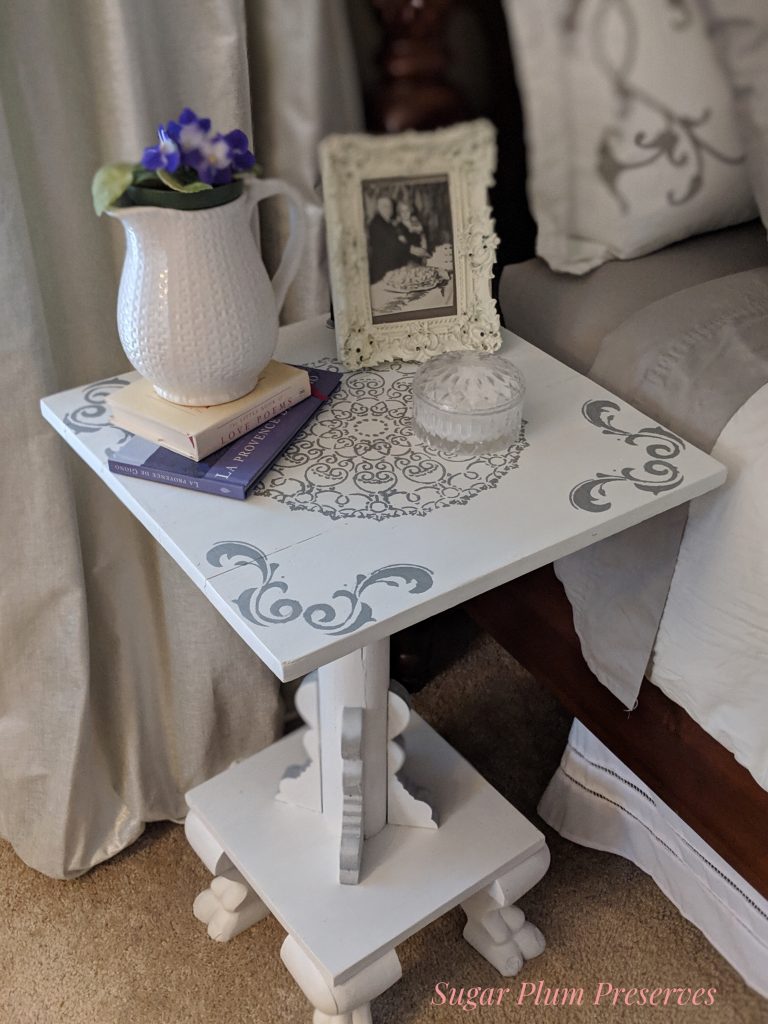
This piece is the counterpart piece to Snowball Cookie (https://sugarplumpreserves.com/snowball-cookie/ ), since we needed a second bedside table. I found it at the same garage sale, at the same time that I found the piece that would become Snowball Cookie. I’m pretty sure that I paid $5 for it. It was in rough shape, but it was the same height as the other table, solid wood, had lovely details on the legs, and it appeared to be handmade, so I went for it. I told you that I can rarely say no to an orphaned piece of furniture! 🙄
This table needed a lot of repairs and to be honest, I wasn’t sure that I would be able to make it work, but I am glad that I gave it a try. The bottom shelf was split in two, the top veneer was pulling up, the bottom shelf had detached from the leg of the table, and it REALLY needed a good scrub and sand.

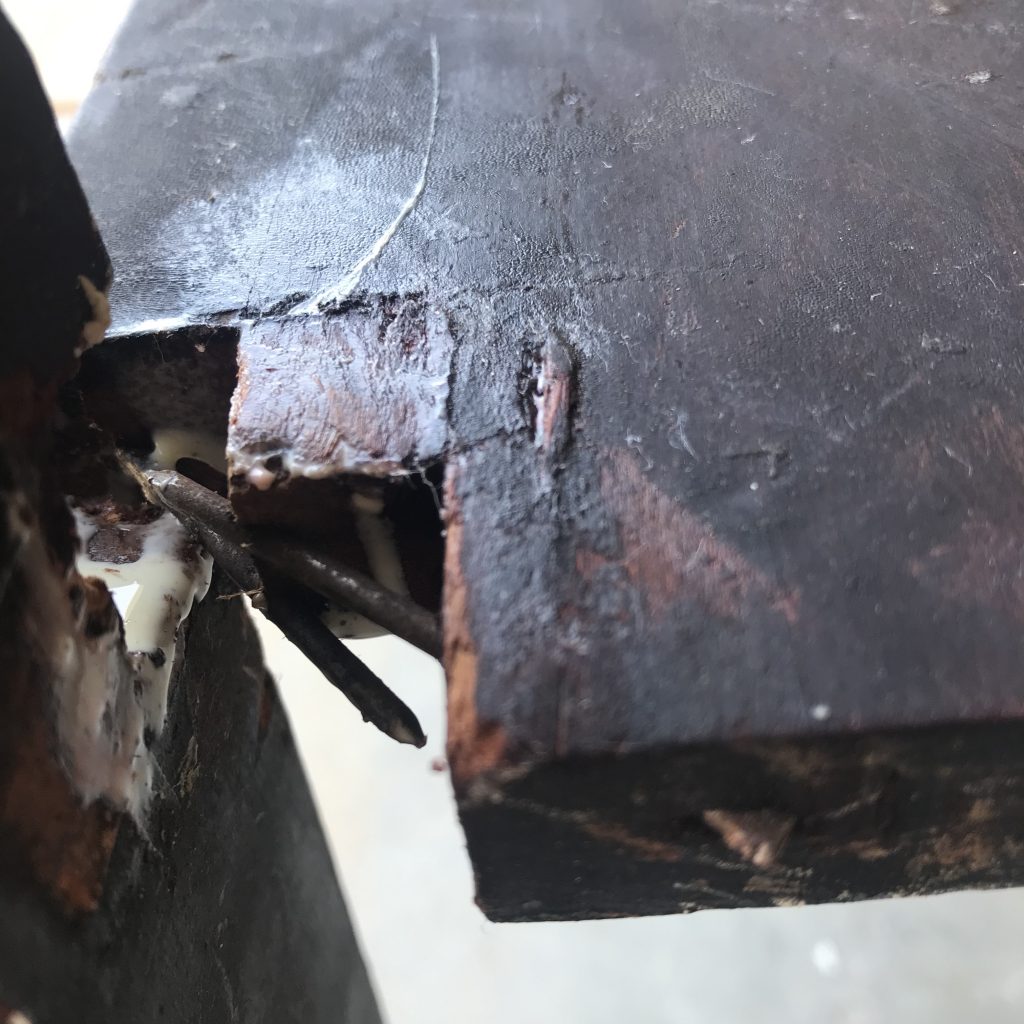
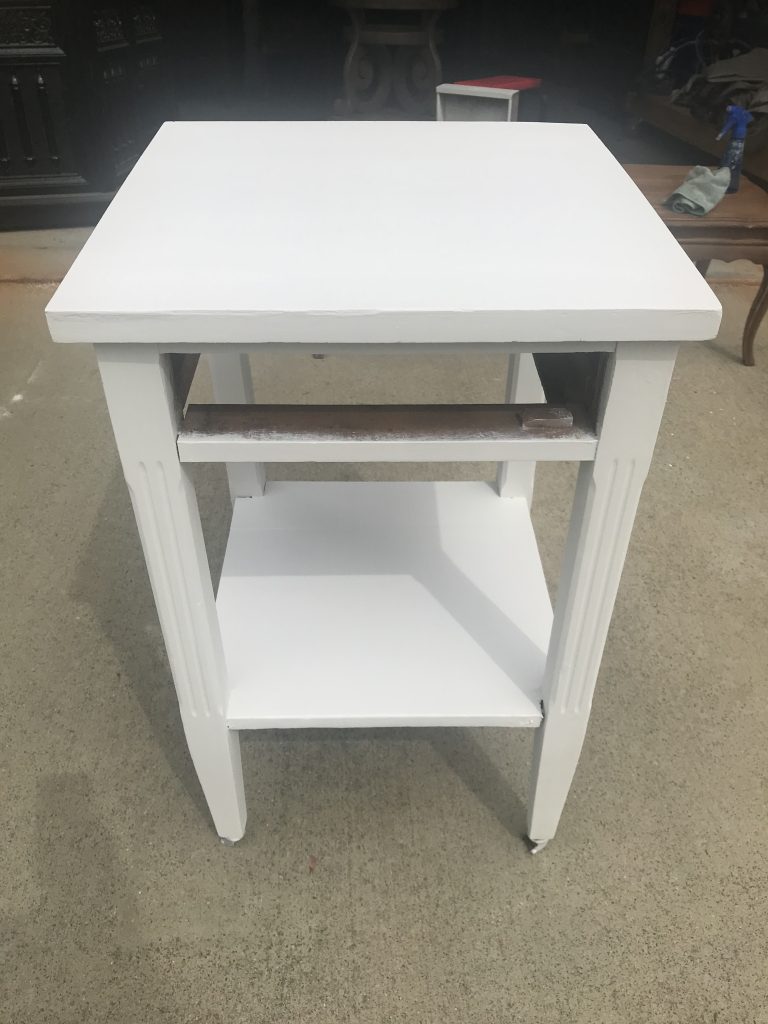
I first addressed all of the issues on the bottom shelf. I removed the old nails and reattached the shelf to the leg with new nails, wood glue, and clamps. Again, if I am being honest, with all the manipulating and gluing and clamping, I was not sure that I would be able to re-square the shelf. I was pleasantly surprised when I removed the clamps and I was able to square up, glue, and clamp the split shelf back together. Now that it was structurally sound, it got it’s much needed cleaning. I used my standard cleaning solution of vinegar, water, and dawn dish soap. It was mighty dirty and the stain kept bleeding, so this step took many sponges and refreshing of the cleaning solution. I knew that the stain would bleed right through the paint, so it got three coats of BIN shellac based primer with a light sanding in between coats. Sanding lightly with 250 grit paper is extremely important to get a nice final finish. The primer dries kind of nubby, so you want to knock that down before painting or it will show up in your paint. Usually two coats does the trick, but i didn’t want to take a chance of my piece turning pink, so I went with a third coat.
Prior to painting, I filled in all the gaps and holes with Dixie Belle Mud. I have fallen in love with this product. The texture is kind of like pudding and goes on smoothly and easily. Simply fill in the areas of damage with the mud, wait for it to dry completely, and sand it level with the area around it. Here is a nice tip for you – I have found that a craft stick works great for the application of the mud. It has rounded ends to use to fill in the holes, but “sharp” sides to wipe the excess level with the area around it. I got a pack of 100 at the Dollar Store for, you guessed it, $1! The color that I chose for this table is the same that I chose for Snowball Cookie. I used a custom made chalk paint that I mixed with calcium carbonate and Bit of Sugar by Behr in flat. Like I said before, I love the adhesion of chalk paint and the way it sands to a beautiful velvety finish.
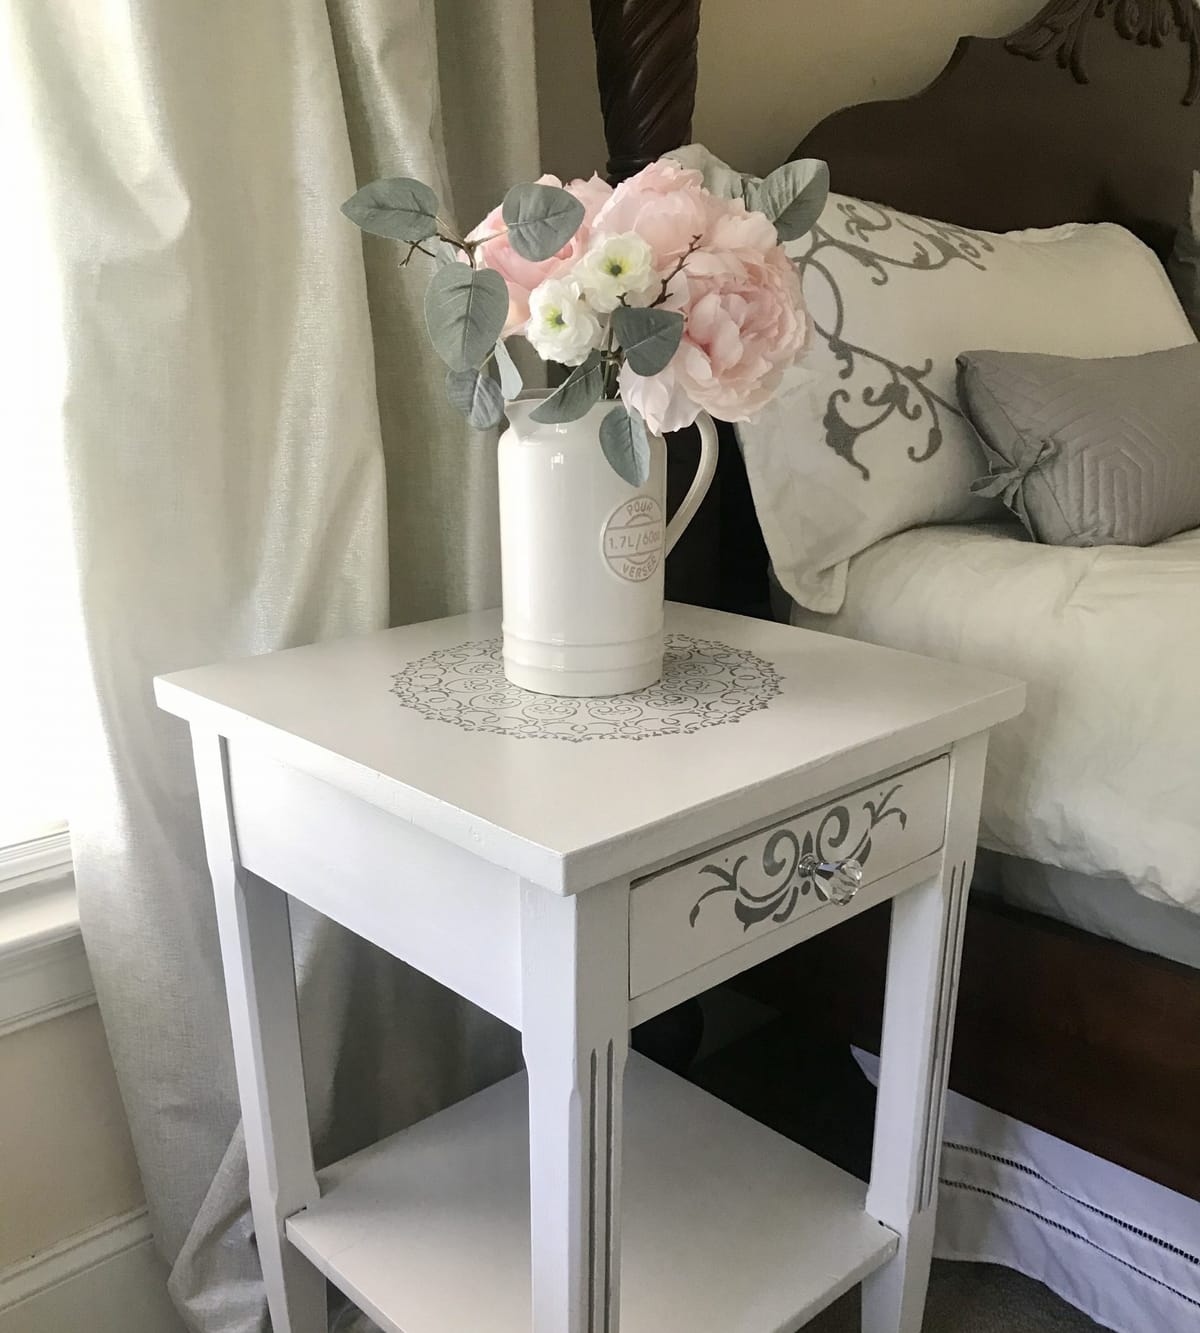
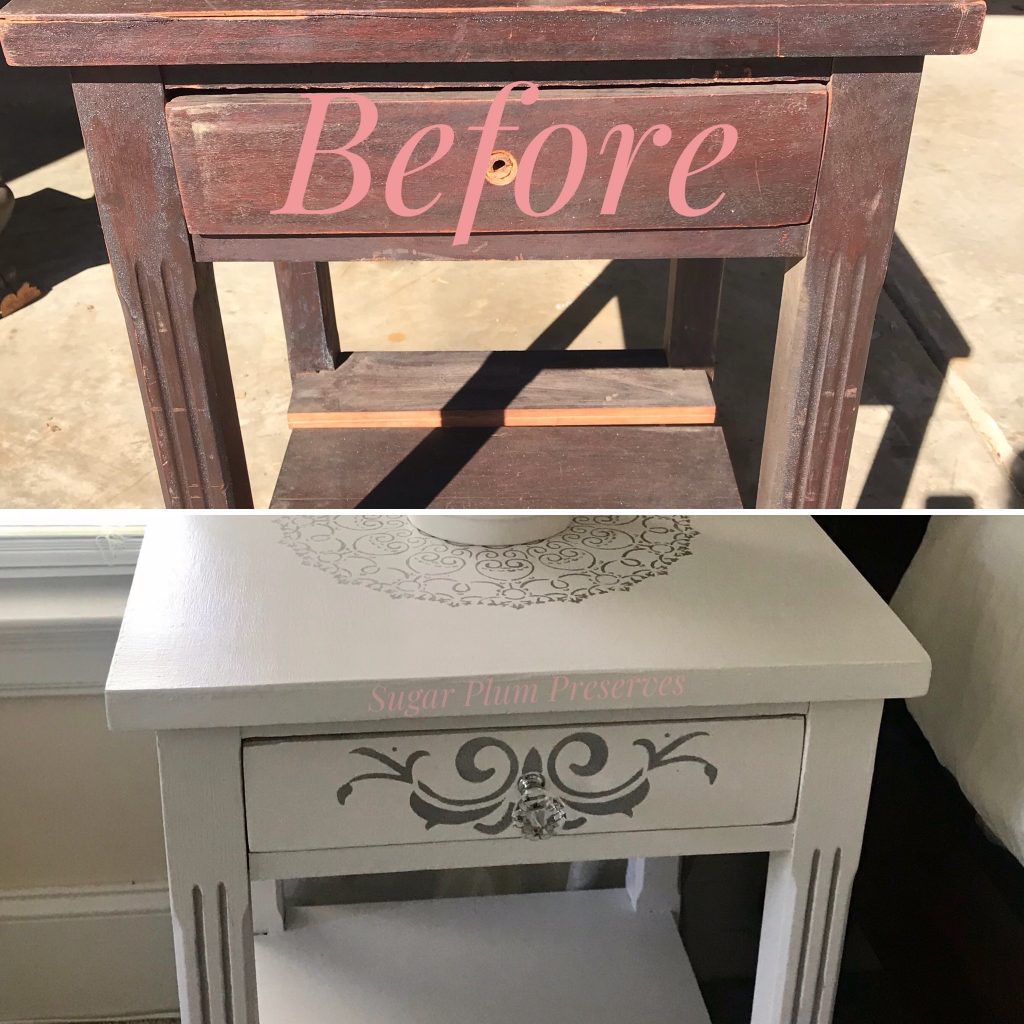
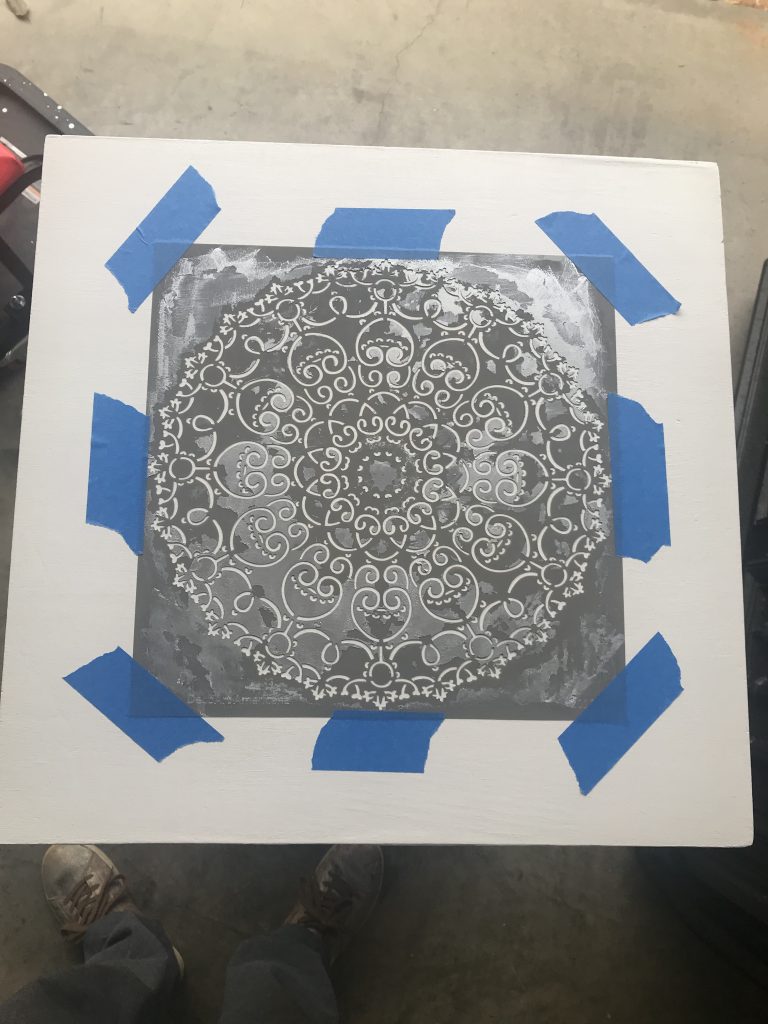
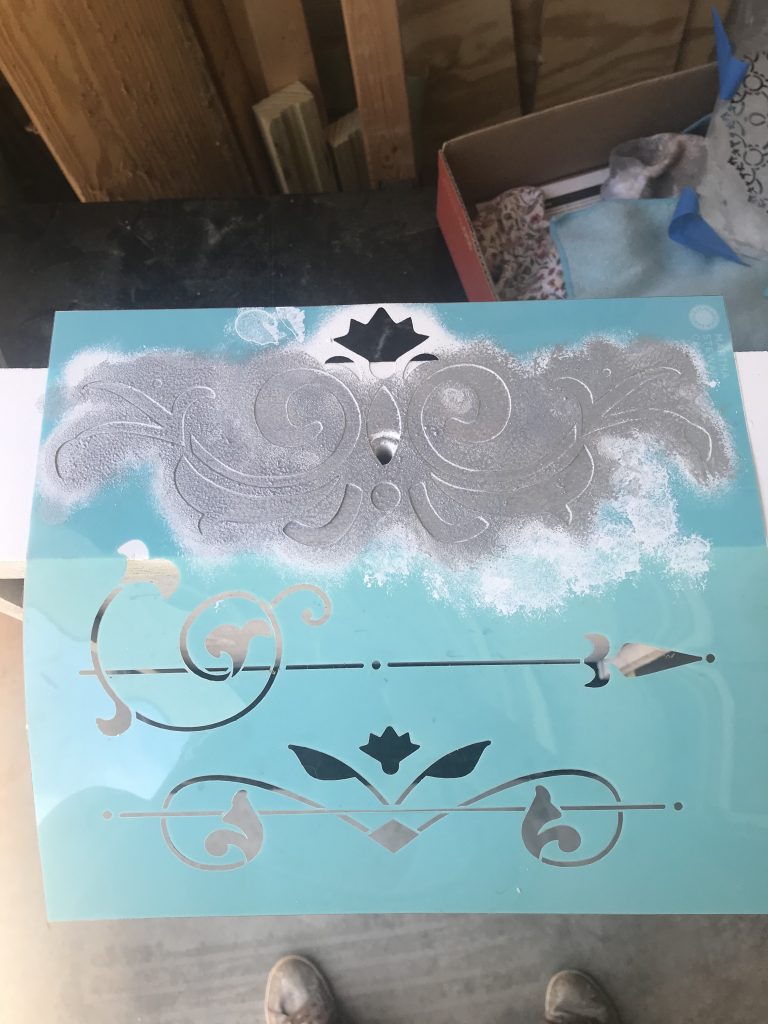
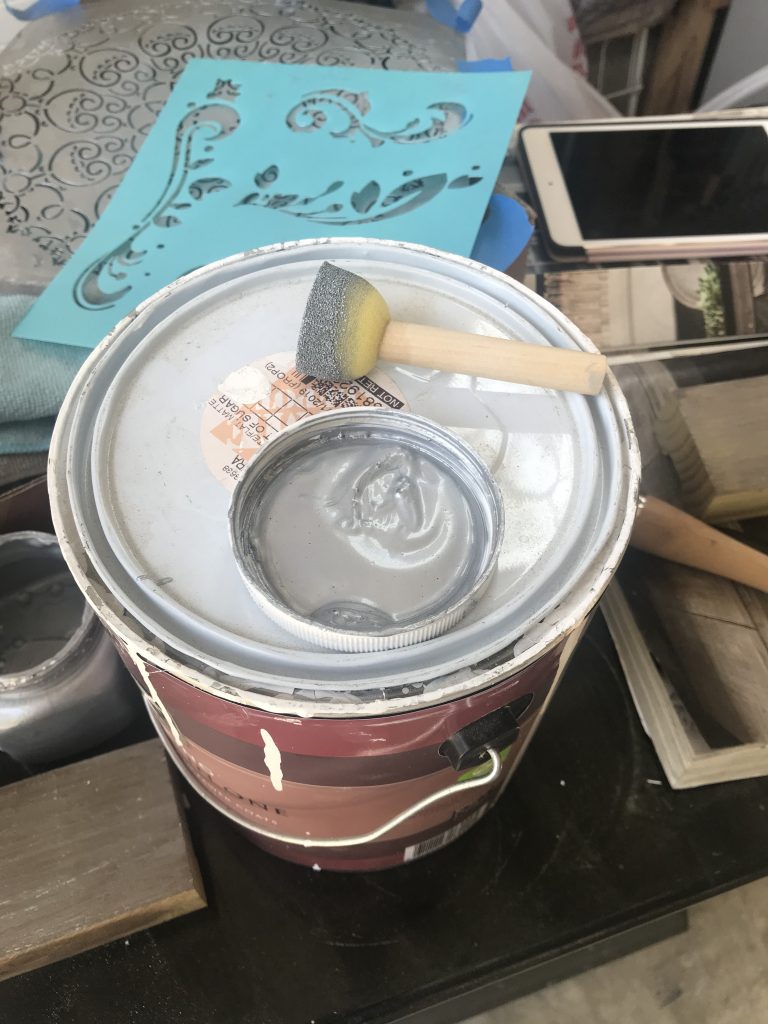
If you recall, I stenciled a design on the other table, so I decided to go with a similar look on this table to tie them both together. I used the same silver paint – Polished Silver by Martha Stewart, the same stencil on top, but a little different stencil for the drawer front. I measured the center of the top of the table, placed the stencil on top and taped it in place. I used a foam pouncing brush to pounce a little bit of paint at a time onto the stencil. This takes some patience. You may be pouncing and pouncing, thinking that it isn’t getting any darker, but do not give in to temptation and load up your brush with paint. You will be rewarded with lots of bleed through in the design of the stencil and have to go back in with an artist’s brush and fix it. Just be patient and keep pouncing with very little paint on your brush. Work in sections and move on to the next section once the stencil is filled in.
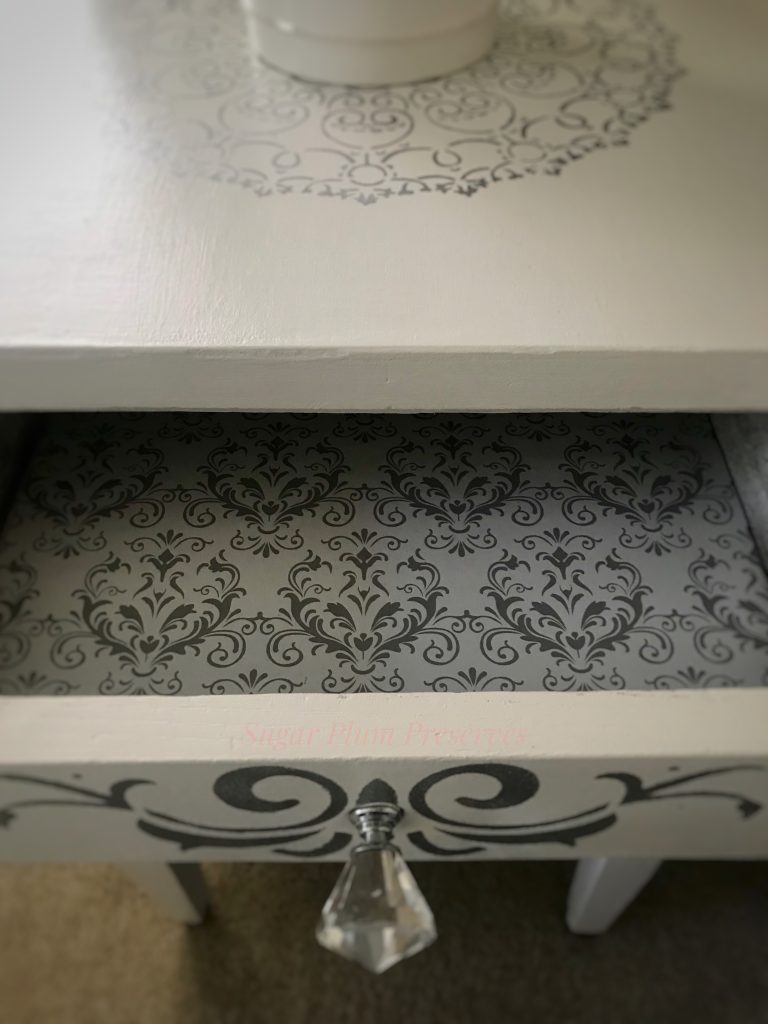
Once the stencils were dry, I added a matching drawer liner, a new pretty crystal pull to the drawer, and silver wax to the detailing on the front of the legs. It’s these extra little details that make a piece special, in my opinion.💖 The only thing left to do was to apply the topcoat. I used Minwax Polycrylic in matte.
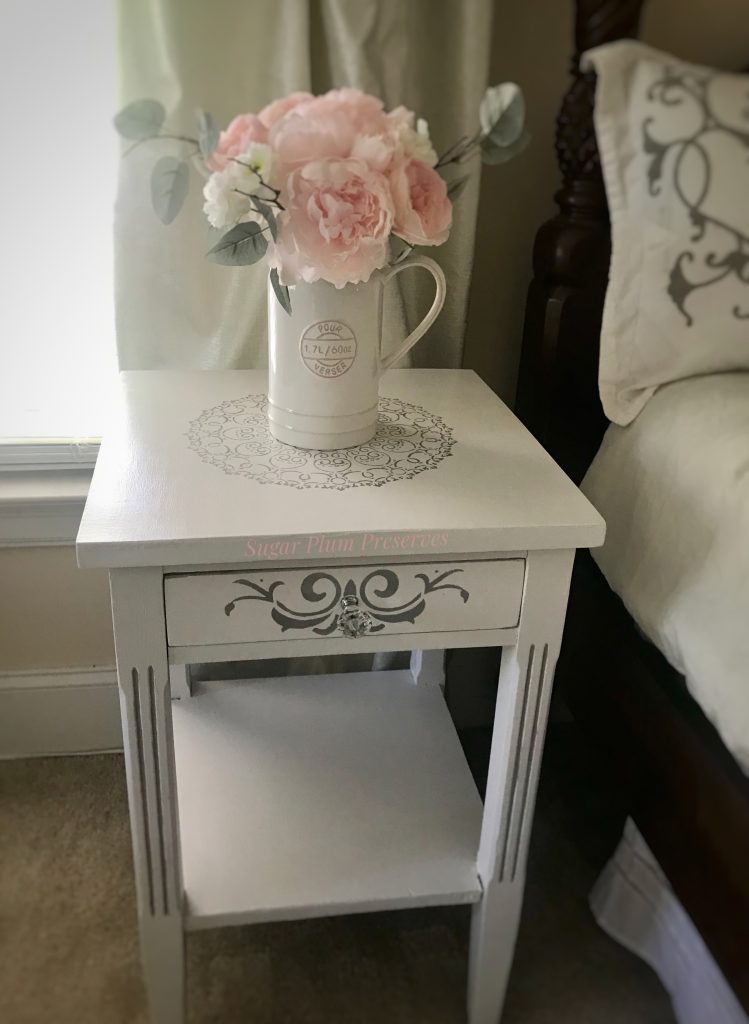
Even thought these are two completely different tables, painting them in the same design tie them together and make them appear to be a set of bedside tables. I’m not a huge fan of matchy-matchy anyway. Not bad for a $10 investment, a little imagination, and some paint!
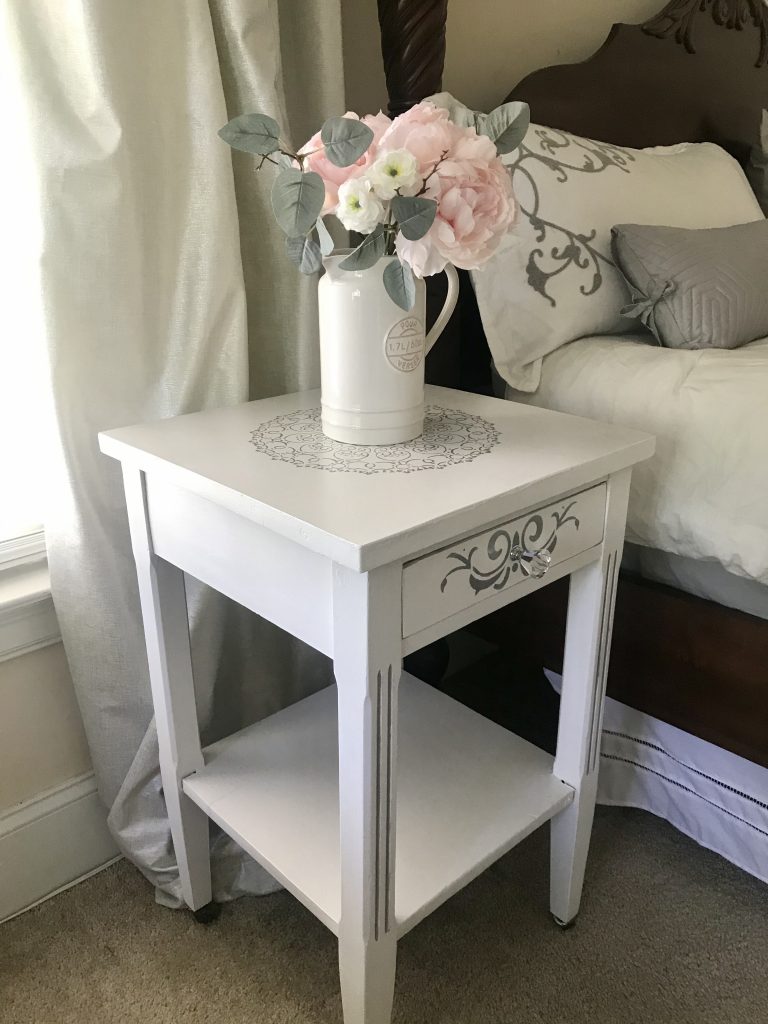
This transformation is the third piece added to our bedroom in the hopes of creating a cohesive, beautiful, restful retreat in a time of uncertainty and stress. Check back in next week for the fourth transformation in our journey.
Thank you so much for joining me for Sugar Plum Sundae! Please check back every Sunday for more yummy recipes to transform reclaimed “junk” into sweet little treats for the home! 🤗
For more delicious treats, follow Sugar Plum Preserves:
Facebook: https://www.facebook.com/SugarPlumPreserves/
Pinterest: https://www.pinterest.com/pinterest/sugarplumpreserves
Instagram: https://www.instagram.com/sugarplumpreserves/
YouTube: https://youtu.be/tQplTZMCjq0
XOXO
Michele
Materials List (may not be all inclusive):
BIN Shellac Primer, Quart https://amzn.to/3g8fuyb
Chip Brush, 3 inch, 24 pack https://amzn.to/2WNntJf
Calcium Carbonate https://amzn.to/2TmGmRa
TiteBond Wood Glue https://amzn.to/2LLxIHP
Paint Brush, Angled 2 inch https://bit.ly/3oI0V9z
Detail Brush, Royal Brush Crafters Choice Variety https://amzn.to/2Xjc0jI
Mandala Stencil https://amzn.to/3S7PYvt
Scroll Stencil (similar) https://amzn.to/3xK1XHB
Sterling Silver Metallic Paint https://amzn.to/2ZT4HlF
Painters Tape https://amzn.to/363jJrh
Minwax Water Based Polycrylic, Matte https://amzn.to/36h3kys
Topcoat Applicator, Car Detail Sponge https://amzn.to/2ANgY0K
Dixie Belle Mud https://amzn.to/2zfMdRB
Rub n Buff Silver Wax https://amzn.to/2XhdgE2
Fabric Rotary Cutting Mat and Tool https://amzn.to/2XfFmj2
Bit of Sugar, Behr
*Affiliate disclosure: As an Amazon Associate I may earn a small commission from qualifying purchases from Amazon.com.