Sparkling Jello Mold
This week's feature is a transformation out of my style comfort zone, MCM.
~ A Sweet Little Treat for the Home ~
Sparkling Jello Mold
Hello My Sweets!
I have to admit, MCM is not really my style. I decided to give Mid Century Modern a try because for one, the pieces kind of fell into my lap, for two, I wanted to stretch my creative comfort zone, and for three, I wanted to see if I could actually pull it off. By the time I was finished with this makeover, I really appreciated the appeal of MCM and I was pleasantly surprised that not only could I pull it off, I could nail it! Read on to see how I made it happen!
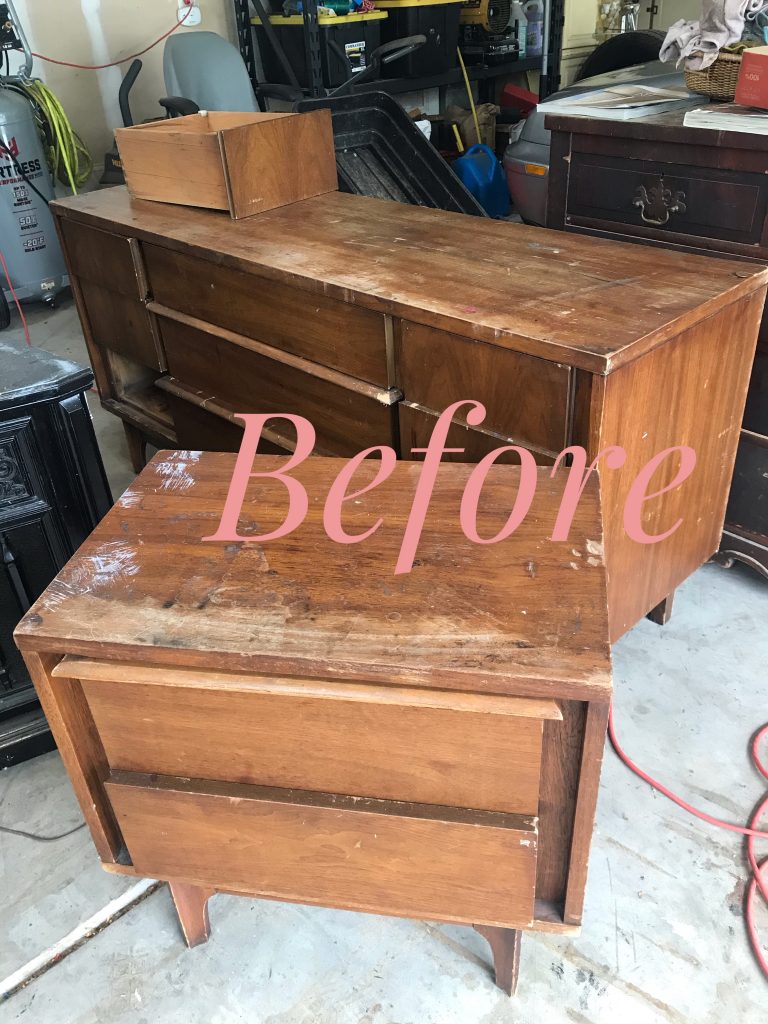
I was given these pieces by a customer who bought one of my other pieces:
https://sugarplumpreserves.com/2020/06/21/midnight-blue-velvet-cupcake/
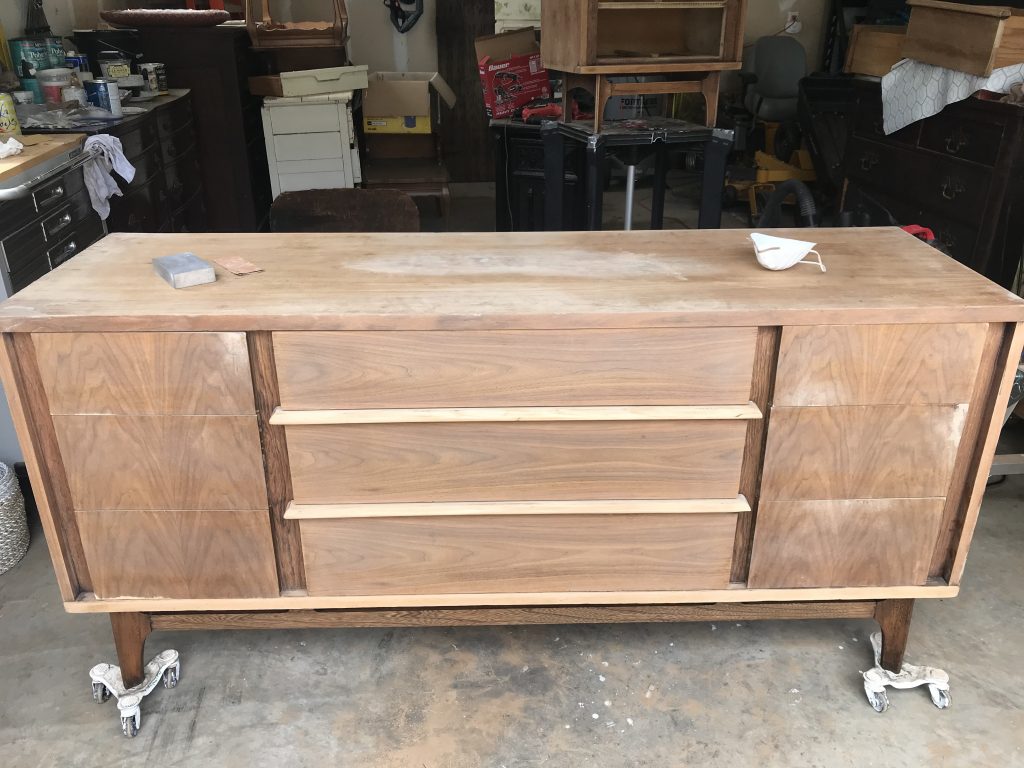
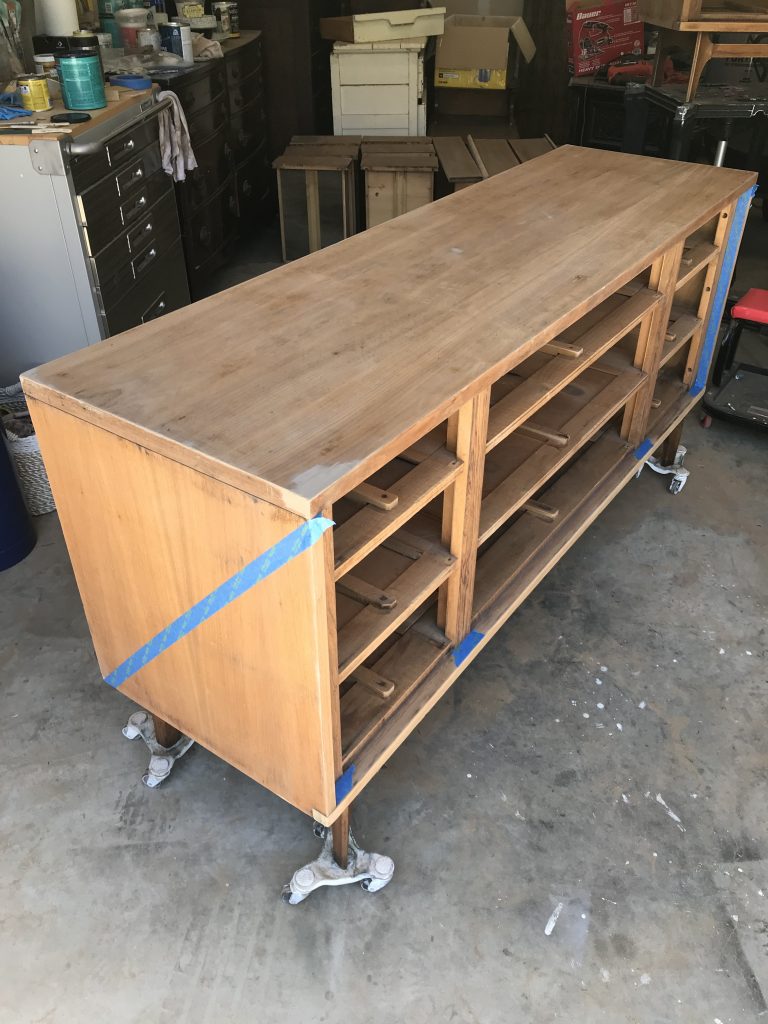
He was so pleased with the transformation of Midnight Blue Velvet Cupcake that he said he really wanted me to have these pieces. He had them laying around waiting to be refinished and knew that I would do them justice. No pressure, amiright??😜 They were not in great condition and desperately in need of some TLC. The drawers were moldy and the whole inside was pretty stinky. I cleaned the insides and outsides of both pieces with dawn dish soap, warm water, and white vinegar and left them in the sun to dry. It took several repeats of this to remove the odor. There were also some deep scratches on the tops, holes in the back, drawers that needed to be squared and glued, lifting veneer on the top and sides, gauges that needed filling, and damaged veneer on the drawer fronts. To say that I had my work cut out for me was an understatement, but they were good quality, solid, rare pieces by Kent Coffey, Predicta Series. I got this! 💪
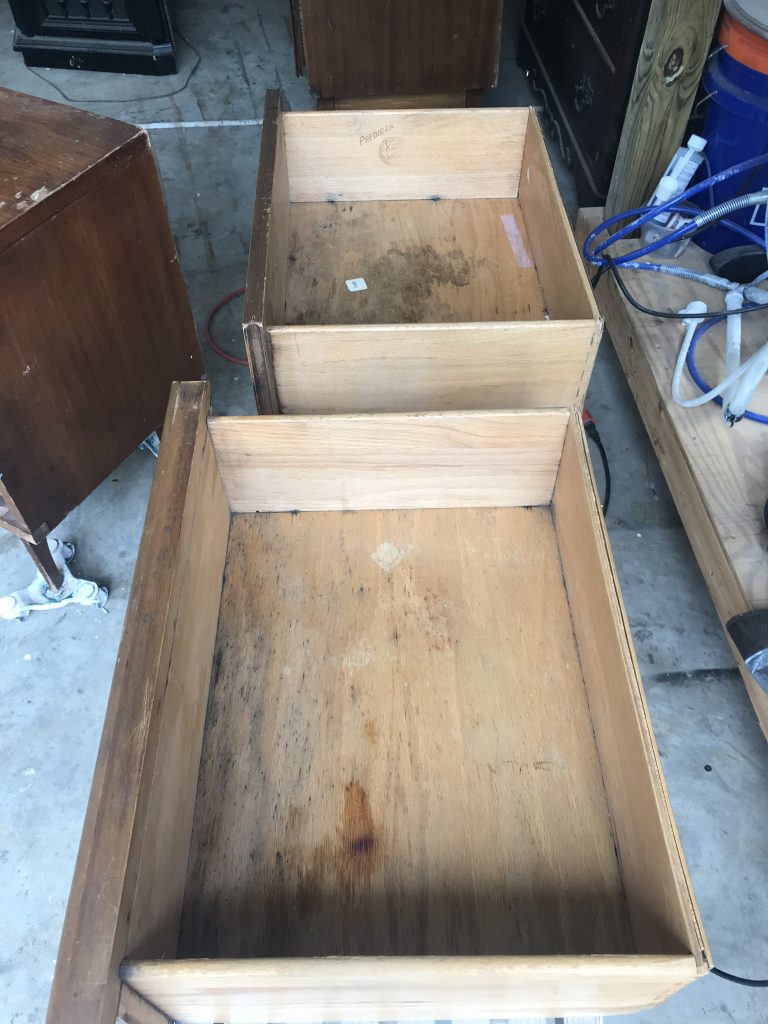
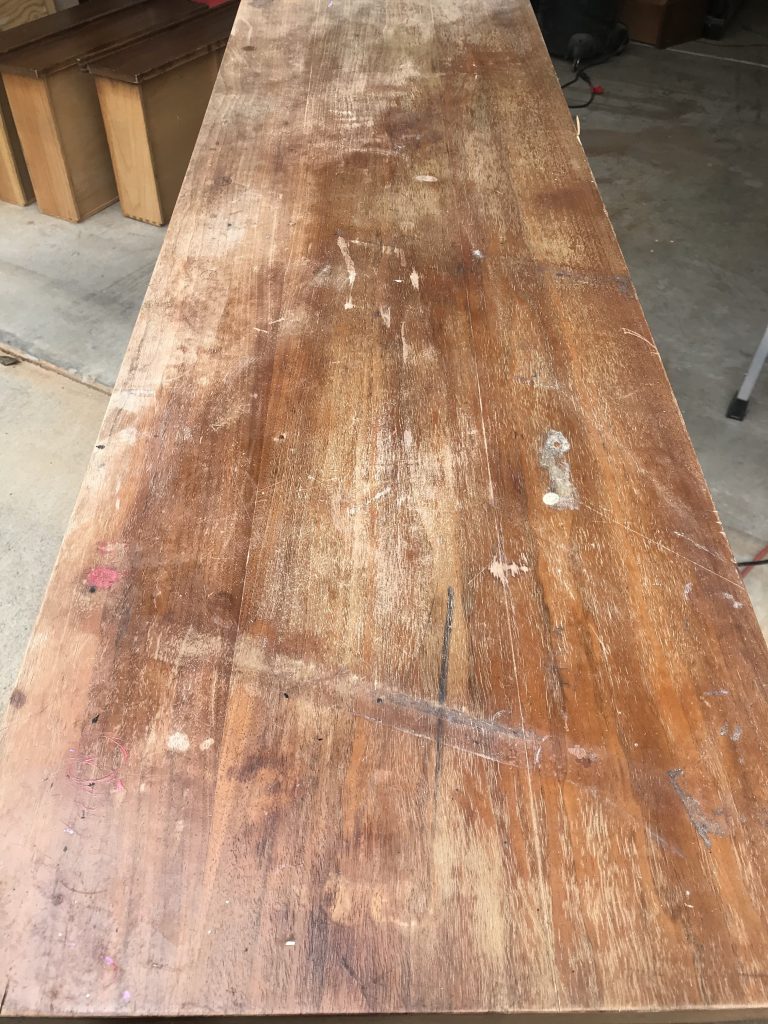

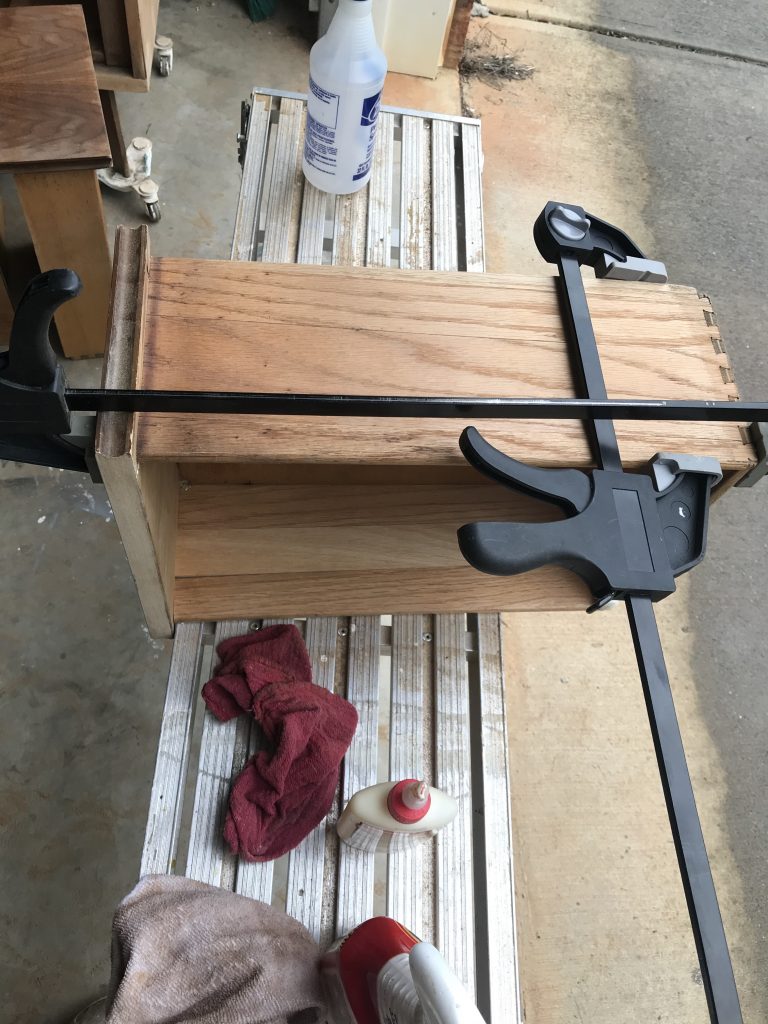
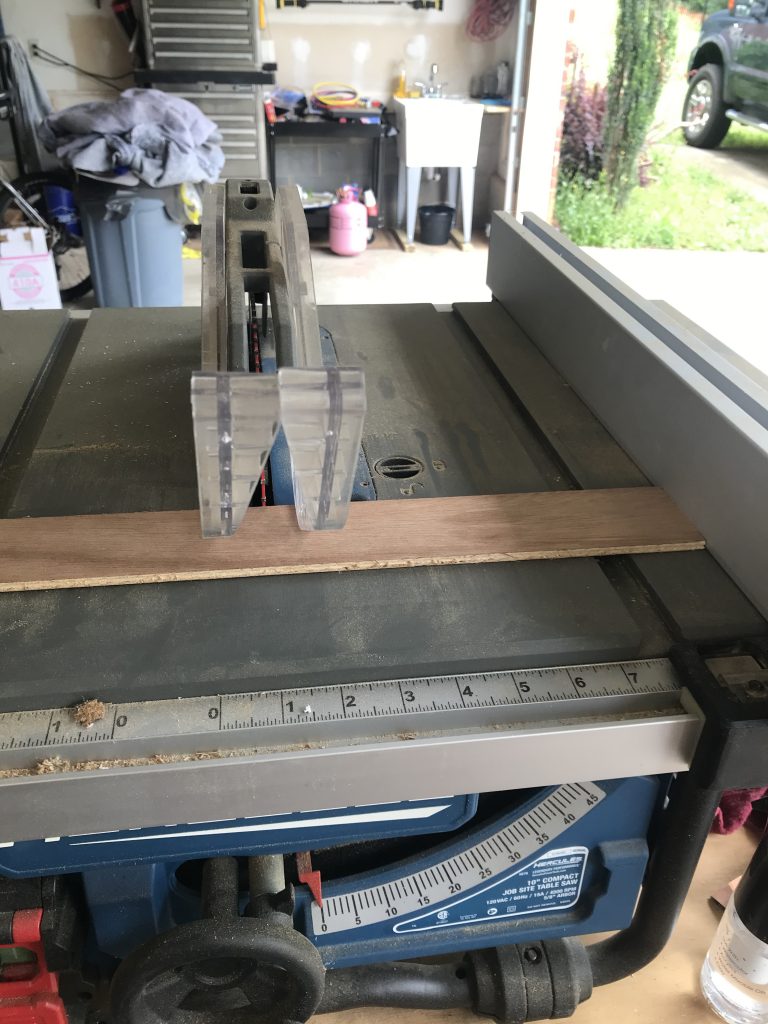
I wanted to preserve as much of the wood as possible, while creating a MCM design with paint. First, I needed to see what I was dealing with and what parts of the wood were salvageable. In order to do that, I sanded both pieces down to try to remove the scratches without sanding through the veneer. I used both my Mouse Sander ~ https://amzn.to/2Yf42cT, and my orbital sander ~ https://amzn.to/3mOzGsi for the job. I glued (using TiteBond Wood Glue ~https://amzn.to/2LLxIHP) and clamped the drawers square, glued and clamped some loose trim, and patched the holes in the back with thin pieces of luan glued in place.

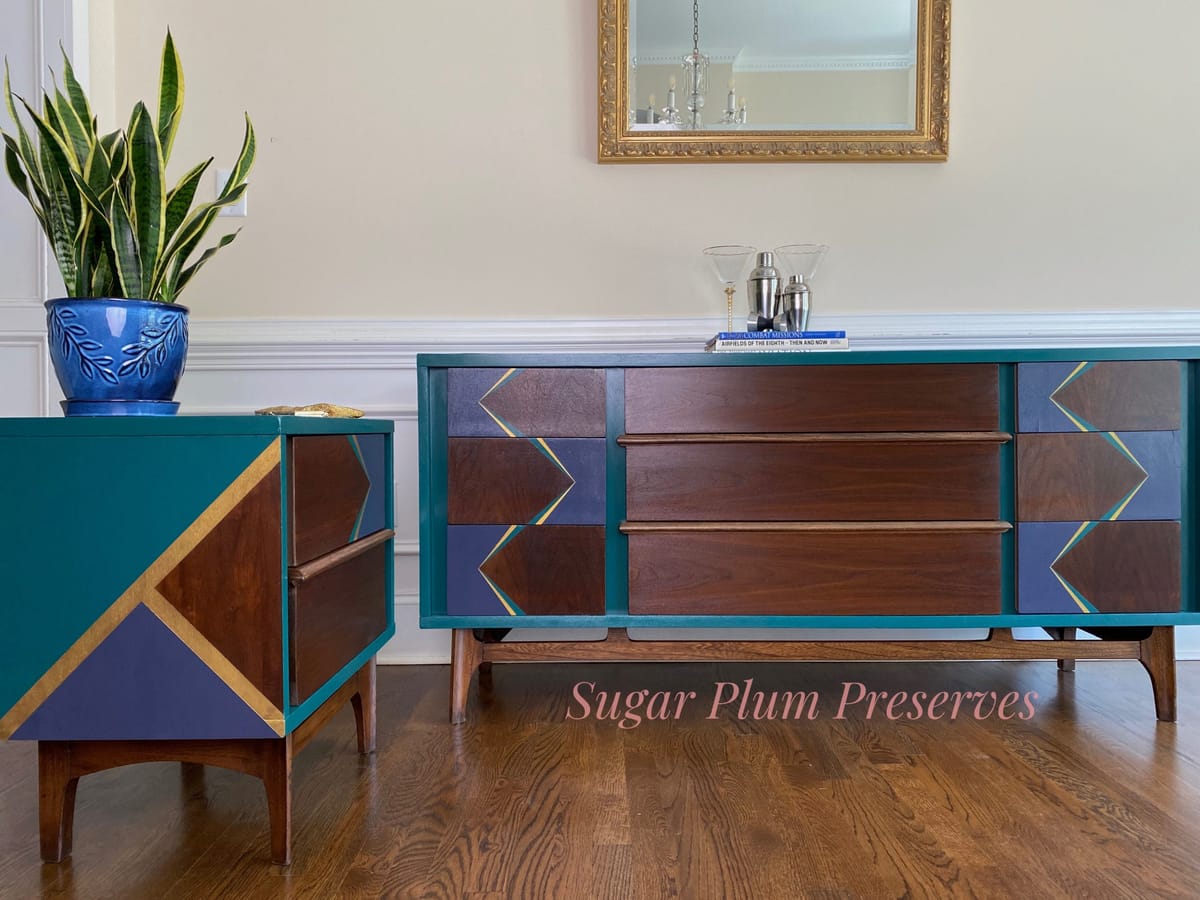
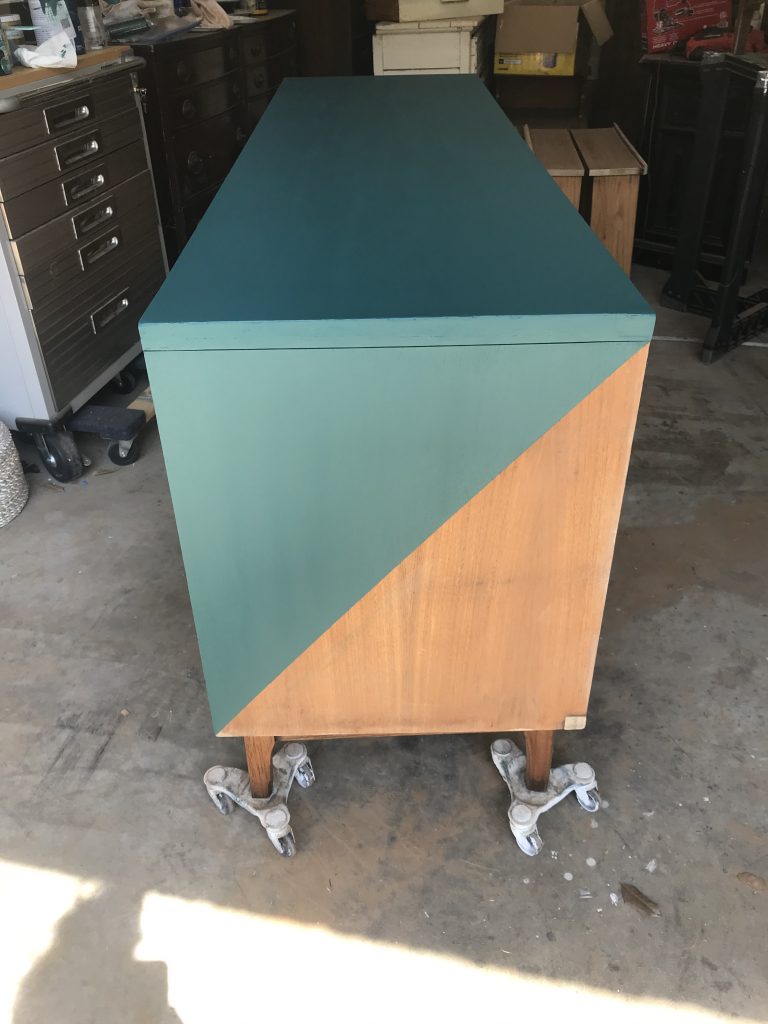
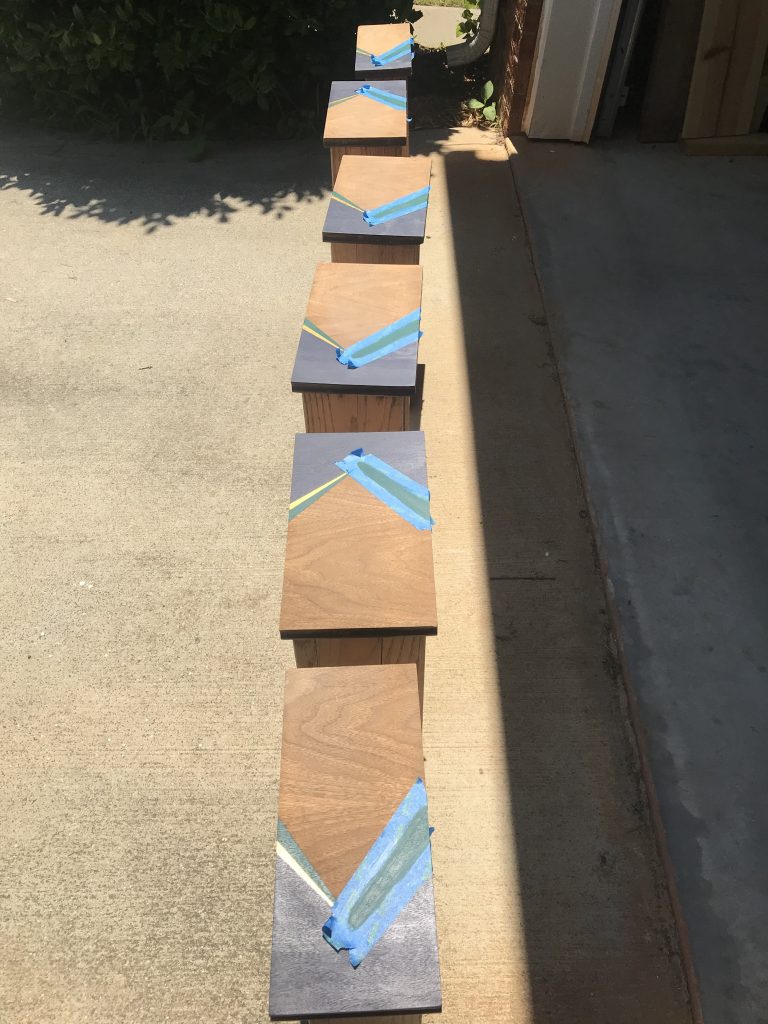
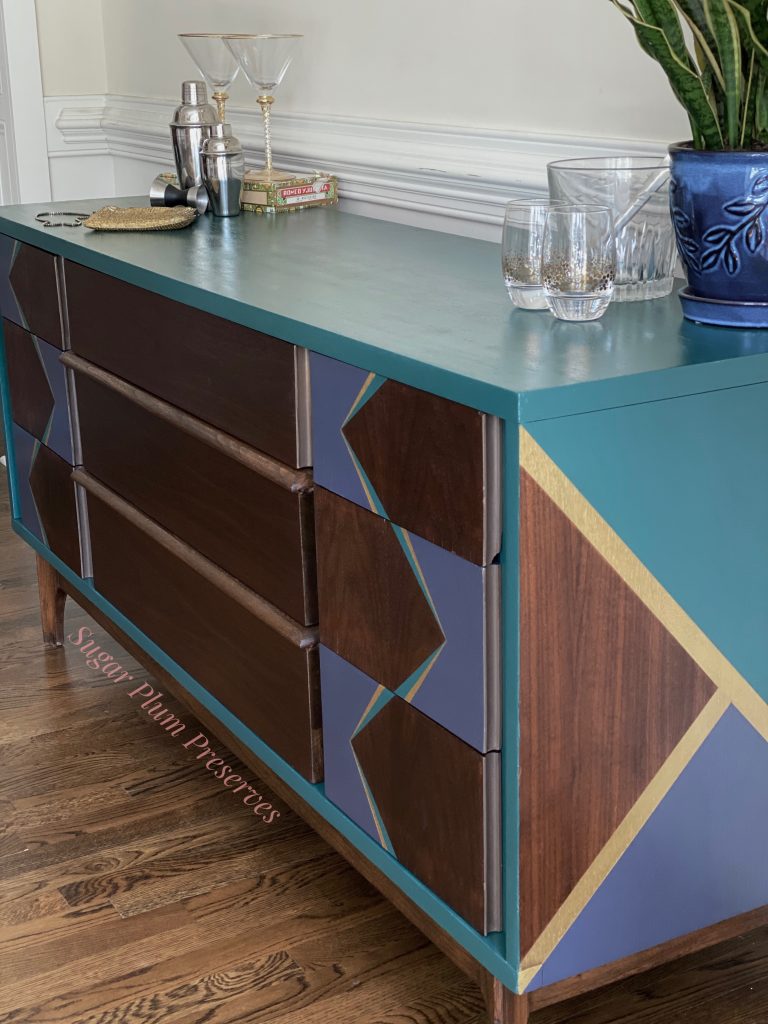
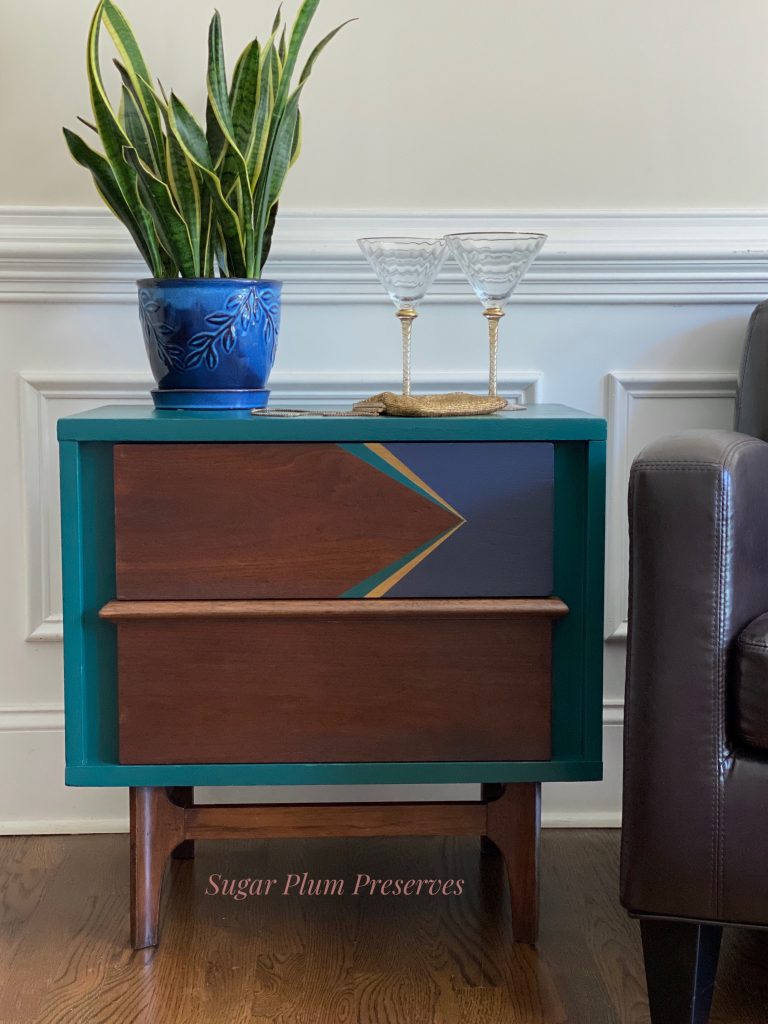
I was disappointed to find that there were too many areas on the top and the drawer fronts that needed to be filled to allow the body and the drawer fronts to be unpainted. I filled all of the holes and scratches with Dixie Belle Mud in brown https://amzn.to/2zfMdRB. Once it was dry, I sanded smooth and repeated if necessary. I had the idea of creating a geometric pattern in three different colors, but I had to create a pattern that would cover the repaired areas in paint, while preserving the areas where the wood grain was nice. Another thing that complicated matters was that I wanted the dresser and the side table to match. That meant that I had to work around areas of damage on both pieces, but in the end, still have the same design. I took out a sketch pad and drew several different potential patterns until I found one that I liked. I decided that I wanted to paint the body of the piece in this really gorgeous emerald green that I had been dying to try, Crystal Ball by PPG. I painted the green color with my favorite brush ~ Angled 2 inch Stubby https://bit.ly/3oI0V9z. Next up, measuring and taping. Lots of measuring and taping!!
The second color that I decided to use was Charcoal Blue by Sherwin Williams. It is a navy bluish color with an undertone of purple that I thought would go beautifully with the green that I had chosen. The third color that I chose as an accent color was gold, to bring out the groovy. 😎 ☮️
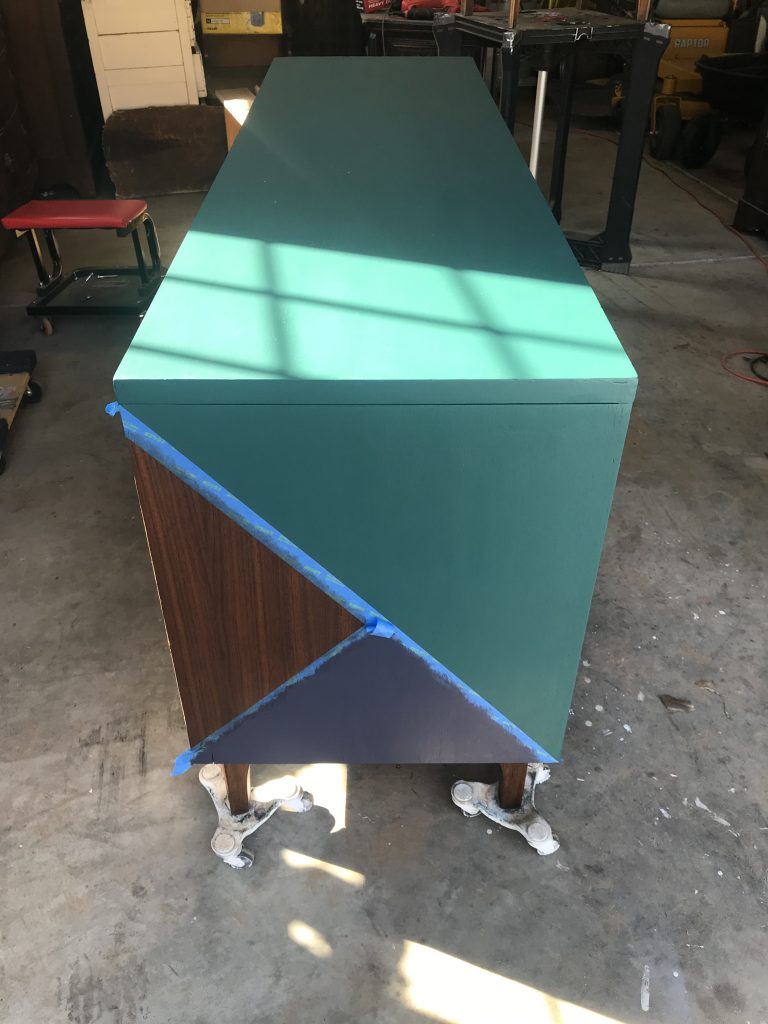
Annnnd we’re measuring, annnnnd taping…… This part was the most tedious for me. I am a “figure it out as you go” kinda gal, so to plan ahead, measure each drawer front exactly, and tape precisely was kind of a drag for me. The process on the drawer fronts took quite a bit of time because each section had to dry completely before I was able to move on to the next section. I can give you a great tip here though! To make sure there is no bleed through under the tape and to have a crisp, clean line, first paint over the tape with a clear topcoat ~ Minwax Water Based Polycrylic, Matte https://amzn.to/36h3kys. Once that’s dry, add the color and slowly remove the tape!

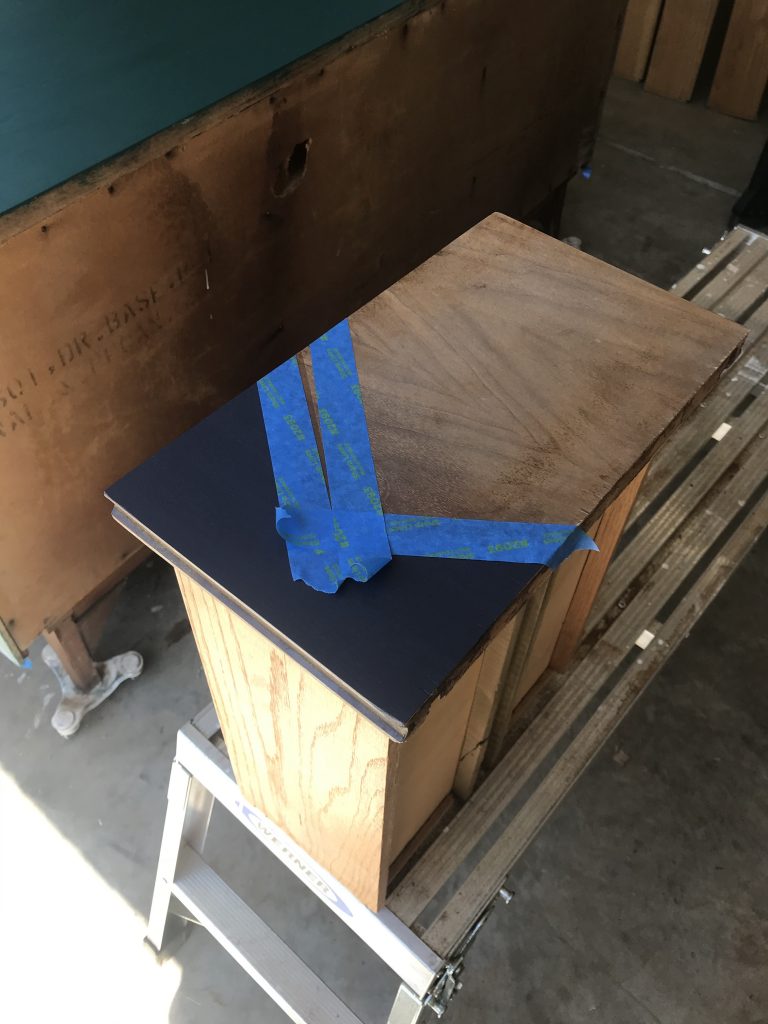
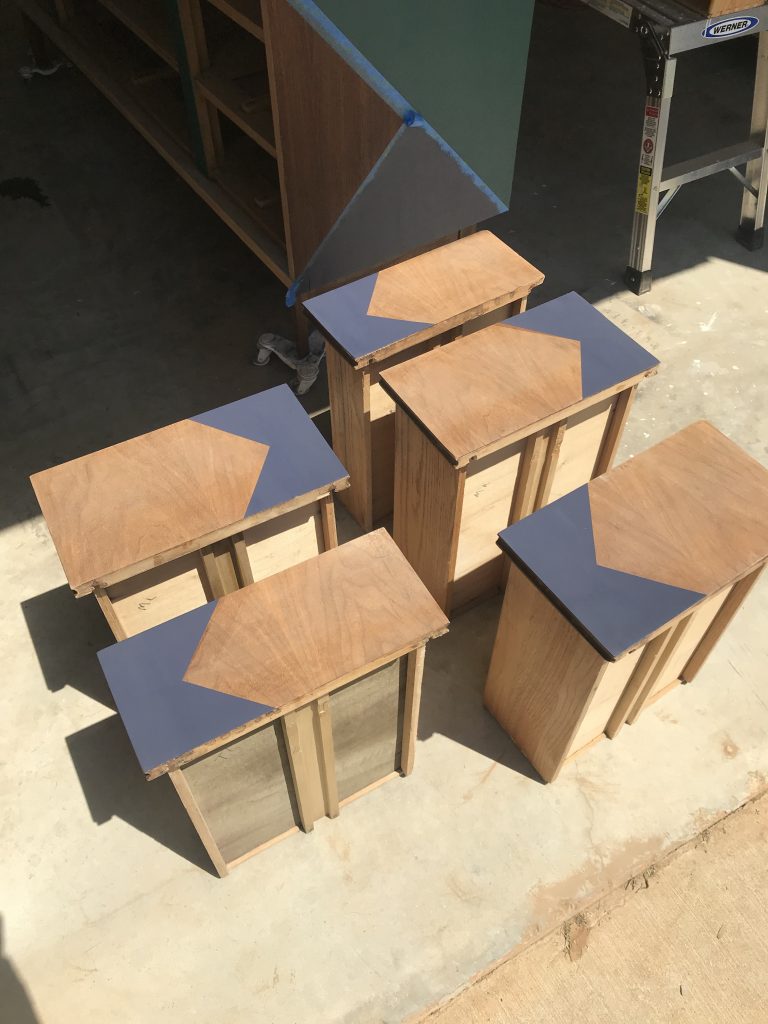
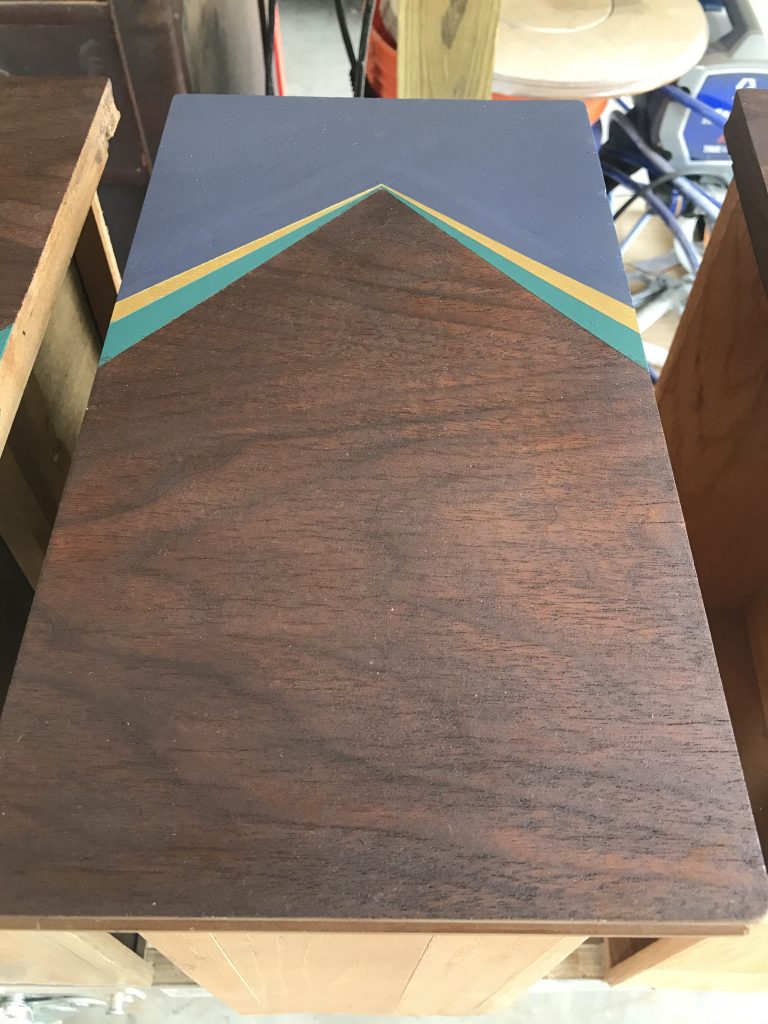
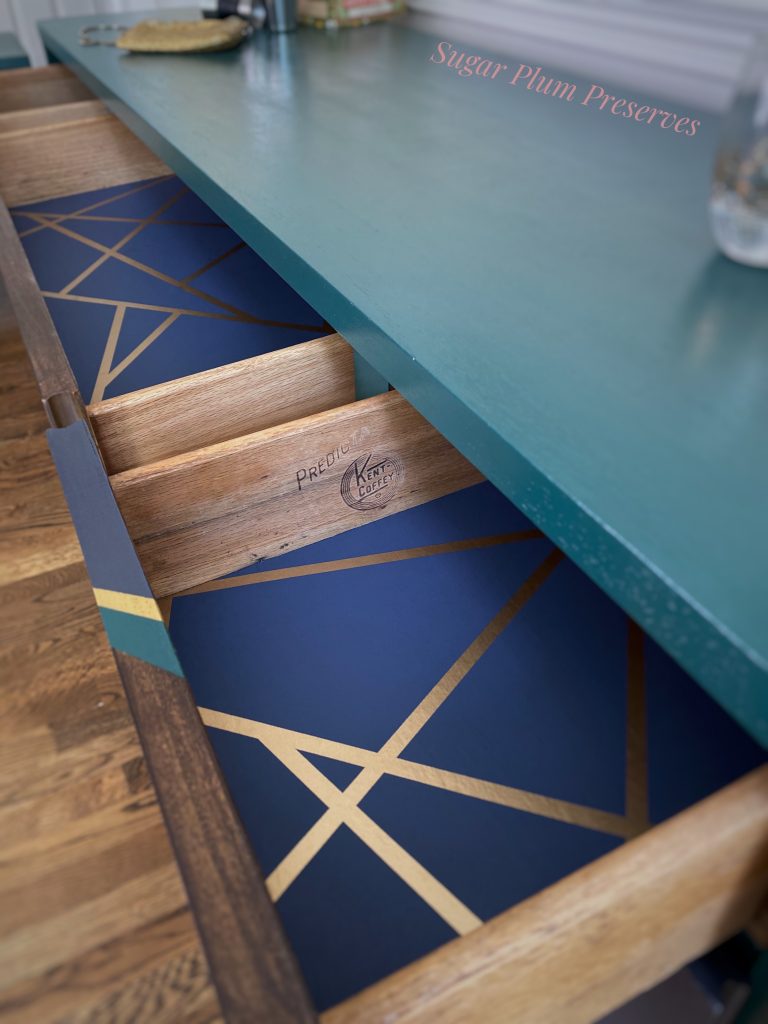
For added interest, I brought the geometric design up and over the tops of the drawers. I stained the remaining wood sections with Minwax Dark Walnut Stain https://amzn.to/3e7D1h8, applied with my favorite method ~ Stain Applicator Pad, https://amzn.to/2Xfun9d. I searched and I searched for a cool drawer liner! I had an image in my mind of what I wanted it to look like, but couldn’t find it. Finally, I found an exact match on Amazon! It is actually wallpaper, so I had to apply it to the insides of the drawers the same way you would apply wallpaper. An added bonus is that it is thick and durable. Score! 🤩 Drawer liner (wall paper) ~ https://amzn.to/2LLaIfs. The photo shows a slight variation in the color, but in person, the blue in the liner and the blue paint match exactly. Kismet! 🤗
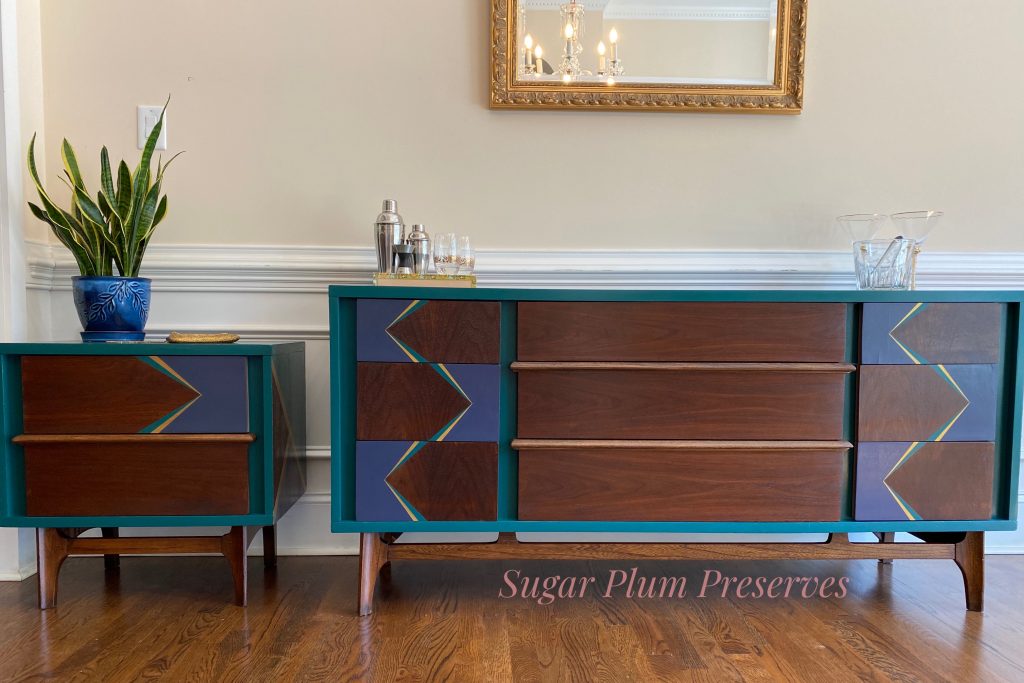
I repeated the exact same steps on the side table and sealed them both with several coats of topcoat, Minwax Water Based Polycrylic, Matte https://amzn.to/36h3kys, applied with my favorite method ~ Car Detail Sponge, https://amzn.to/2ANgY0K. I noticed that the sides of the drawers (where you would put your fingers to pull) were worn and not uniform in color. I quickly rectified that with a few coats of Dixie Belle Chalk Paint in Chocolate, https://amzn.to/36fG7g6. Check them out now maaaaan, outta sight! ✌️
Thank you so much for joining me for Sugar Plum Sundae! Please check back every Sunday for more yummy recipes to transform reclaimed “junk” into sweet little treats for the home! 🤗
For more delicious treats, follow Sugar Plum Preserves:
Facebook: https://www.facebook.com/SugarPlumPreserves/
Pinterest: https://www.pinterest.com/pinterest/sugarplumpreserves
Instagram: https://www.instagram.com/sugarplumpreserves/
YouTube: https://youtu.be/tQplTZMCjq0
XOXO
Michele
Materials List (may not be all inclusive):
Krud Kutter ~ https://amzn.to/36549fO
Mouse Sander ~ https://amzn.to/2Yf42cT
Orbital Sander ~ https://amzn.to/3mOzGsi
TiteBond Wood Glue ~https://amzn.to/2LLxIHP
Dixie Belle Mud in brown https://amzn.to/2zfMdRB
Angled 2 inch Stubby Brush https://bit.ly/3oI0V9z
Painters Tape https://amzn.to/363jJrh
Minwax Water Based Polycrylic, Matte https://amzn.to/36h3kys
Minwax Dark Walnut Stain https://amzn.to/3e7D1h8
Stain Applicator Pad, https://amzn.to/2Xfun9d
Drawer liner (wall paper) ~ https://amzn.to/2LLaIfs
Car Detail Sponge, https://amzn.to/2ANgY0K
Dixie Belle Chalk Paint, Chocolate, https://amzn.to/36fG7g6
Crystal Ball, PPG
Charcoal Blue, Sherwin Williams
*Affiliate disclosure: As an Amazon Associate I may earn a small commission from qualifying purchases from Amazon.com.