Vanilla Ice Cream
This week's feature takes a dated old chair and gives it an update with paint and fabric (no sewing required!).

~ A Sweet Little Treat for the Home ~
Vanilla Ice Cream
Hello my Sweets!
This is the sixth post, in a series of blog posts, about transforming our bedroom. I will post a new piece each week that I have transformed. Once all of the pieces have been completed, I will post an entire before and after of our bedroom with all of the pieces included. If you missed any of the previous blog posts:
You can check out the first transformation here: https://sugarplumpreserves.com/snowball-cookie/
You can check out the second transformation here: https://sugarplumpreserves.com/madeleine/
You can check out the third transformation here: https://sugarplumpreserves.com/snowball-cupcake/
You can check out the fourth transformation here: https://sugarplumpreserves.com/chou-a-la-creme/
You can check out the fifth transformation here: https://sugarplumpreserves.com/earl-gray-macaron/
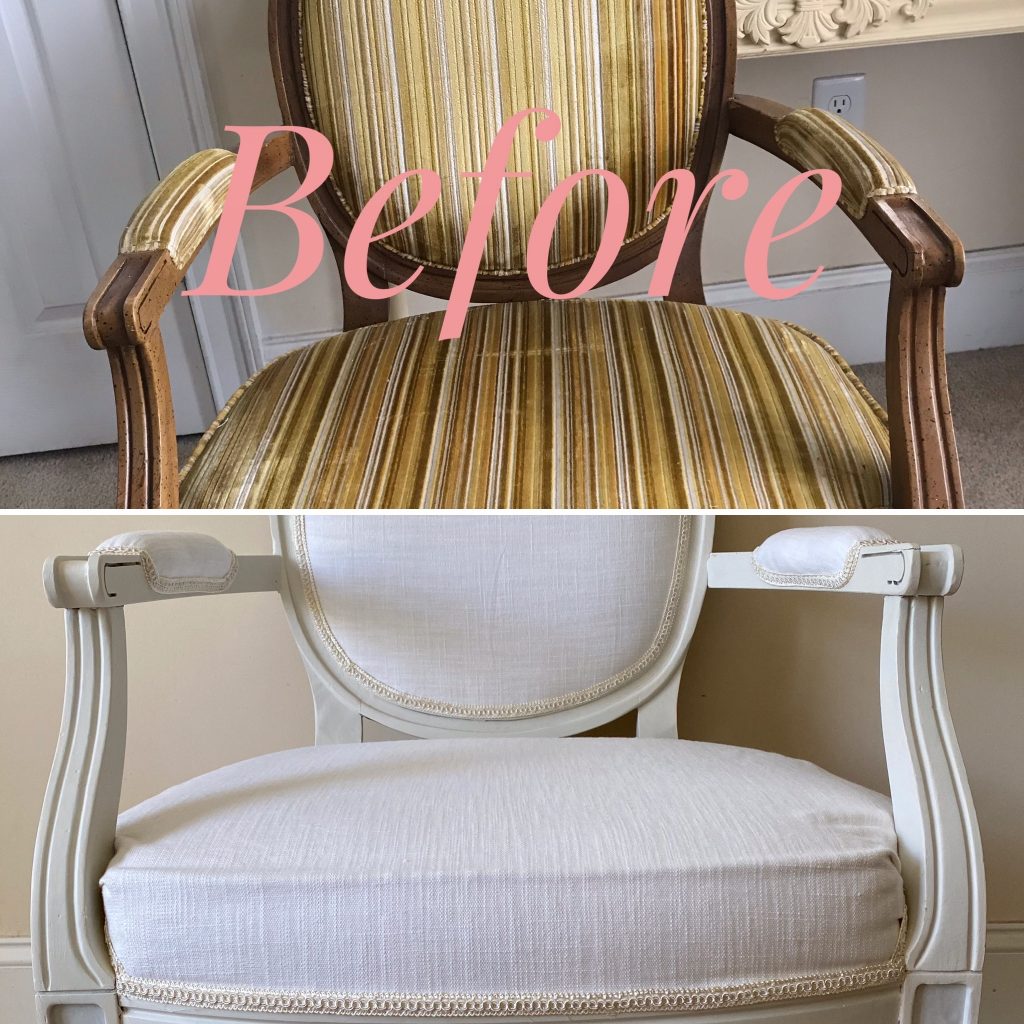
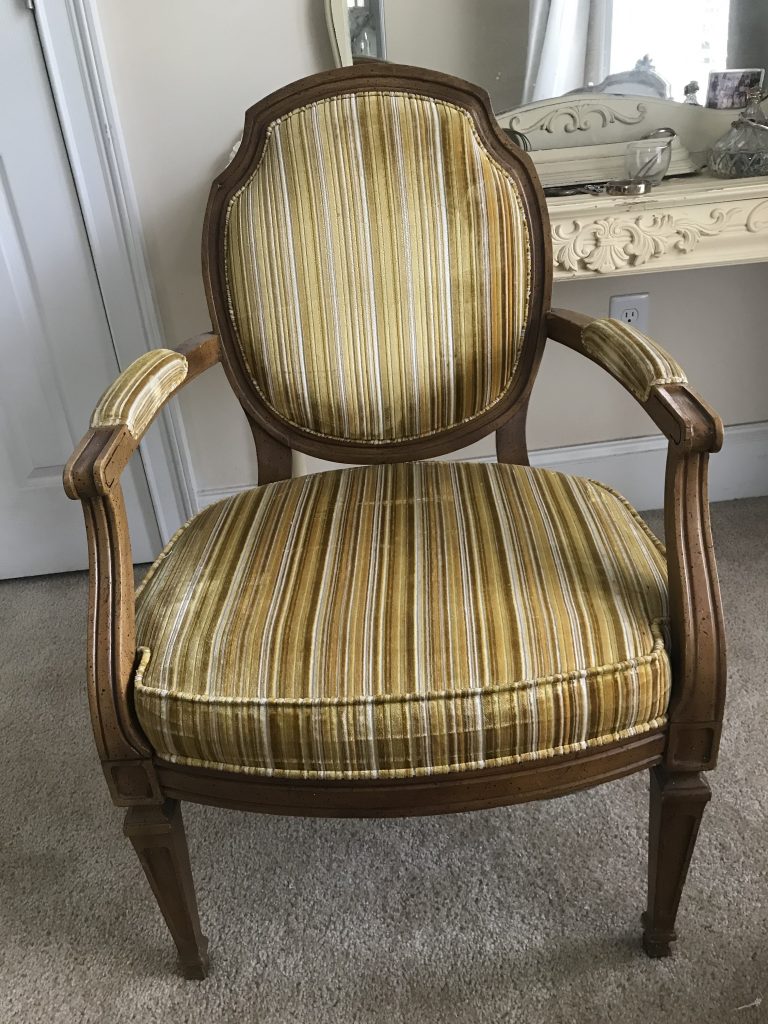
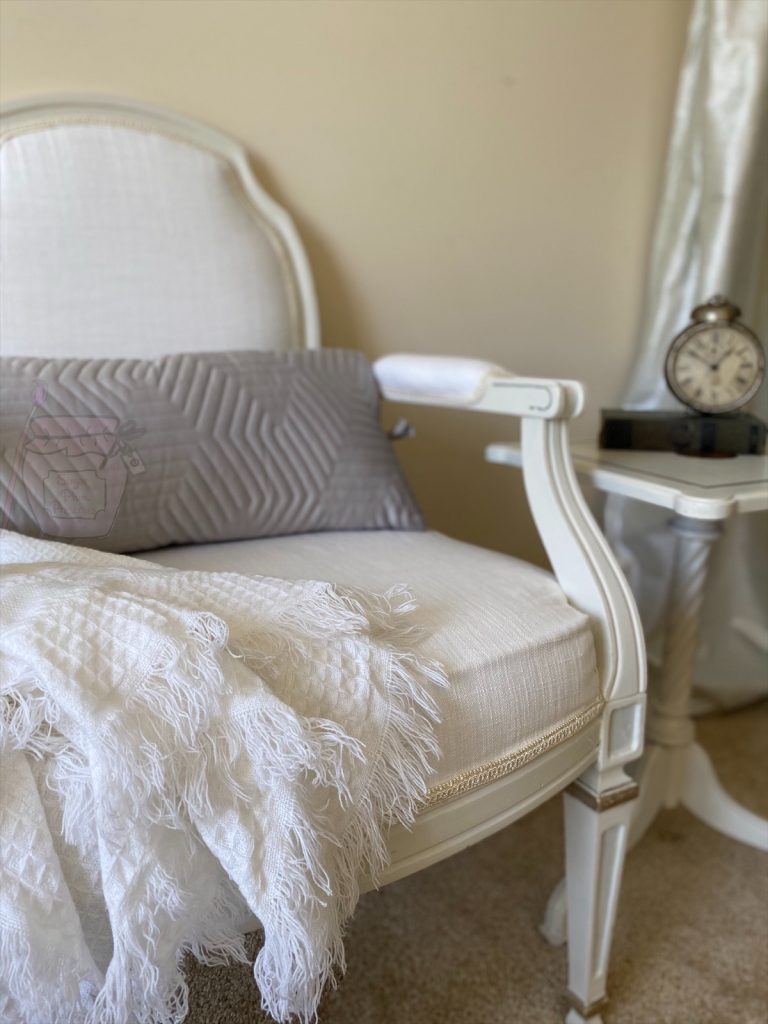
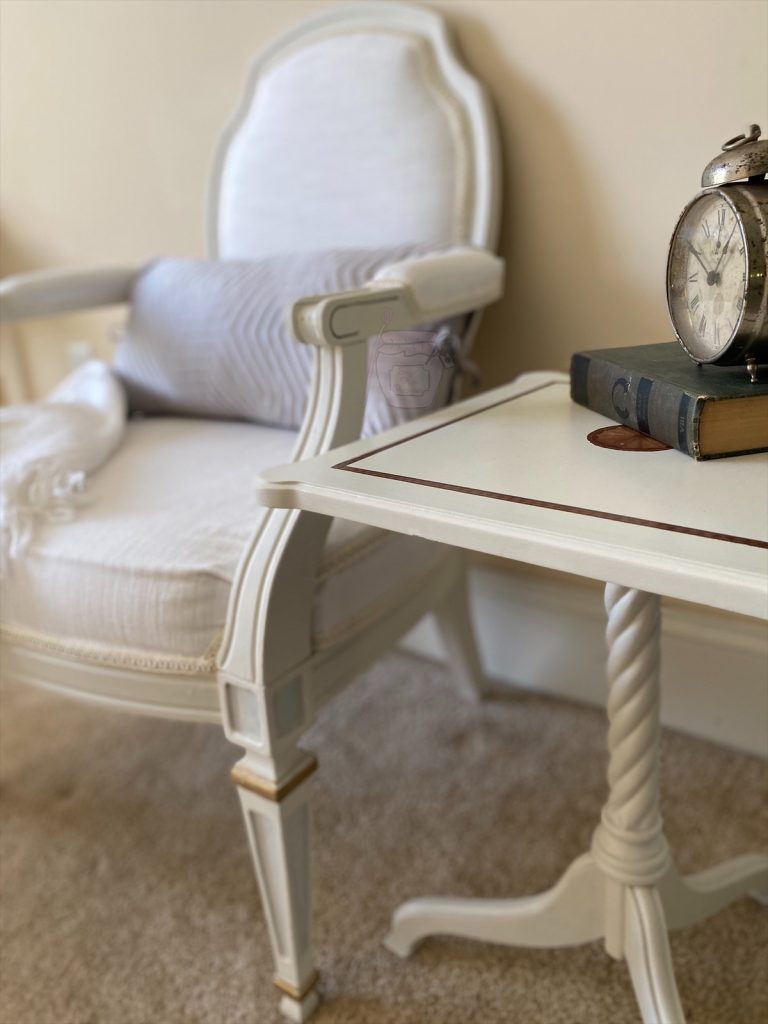
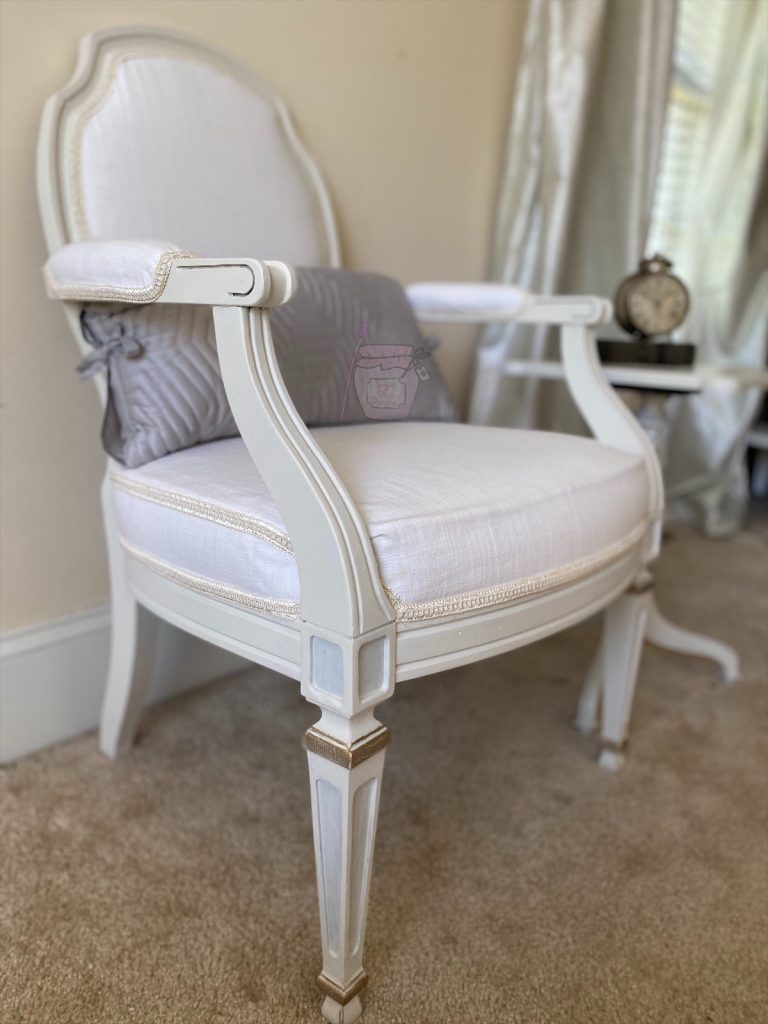
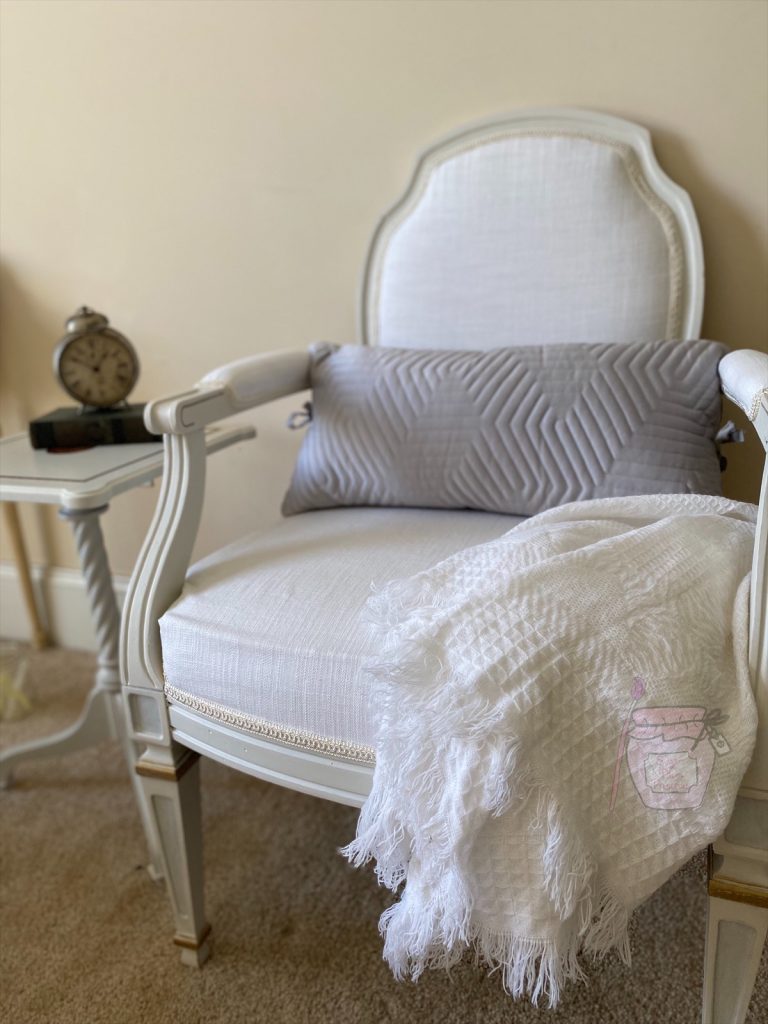
As I have said in previous posts, my attention has turned to the sitting area in our bedroom makeover. I have transformed a settee (Chou A La Creme), a coffee table (Earl Gray Macaron), and this weeks feature completes the space with a side chair. I found this chair for free in Boston. I ask you, who am I to deny a free piece of furniture a home??? 🤷🏻♀️ I do admit, the fabric isn’t so pretty, but the shape is! I could see how lovely it would be with a little paint and some new fabric. Since I already went over in detail how I painted and reupholstered the settee, this post will not be so detailed (I don’t want to bore you to death with repeat info 🙄). If you feel like you want to read about a step in more detail, follow the link above for Chou A La Creme.
The first step, as always, is to clean well. I used Krud Kutter and a rag and gave the chair a good scrub. I went back over the chair with a damp rag to remove any residue left by the cleaner. This chair wasn’t particularly slick and I happened to be particularly lazy that day, so I didn’t sand it. If this piece was for resale, it would have gotten the works – scrubbed, sanded, scrubbed again, primed, sanded, wiped, and painted. But alas, it is for us, so I risked not sanding and priming. Here is what it looked like after a wipe down.
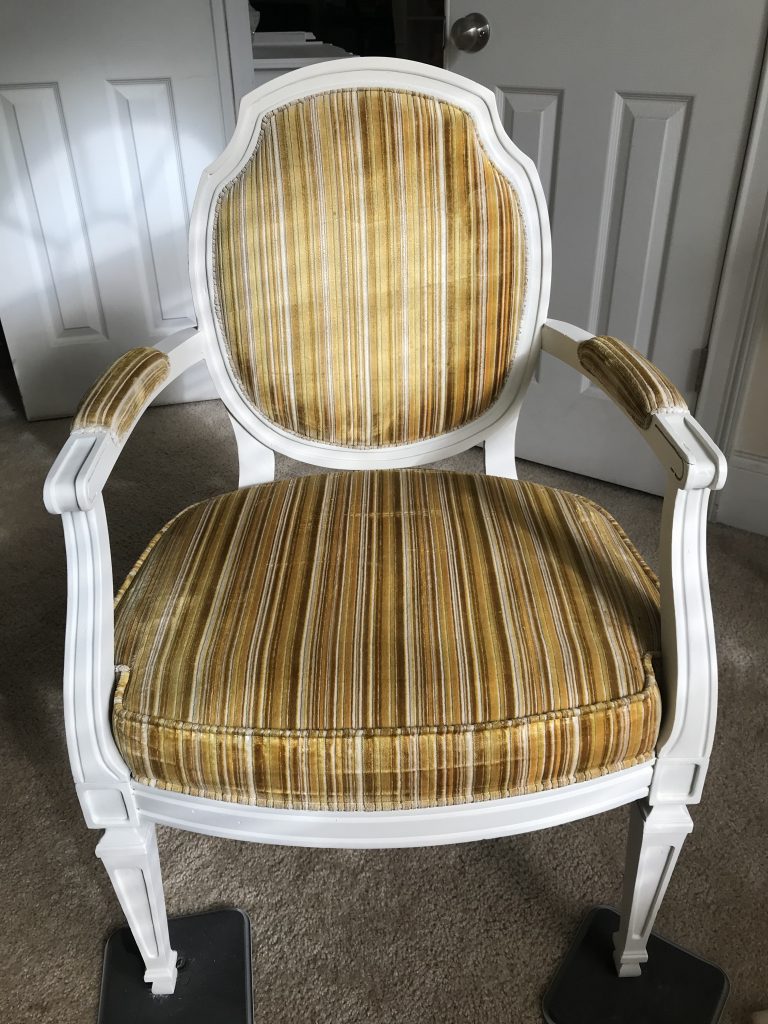
I went with the same paint as the settee, to tie it in. I used Raw Silk by Fusion. This is another reason I was a little lazy on the prep. Fusion is known to be a paint that adheres well, has good coverage, and requires minimal prep. I used my favorite brand of brush – zibra, in the square shape. It was the perfect size and shape to get all the details without getting paint all over the existing fabric. It took about 3 coats for complete coverage and the adhesion seems to be fine. This could encourage my lazy behavior. 😝 I opted not to distress the chair because I did not want it to be too matchy-matchy with the settee.
When the paint was dry, I tackled the reupholstery. I didn’t tear off the old fabric, I simply went right over it. I had extra fabric from the settee project, so I chose the off white chenille. I ironed the fabric, cut it slightly larger than I needed, and hot glued it right over the existing fabric. I then went back in and trimmed off the excess.
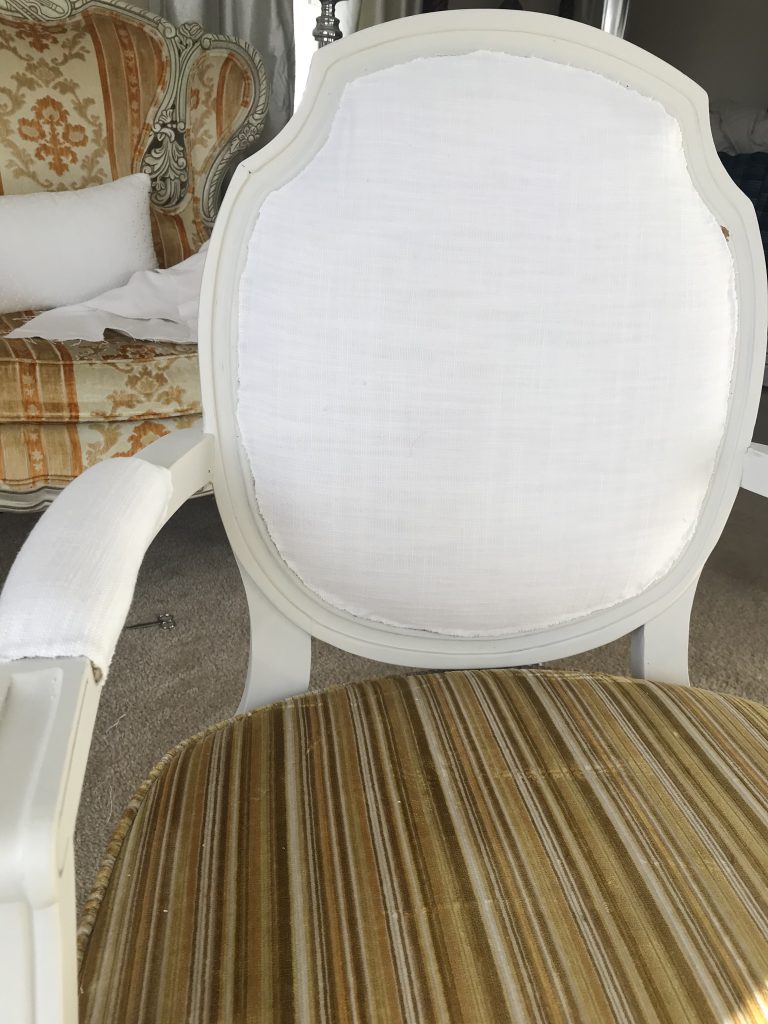
Don’t worry if the edges look uneven or ragged, this will be covered up with the trim. I used the same trim that I had on hand from the settee and got busy with my glue gun again. For a little interest, I went over some of the details with gold Rub n Buff. And, voila! As simple as that, a new coordinating side chair to complete our bedroom sitting area. We are getting so close to the completion of our bedroom transformation!
This transformation is the sixth piece added to our bedroom in the hopes of creating a cohesive, beautiful, restful retreat in a time of uncertainty and stress. Check back in next week for the seventh transformation in our journey.
Thank you so much for joining me for Sugar Plum Sundae! Please check back every Sunday for more yummy recipes to transform reclaimed “junk” into sweet little treats for the home! 🤗
For more delicious treats, follow Sugar Plum Preserves:
Facebook: https://www.facebook.com/SugarPlumPreserves/
Pinterest: https://www.pinterest.com/pinterest/sugarplumpreserves
Instagram: https://www.instagram.com/sugarplumpreserves/
YouTube: https://youtu.be/tQplTZMCjq0
XOXO
Michele
Materials List (may not be all inclusive):
Krud Kutter Cleaner/Degreaser https://amzn.to/3ciVtIm
Paint Brush, Square 1 inch https://bit.ly/3oI0V9z
Rub n Buff Wax, Antique Gold https://amzn.to/2LNYTla
Fabric Rotary Cutting Mat and Tool https://amzn.to/2XfFmj2
Raw Silk, Fusion Mineral Paint https://amzn.to/2YKSyxK
Glue Gun https://amzn.to/3Kl7J7r
*Affiliate disclosure: As an Amazon Associate I may earn a small commission from qualifying purchases from Amazon.com.