Wedding Cake
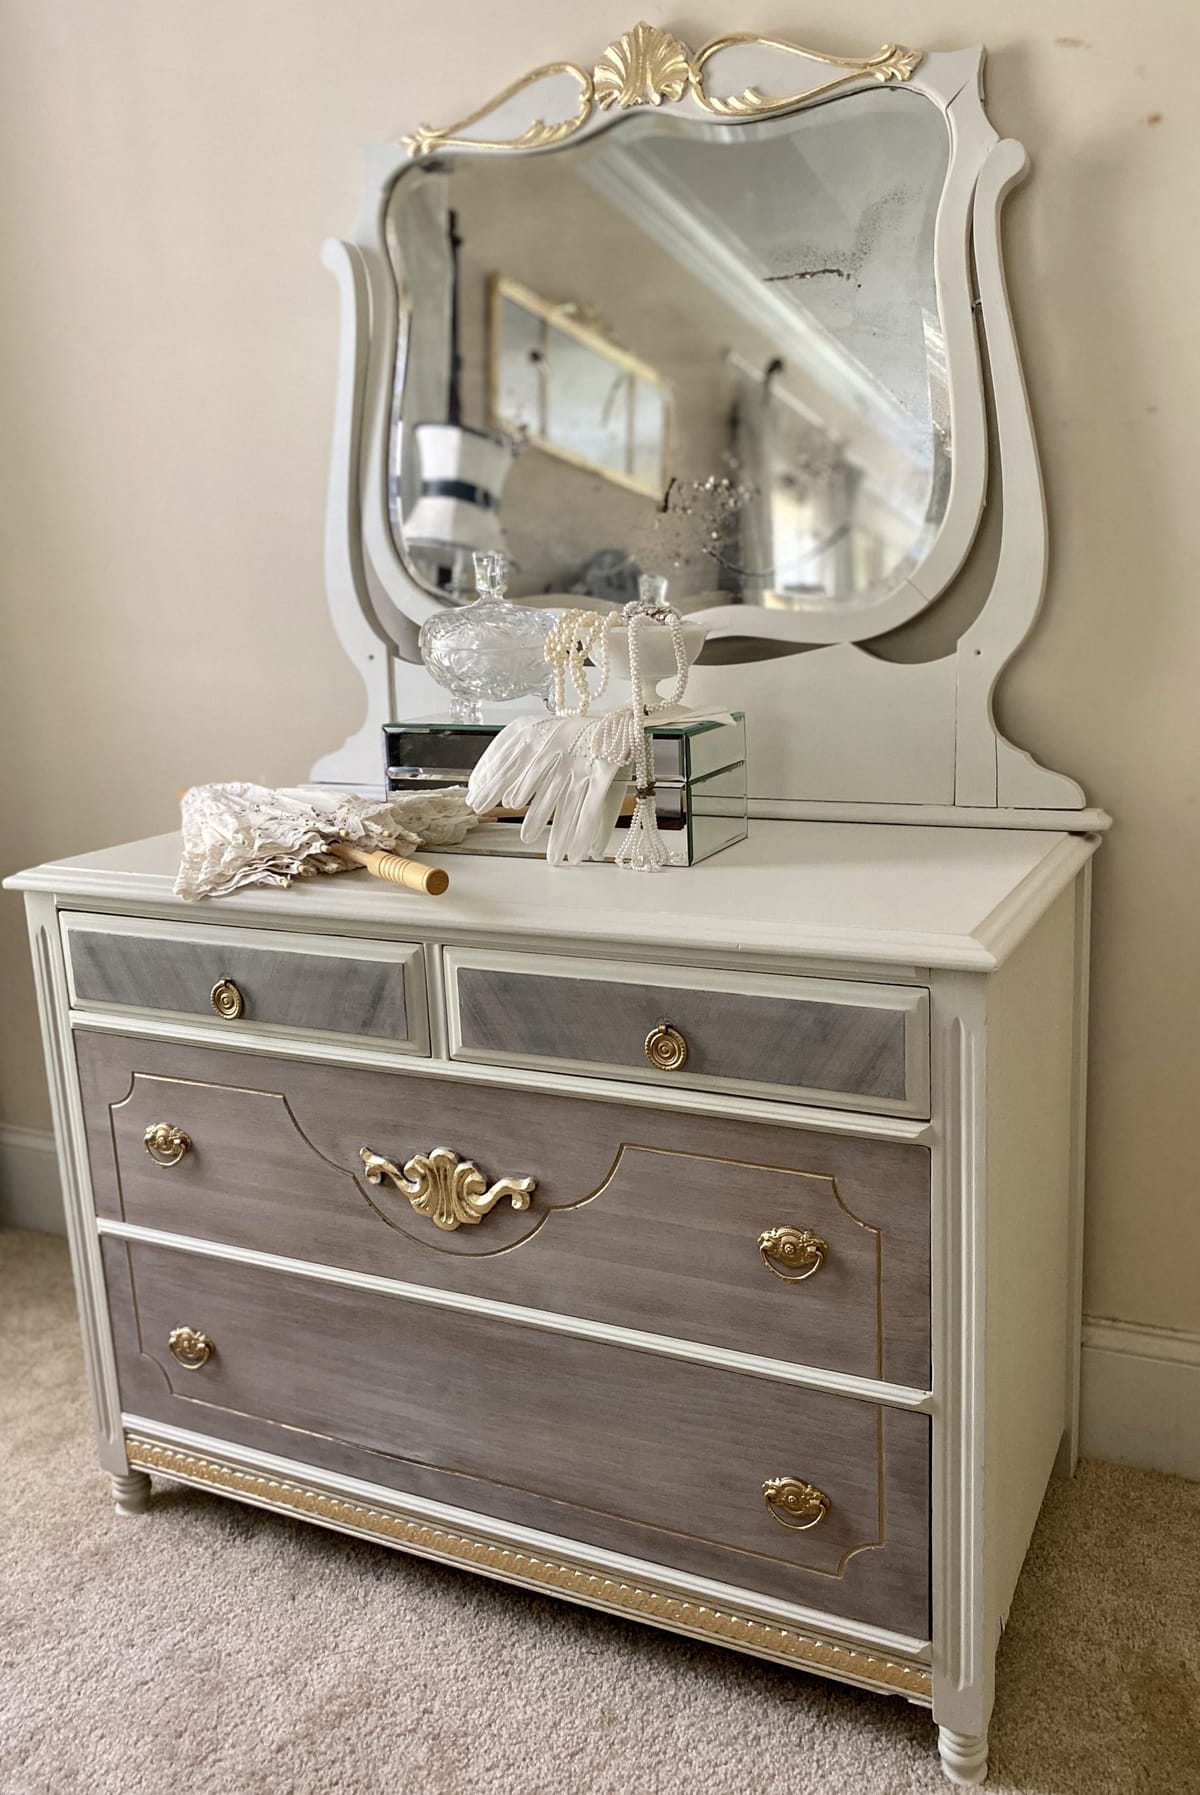
This week's feature is a transformation that went from literal trash to treasure with a white wash finish, gold leaf, and creamy paint.
~ A Sweet Little Treat for the Home ~
Wedding Cake
Hello my Sweets!
This is the seventh post, in a series of blog posts, about transforming our bedroom. I will post a new piece each week that I have transformed. Once all of the pieces have been completed, I will post an entire before and after of our bedroom with all of the pieces included. If you missed any of the previous blog posts in the series:
You can check out the first transformation here: https://sugarplumpreserves.com/snowball-cookie/
You can check out the second transformation here: https://sugarplumpreserves.com/madeleine/
You can check out the third transformation here: https://sugarplumpreserves.com/snowball-cupcake/
You can check out the fourth transformation here: https://sugarplumpreserves.com/chou-a-la-creme/
You can check out the fifth transformation here: https://sugarplumpreserves.com/earl-gray-macaron/
You can check out the sixth transformation here: https://sugarplumpreserves.com/vanilla-ice-cream/
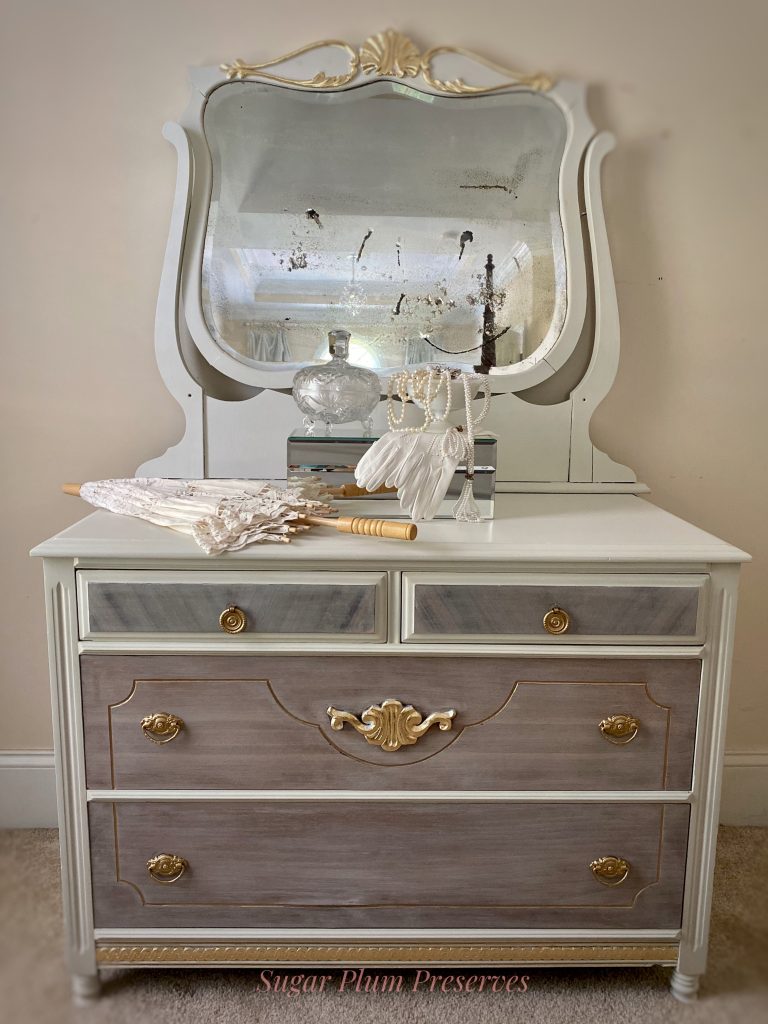
I have had this dresser for a few years. I got it for free in Boston and have had the intention of painting it for a few years, but you know how that goes.🙄 The mirror did not come with it, my friend (who is also a picker) found it on the side of the road waiting for the trash. It was in a few pieces and she eventually decided that she didn’t want to spend the time to fix it and asked me if I wanted it. The shell detail matched my dresser, I liked how the mirror was aged and losing some of the silvering (plus, it was in need of a home! What was I to do??), so I said sure! I was moving from Boston to North Carolina at that time, so I did a quick stitch together with liquid nails to keep it in one piece until I got there……..Annnnnd it sat like that on top of my unfinished dresser up until NOW! Read on to see how I turned these mismatched give aways into one beautiful piece of furniture.

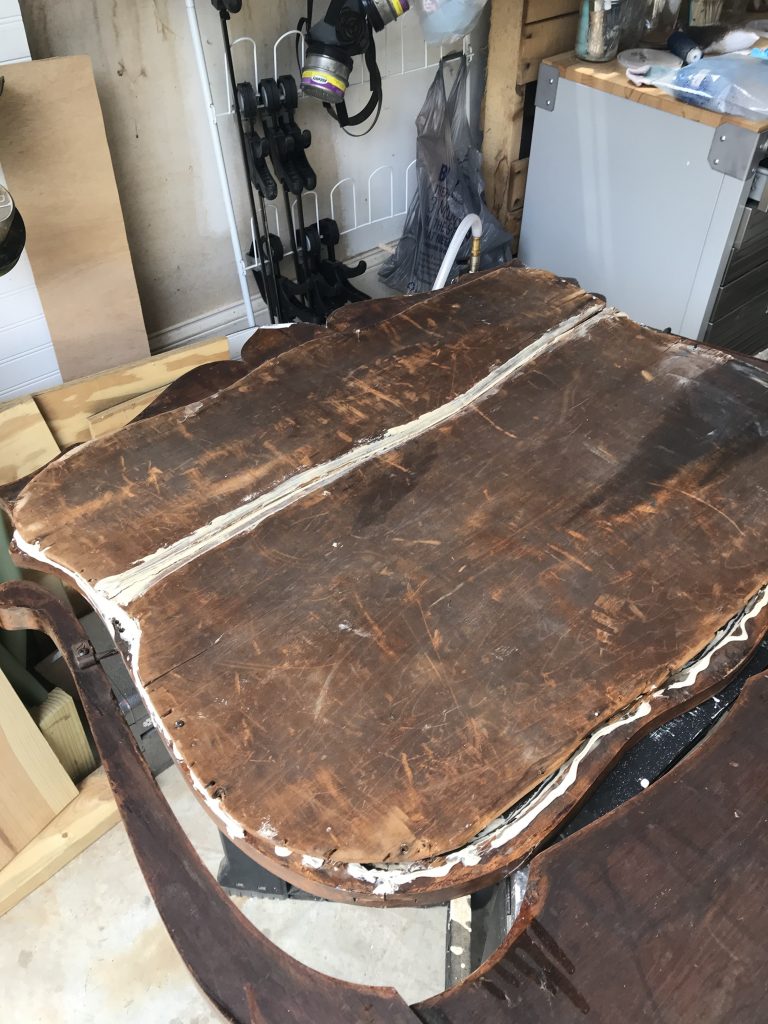
The backing on the mirror was warped and falling off. My hack-job repair had served it’s purpose, but it was time for an actual repair. I removed the old back and replaced it with some luan that I cut to fit with my jigsaw, and wood glue. More of the silver came off with the old backing, but I think it just adds to the cool aged feel. I cleaned the mirror and the dresser well with krud kutter and wiped them both down with a wet rag.
The age old question resurfaced – to prime, or not to prime? Again, if i were planning on selling this piece, I definitely would have primed. Since it was “just” for me, I let it ride. I figured the worst thing that would happed is that I would have to go back and prime and repaint if there was bleed through. As I was working on them, I often found myself saying to myself, “ehhhh, it’s JUST for me, soooo…….” and wanting to cut corners or not make it as special as I would if I were selling it. I feel like there is a life lesson in here. Toward the end of the project, I caught myself and thought, why should I not make it as beautiful for myself as I would for someone else?? Can anyone relate to this type of thinking? Well, once I changed my internal dialog, that’s when the gold leaf came out! 😉👸🏻💁🏻♀️
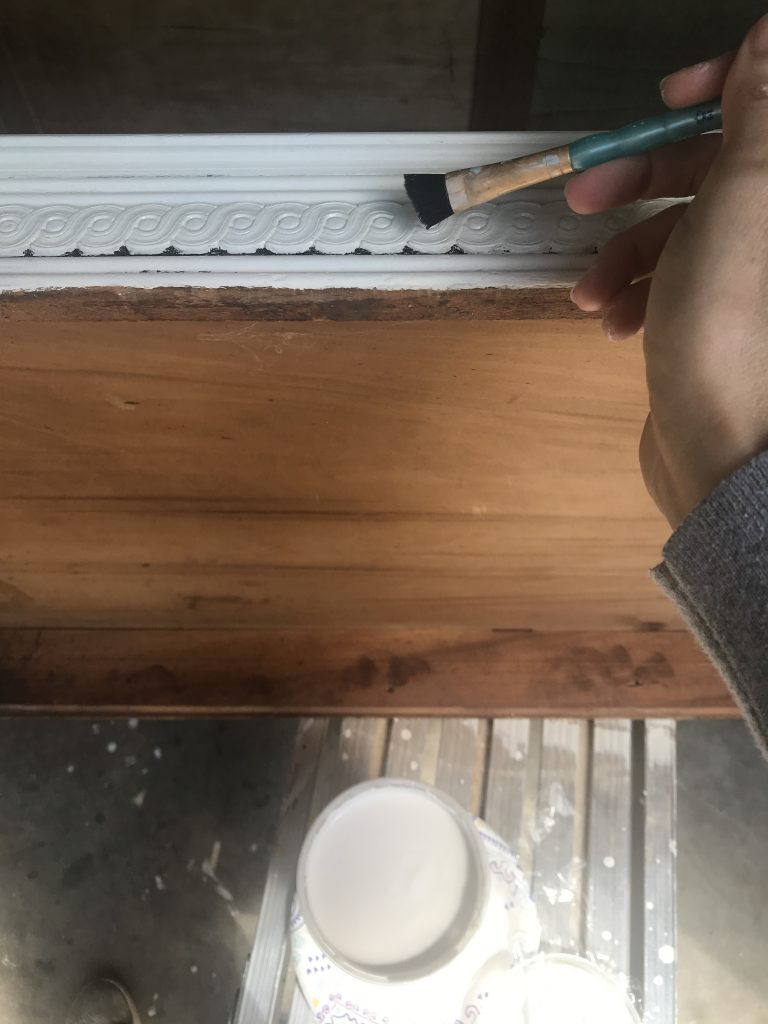
Since I am trying to make a cohesive set of furniture in my bedroom, I painted the mirror and dresser in Raw Silk by Fusion, to go with the other pieces in the transformation series. It has looked great on all of the other pieces, and I have found it easy to work with. I will say though, after all of this white, I am ready to paint some color! It took 3 coats for complete coverage on most parts, and then a 4th coat in some areas. Fusion says that it has a built in topcoat, so I am going to forgo the sealer. Again, if I were selling it, I would seal it, no question. Since I am keeping it, I can always touch it up if it needs it.
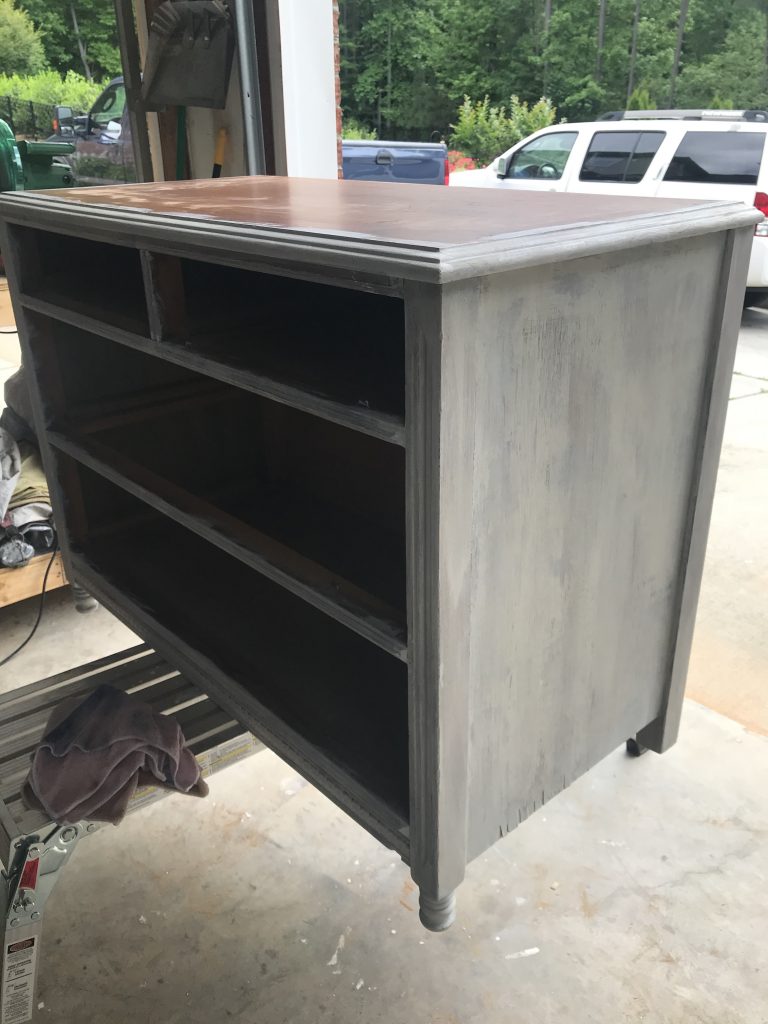
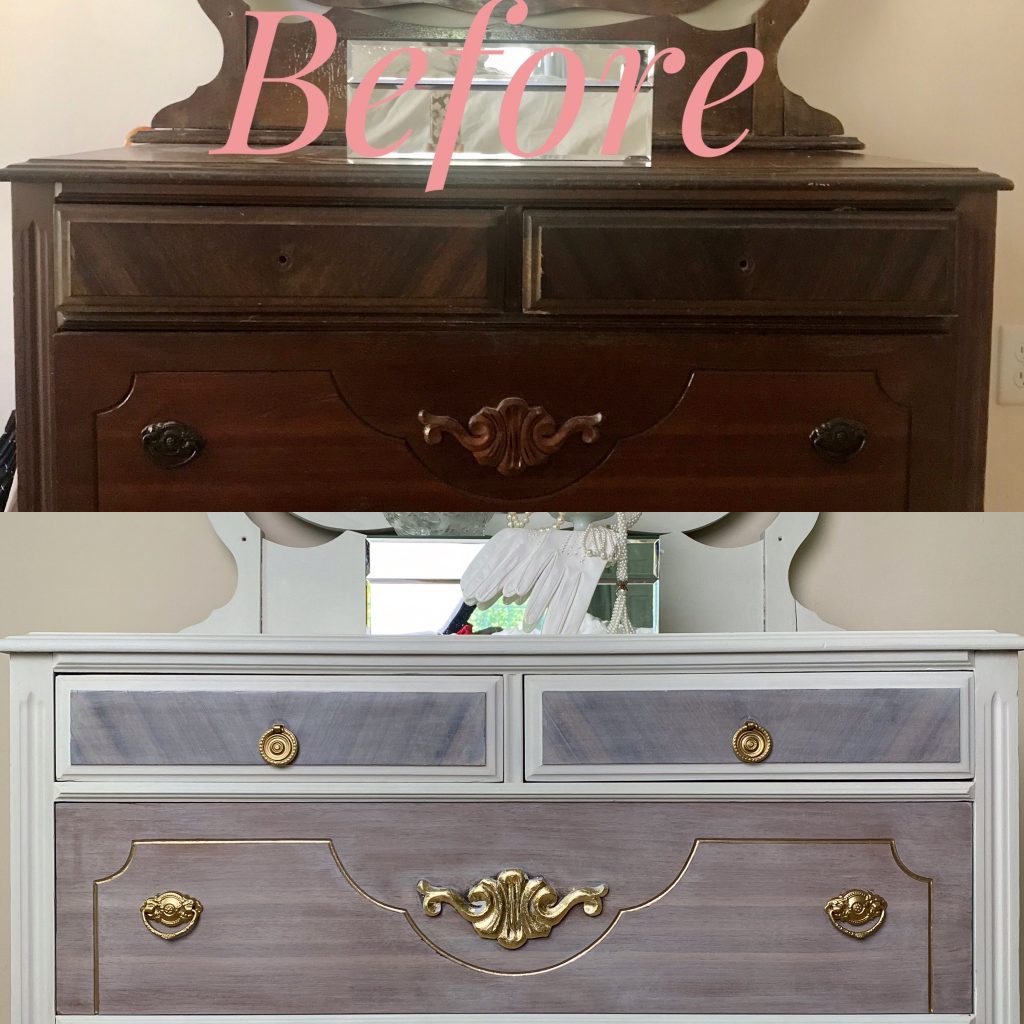
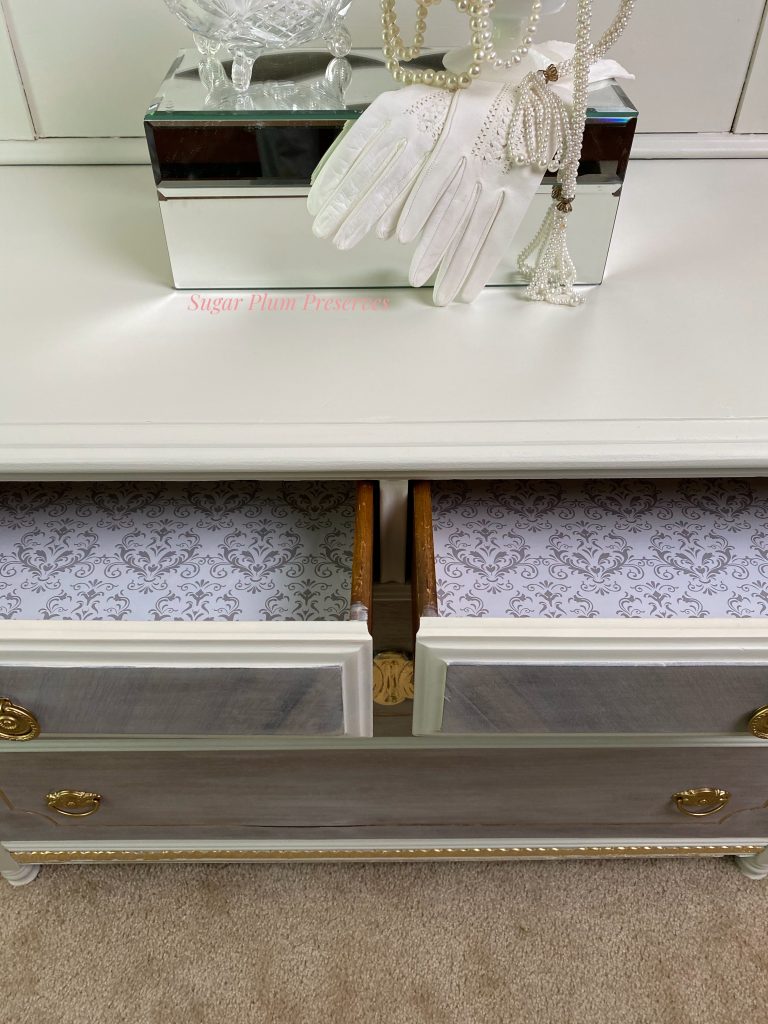
The drawers were coated in a thick layer of polyurethane, so I had to sand them down to make sure that I didn’t have an adhesion problem with the paint. I also sanded down the top because there were several dents and scratches. Once I started sanding, I noticed that the drawer fronts were in good shape and had a cool grain. Change of plans! I decided not to paint them and instead to sand them down to bare wood, and then do a wash of the Raw Silk. As you can see, the top drawers have a different type, darker type of veneer. I hoped that I could do an extra layer or two of the wash to even that out and get them to match the other drawers.

To achieve the sheer color wash on the drawer fronts, I simply made a wash out of Raw Silk by adding water – about 3 parts water to 1 part paint. I brushed it on in sections, so that I could go back over and remove some before it sank into the wood too much. I had a paint brush in one hand and a wet rag in the other. I brushed it on, and wiped it back with the wet rag, working in sections. When that was dry, I repeated the process. When that was dry, I repeated the process again, only this time I had a dry rag and rubbed and blended it in. I did it a 4th time on the small drawers to lighten them to match the other 2. I also painted the trim around the small drawers.
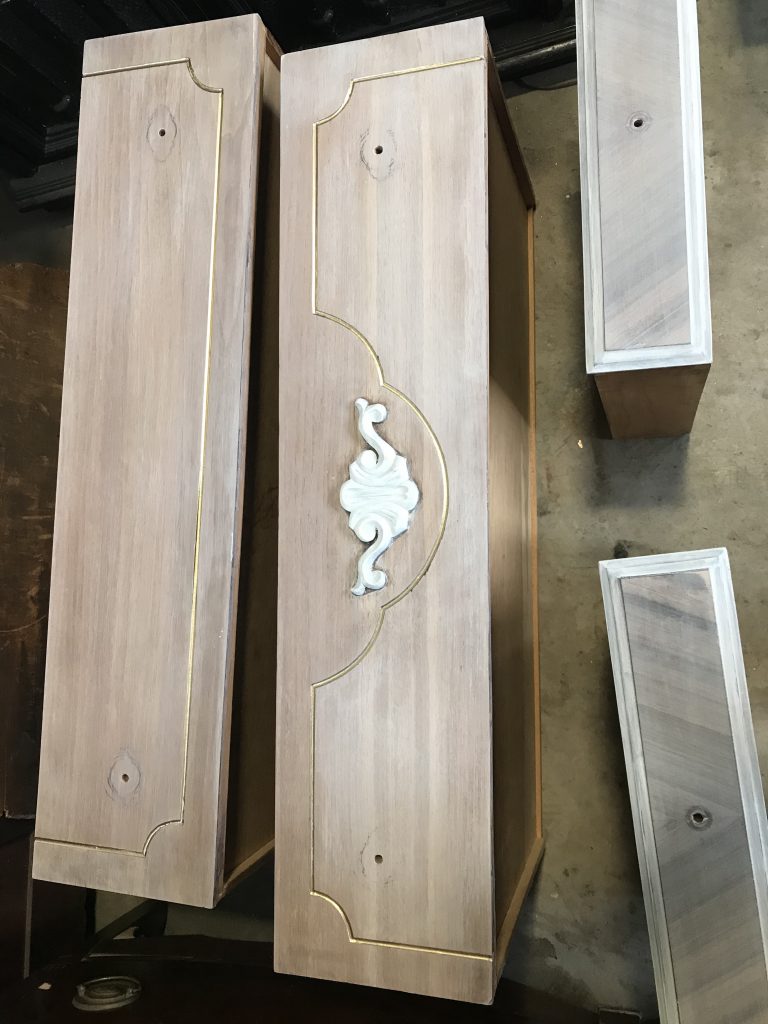
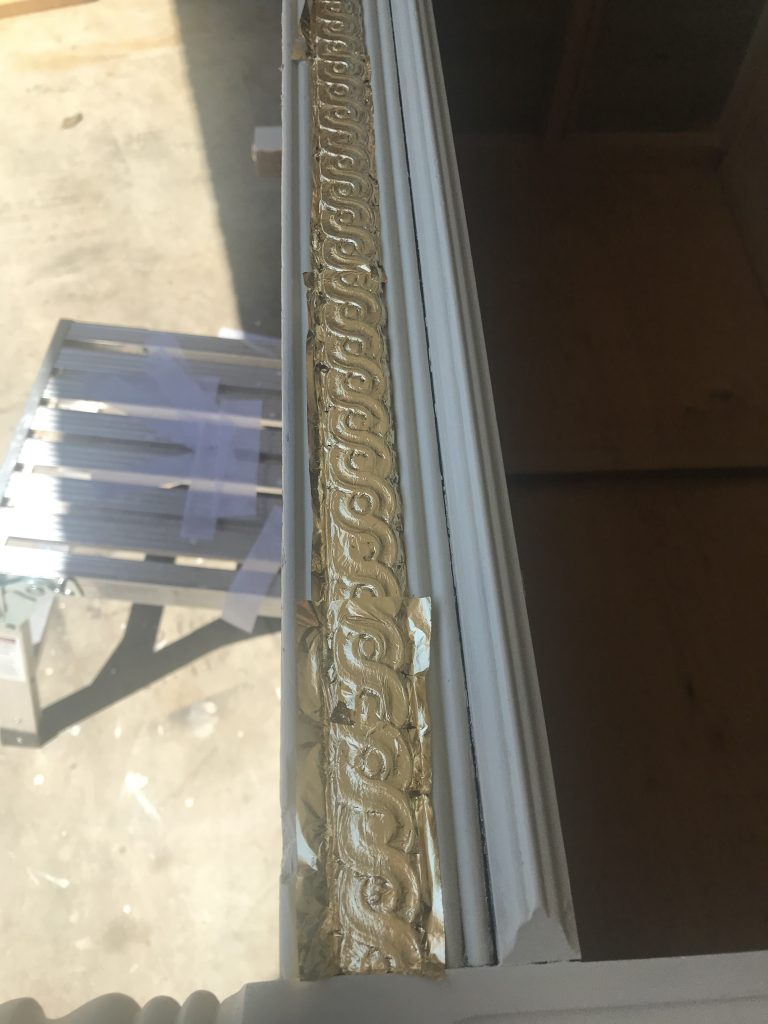
I used a gold paint pen to bring out the accents on the bottom drawers. As you can see, I painted the shell detail in Raw Silk. I thought maybe I would add gold rub n buff on the shell detail on the drawers and mirror to match the gold rub n buff scroll detail on the settee, Chou A La Creme (https://sugarplumpreserves.com/2020/04/26/chou-a-la-creme/) However, I am a “figure it out as I go along” type of person and after I added the gold rub n buff to the shell on the mirror, it wasn’t glamorous enough. I knew they had to be gold leafed too! AMIRIGHT?!? 🙋🏻♀️
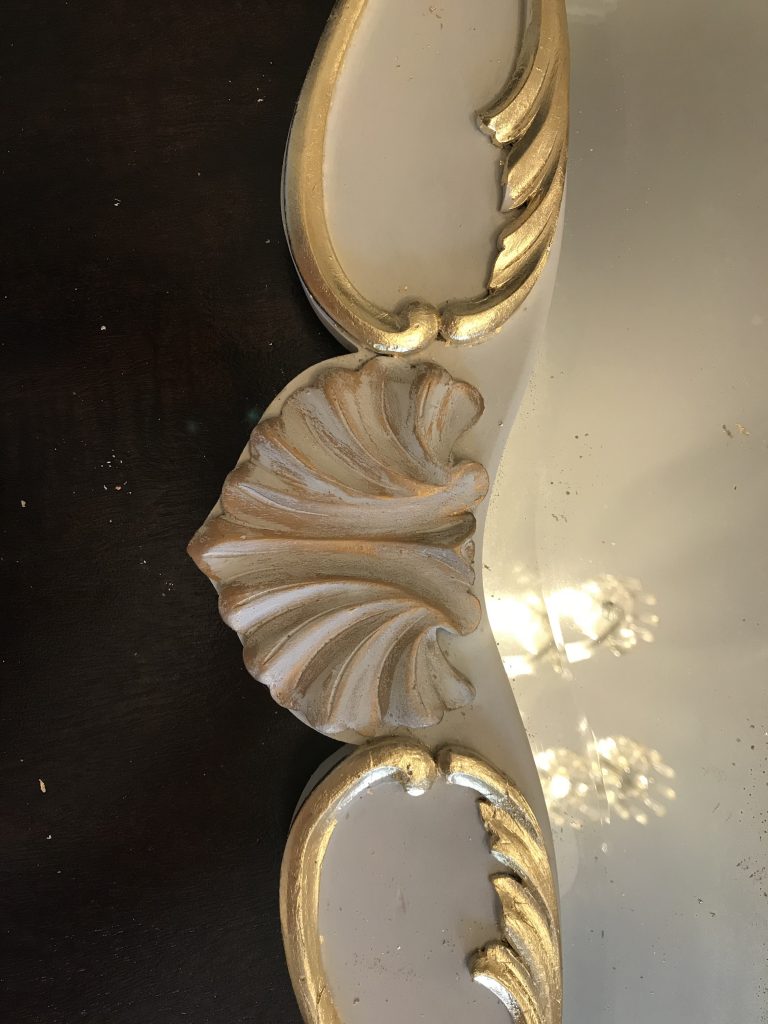
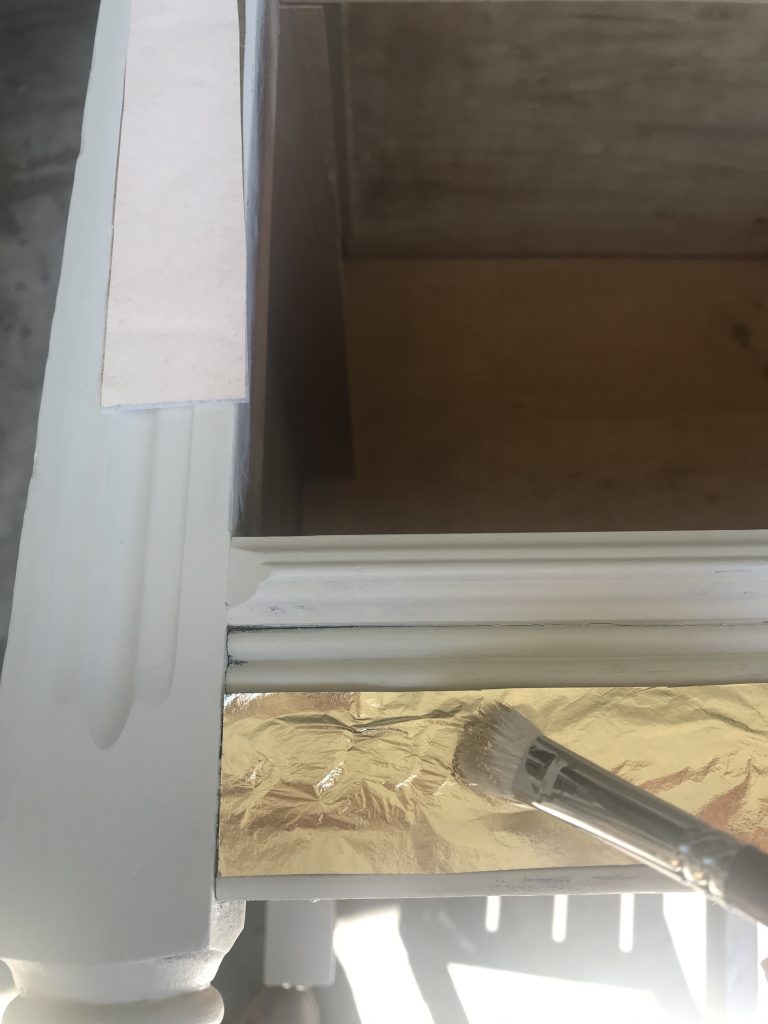
I chose to use gold leaf to match the gold leaf mirror that I transformed for the second post in the series – Madeleine (https://sugarplumpreserves.com/2020/04/12/madeleine/). I applied gold leaf to the shell and scroll work on the mirror, the shell on the drawer, and the detail on the bottom of the dresser. To apply gold leaf, you must first apply the sizing (adhesive). Use a crafters brush that you will designate for this purpose, as you won’t be able to get it “unsticky” after you use it for this purpose. The sizing goes on white but dries clear. Once it is clear and tacky, you lay the gold leaf, tamping down with your finger or a soft natural bristle brush. The gold leaf will only stick to where the sizing was applied. Brush off the excess and buff it smooth. If you missed an area, just repeat the process until it is filled in how you like.
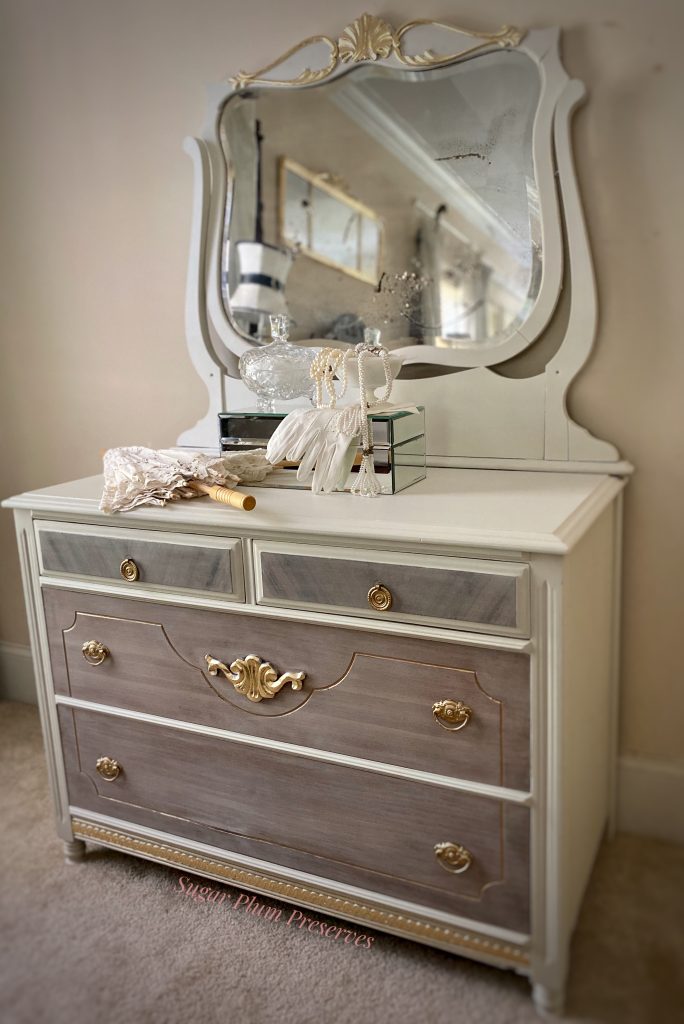
Lastly, I spray painted the hardware gold, and lined the drawers to match Snowball Cupcake (https://sugarplumpreserves.com/2020/04/19/snowball-cupcake/). I refreshed the wood in the other two drawers with a few coats of hemp oil. It rehydrates the wood and will harden to a protective coat after a 30 day cure time. That should do it! A free dresser and a falling apart, trash-bound mirror now are a beautiful unified piece of furniture for our bedroom transformation! I’m sure glad that I didn’t skimp on the “special” with this piece for myself! 🤩
This transformation is the seventh piece added to our bedroom in the hopes of creating a cohesive, beautiful, restful retreat in a time of uncertainty and stress. Check back next week for the eighth (and last) transformation in our journey.
Thank you so much for joining me for Sugar Plum Sundae! Please check back every Sunday for more yummy recipes to transform reclaimed “junk” into sweet little treats for the home! 🤗
For more delicious treats, follow Sugar Plum Preserves:
Facebook: https://www.facebook.com/SugarPlumPreserves/
Pinterest: https://www.pinterest.com/pinterest/sugarplumpreserves
Instagram: https://www.instagram.com/sugarplumpreserves/
YouTube: https://youtu.be/tQplTZMCjq0
XOXO
Michele
Materials List (may not be all inclusive):
Paint Brush, Angled 2 inch https://bit.ly/3oI0V9z
Paint Brush, Square 1 inch https://bit.ly/3oI0V9z
Rub n Buff Wax, Antique Gold https://amzn.to/3AjJcLt
Fabric Rotary Cutting Mat and Tool https://amzn.to/2XfFmj2
Detail Sander https://amzn.to/3eauZEb
Gold Leaf Sizing, Quart https://amzn.to/36hdOxP
Gold Leaf, Silver Leaf, Rose Gold Leaf, 300 sheets https://amzn.to/3e1vhgr
Natural Bristle Gold Leafing Brush https://amzn.to/3LAVdBu
Gold Paint Pen, Oil Based https://amzn.to/3pJ9y4H
TiteBond Wood Glue https://amzn.to/2LLxIHP
Liquid Nails https://amzn.to/3SrUftu
Clamps https://amzn.to/3DKenTC
Rustoleum Gold https://amzn.to/3g809xO
Jigsaw https://amzn.to/2ZqUGfs
Royal Brush Crafters Choice Variety https://amzn.to/2Xjc0jI
Fusion Hemp Oil https://amzn.to/3bLQxoR
Raw Silk, Fusion Mineral Paint https://amzn.to/2YKSyxK
*Affiliate disclosure: As an Amazon Associate I may earn a small commission from qualifying purchases from Amazon.com.